I wasn’t intending on repeating and improving recipes this early, but frankly, it had to be done. Ever since I posted that Nutcake recipe I’ve been upset and embarrassed by it. Not because anyone said anything bad about it. Simply because I hate it. I don’t think it tastes very good. It’s dry and crumbly and nothing like a nice, cakey quick bread should be. So I’ve improved it. And trust me when I say that it is improved! So much better than the last recipe that I just want to pretend it never happened. Plus, this one feels like a happy medium between a rich, winter cakey bread and a fresh, springy cakey bread. Perfect for this time of year!
Nutcake Take 2
 We start by toasting the walnuts. This step, while seemingly tedious, is what gives the cake the most delicious flavor. It brings out all the nutty sweetness that you crave in something like this. Place the whole walnuts on a baking sheet in a single layer (none on top of each other). Toast at 350°F for about 10-12 minutes, stirring once halfway through. Then take them out and let them cool. It’s an easy way to take your recipes to the next level and you should definitely get in the habit of doing it every time!

The next step is mixing together the dry ingredients. Flour, sugar, baking powder and soda, and salt. Give it a few stirs with a whisk to incorporate some air into the mixture. It’s almost as good as sifting but it’s half the effort! Make a well in the center of the mixture.

Let’s add all the wet ingredients to the top of the dry ingredients. Now, you can be fancy and mix your wet ingredients away from your dry ingredients and then add them at a later date, but who wants two bowls to clean instead of one? As the queen of baking-and-hating-dishes-so-they-pile-up-forever I never use more bowls than I absolutely have to. Once the wets are on top of the drys simple whisk the wet ingredients together without incorporating any of the dry. It’s that easy.
When the wet ingredients are thoroughly mixed switch to a spoon and start stirring together all the ingredients. When it’s all together and no dry bits remain let it sit for a minute. We don’t want to overmix it so as soon as the dry stuff is all wet you’re done! Think of it like charging an attack. You want to charge it enough to be effective but overcharging won’t give you more power, it’ll just take Link out of control and exhaust him before the next strike. Overmix now and your nutcake will turn out flat and dense and not ready for consumption at all… (yeah, I know that was a stretch… but I feel like there’s a definite lack of Zelda references in my posts lately and I’m trying to make it work).

Let the batter sit while you chop the cooled walnuts. I like mine to be in half’s but if you want smaller pieces, simply chop them more. Lay them on a cutting board, and roughly cut them with a large knife until they’re the perfect size for you!


Add the nuts, cinnamon, vanilla, and nutmeg to the batter and stir gently until everything is mixed together. But again, no overstirring at this point! Just until everything looks even.

Butter and flour a loaf tin. Rub the butter in the pan until all the cracks and surfaces are slathered. Then sprinkle in flour until all the butter is covered. Tip the tin over and pat the bottom to remove excess flour.


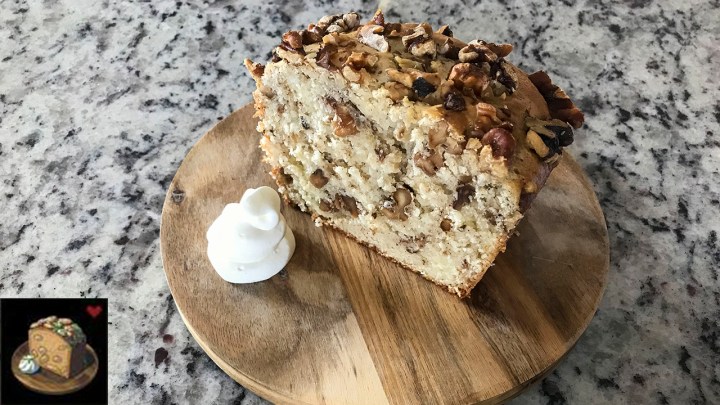
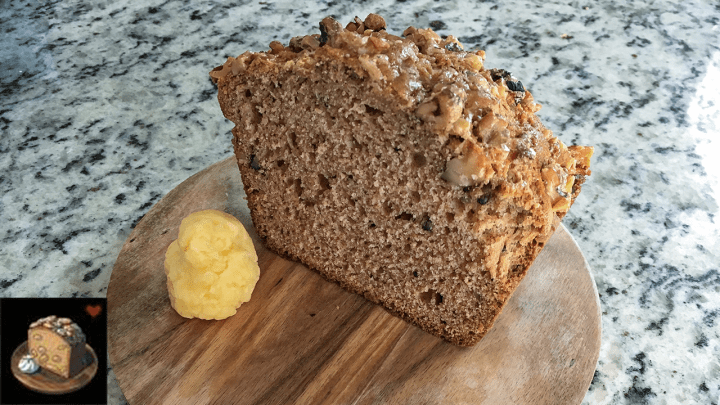
Add your batter and smooth it out with a spoon. It’ll be thick and gooey and oh, so delicious-looking. Add some more walnuts (the chopped but not toasted ones) on top and bake! A cake tester should come out clean when it’s done. Baking time is so fickle based on your oven and the will of the goddesses. Mine took about 45 minutes. I’d start watching it closely at 40. The top will crack and everything will look set, no wobbly bits. Wait until the cake is completely cooled before removing it from the pan. If it’s still warm it may be annoying and stick. Serve with whipped cream (which you can find a recipe for in the fruitcake recipe) and enjoy!
Link’s Nutcake
-
- Tabantha Wheat
- Cane Sugar
- Goat Butter
- Any Nut
Nutcake Take 2
Another look at Link's Breath of the Wild Nutcake recipe, this time much improved!
Ingredients
- 2 cups all-purpose flour
- 1 cup sugar
- 1 tablespoon baking powder
- 1/2 teaspoon salt
- 1 egg
- 1 cup buttermilk
- 1/4 cup melted butter
- 1 tablespoon cinnamon
- 1 teaspoon ground nutmeg
- 1 cup walnuts for toasting
- 1/2 cup walnuts for topping
Directions
- Preheat the oven to 350°F
- Toast the walnuts. Place them in a single layer on a baking sheet and toast in the oven for about 10-12 minutes, stirring once halfway through. Remove from the oven and cool for at least 10 minutes.
- Mix together the flour, sugar, baking powder and soda, and salt. Give it a few stirs with a whisk to incorporate some air into the mixture. Make a well in the center of the mixture.
- All the wet ingredients to the top of the dry ingredients. Whisk the wet ingredients together without incorporating any of the dry.
- When the wet ingredients are thoroughly mixed switch to a spoon and start stirring together all the ingredients. When it’s all together and no dry bits remain let it sit for one minute. Be cautious not to overmix the batter at this point. Stir only until there are no more dry ingredients visible. The batter will be slightly lumpy.
- Chop the cooled walnuts by laying them on a cutting board, and roughly cut them with a large knife until they’re in rough halves.
- Add the nuts, cinnamon, and nutmeg to the batter and stir gently until everything is mixed together. Don’t overmix! Just stir until everything looks even.
- Butter and flour a loaf tin. Rub the butter in the pan until all the cracks and surfaces are slathered. Then sprinkle in flour until all the butter is covered. Tip the tin over and pat the bottom to remove excess flour.
- Add your batter and smooth it out with a spoon. Add the untoasted, chopped walnuts to the top. Bake until a cake tester comes out clean from the center, about 40-55 minutes. Serve with whipped cream and enjoy!


 Now here comes the different part and the reason this isn’t an “easy” recipe. Add all the eggs to a bowl and whip on high, using a whisk or electric mixer fitted with a whisk attachment, until they start to get bubbly. Stop and add the rest of the sugar and all the oil, and continue whisking until the eggs get light in color, start to get fluffy, and can almost double in volume. This will take at least 5 minutes. If you’re lucky enough to have a stand mixer like a KitchenAid you can do this while grating the carrots and save yourself even more time!


 Butter a 10 inch round cake pan, making sure you get all the cracks and crannies. I prefer a springform pan because they are the easiest to get a cake out of. If you don’t use a springform you may have to flour the pan as well as butter it. Just throw in some flour after you grease it, shake it until the butter is covered, and dump out the excess. It’s pretty easy. Add the cake batter and stick it in the oven. The entire bake process is an adventure, like completing a shrine. Depending on the oven, the type of oven, how old your oven is, etc… your baking time will be different from someone else’s. But my oven bake time was about 45 minutes. Yours will be pretty close to this, but just watch starting around 40 minutes. Getting a perfectly domed cake is all about timing. Take the cake out to early (or even check on it too early) and the whole thing will collapse on you. Take the cake out late and it’ll be so dry you’ll regret eating it. So if you open the oven door to check on the cake and the center wobbles a bit close it quick and wait another 5-10 minutes before you even try again. A toothpick inserted into the center will come out clean when it’s ready!
