Cream of Mushroom Soup

Cream of Mushroom Soup

Happy Valentine’s Day! To tell the truth, my husband and I don’t actually celebrate this one… Not that we have anything against it, but with birthdays and holidays so close to this date it just feels like too much to celebrate yet another holiday where giving gifts is recommended. So tonight we will be celebrating by eating take out and watching Overwatch League, which has finally started up again (YAY!). But, in honor of the holiday, I have the least romantic dish possible to share with you. Guys, I don’t know why I didn’t plan this better, but I totally spaced that this post would come out on a holiday celebrating love. So instead of sweets, dessert, or even a romantic dinner option, I bring you Cream of Mushroom Soup…

Cream of Mushroom Soup
time and difficulty

I need to admit something. I relied heavily on the recipe of Cafe Delites for this one. I’ve never in my wildest dreams thought of making cream of mushroom soup from scratch. Frankly, the only time I use it is in my stroganoff recipe. So I needed a lot of guidance to even know what direction to head in. I changed a few things, made a few additions of my own, but definitely check her recipe out if you want the pure, unadulterated version!

We start by chopping mushrooms, dicing onions, and mincing garlic. All pretty basic stuff at this point.

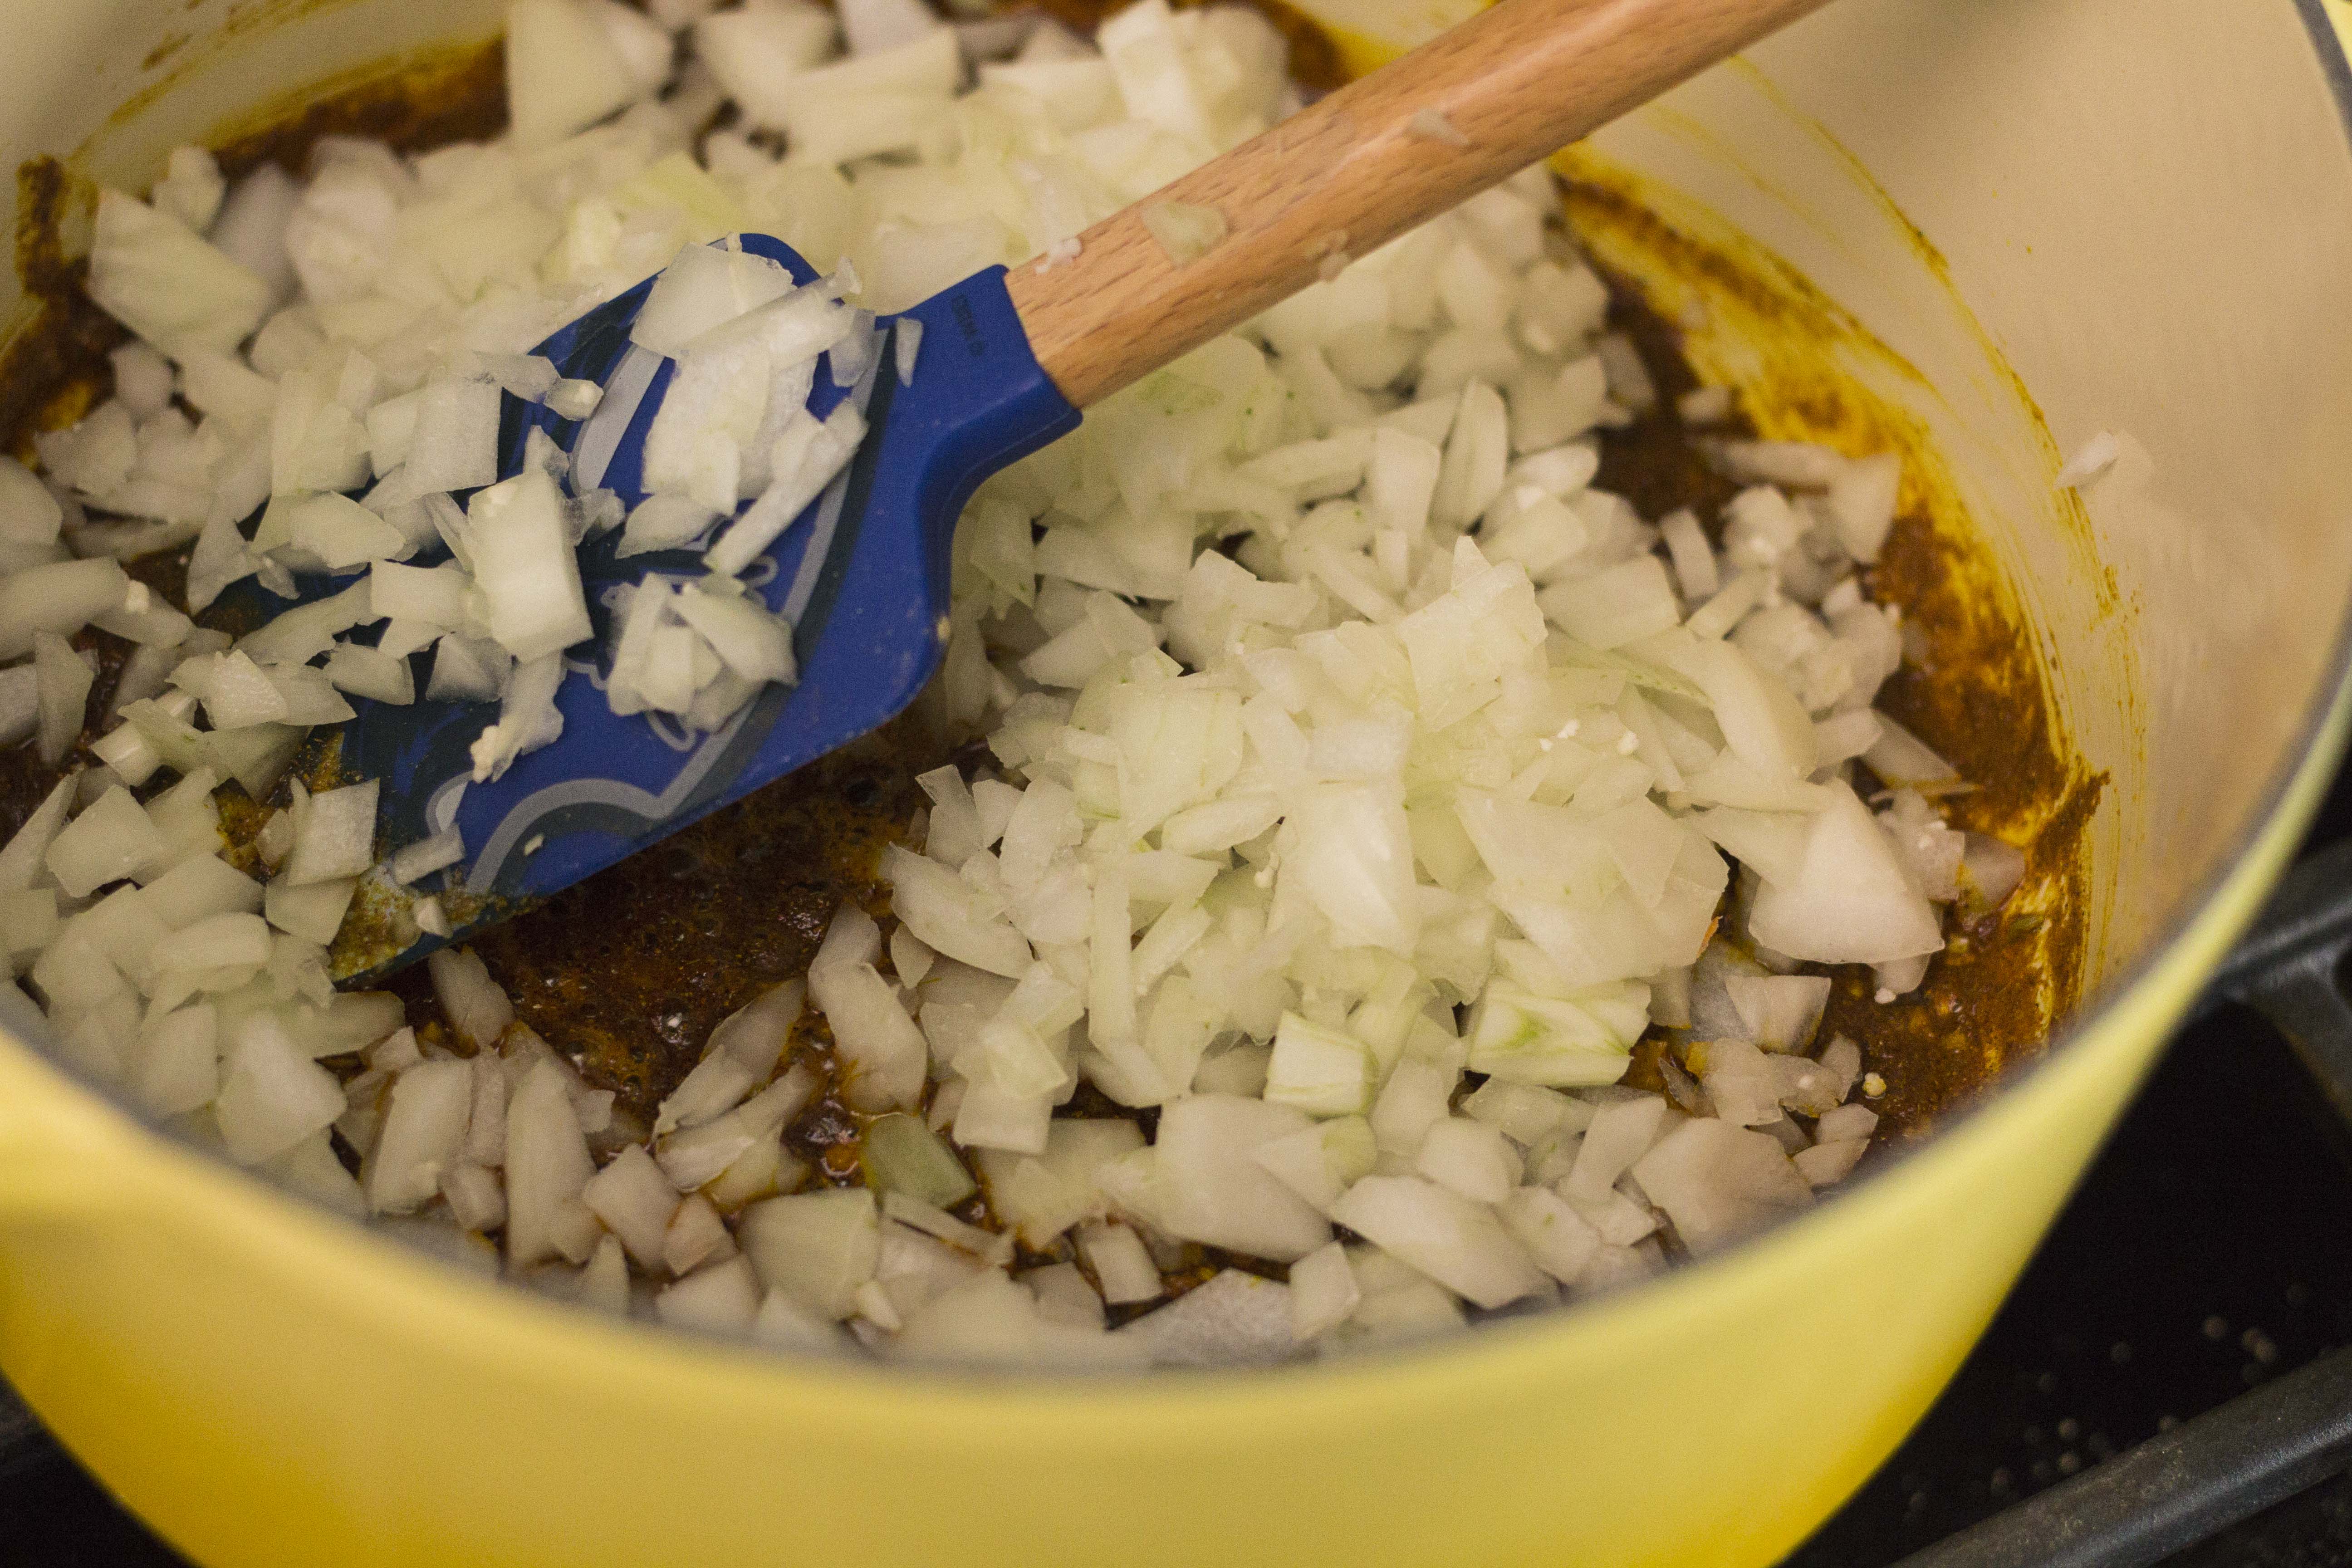
Next, heat some butter in a pot… or dutch oven (you guys know me so well) over medium heat. Add the onions and saute until golden and shiny. Then add the garlic and stir for just a minute or so. Garlic burns so easily and we don’t want to overdo it. When everything smells nice add the mushrooms and salt and pepper and saute until they start to change color and become soft. We don’t really want to cook them too much or they’ll be rubbery at the end.

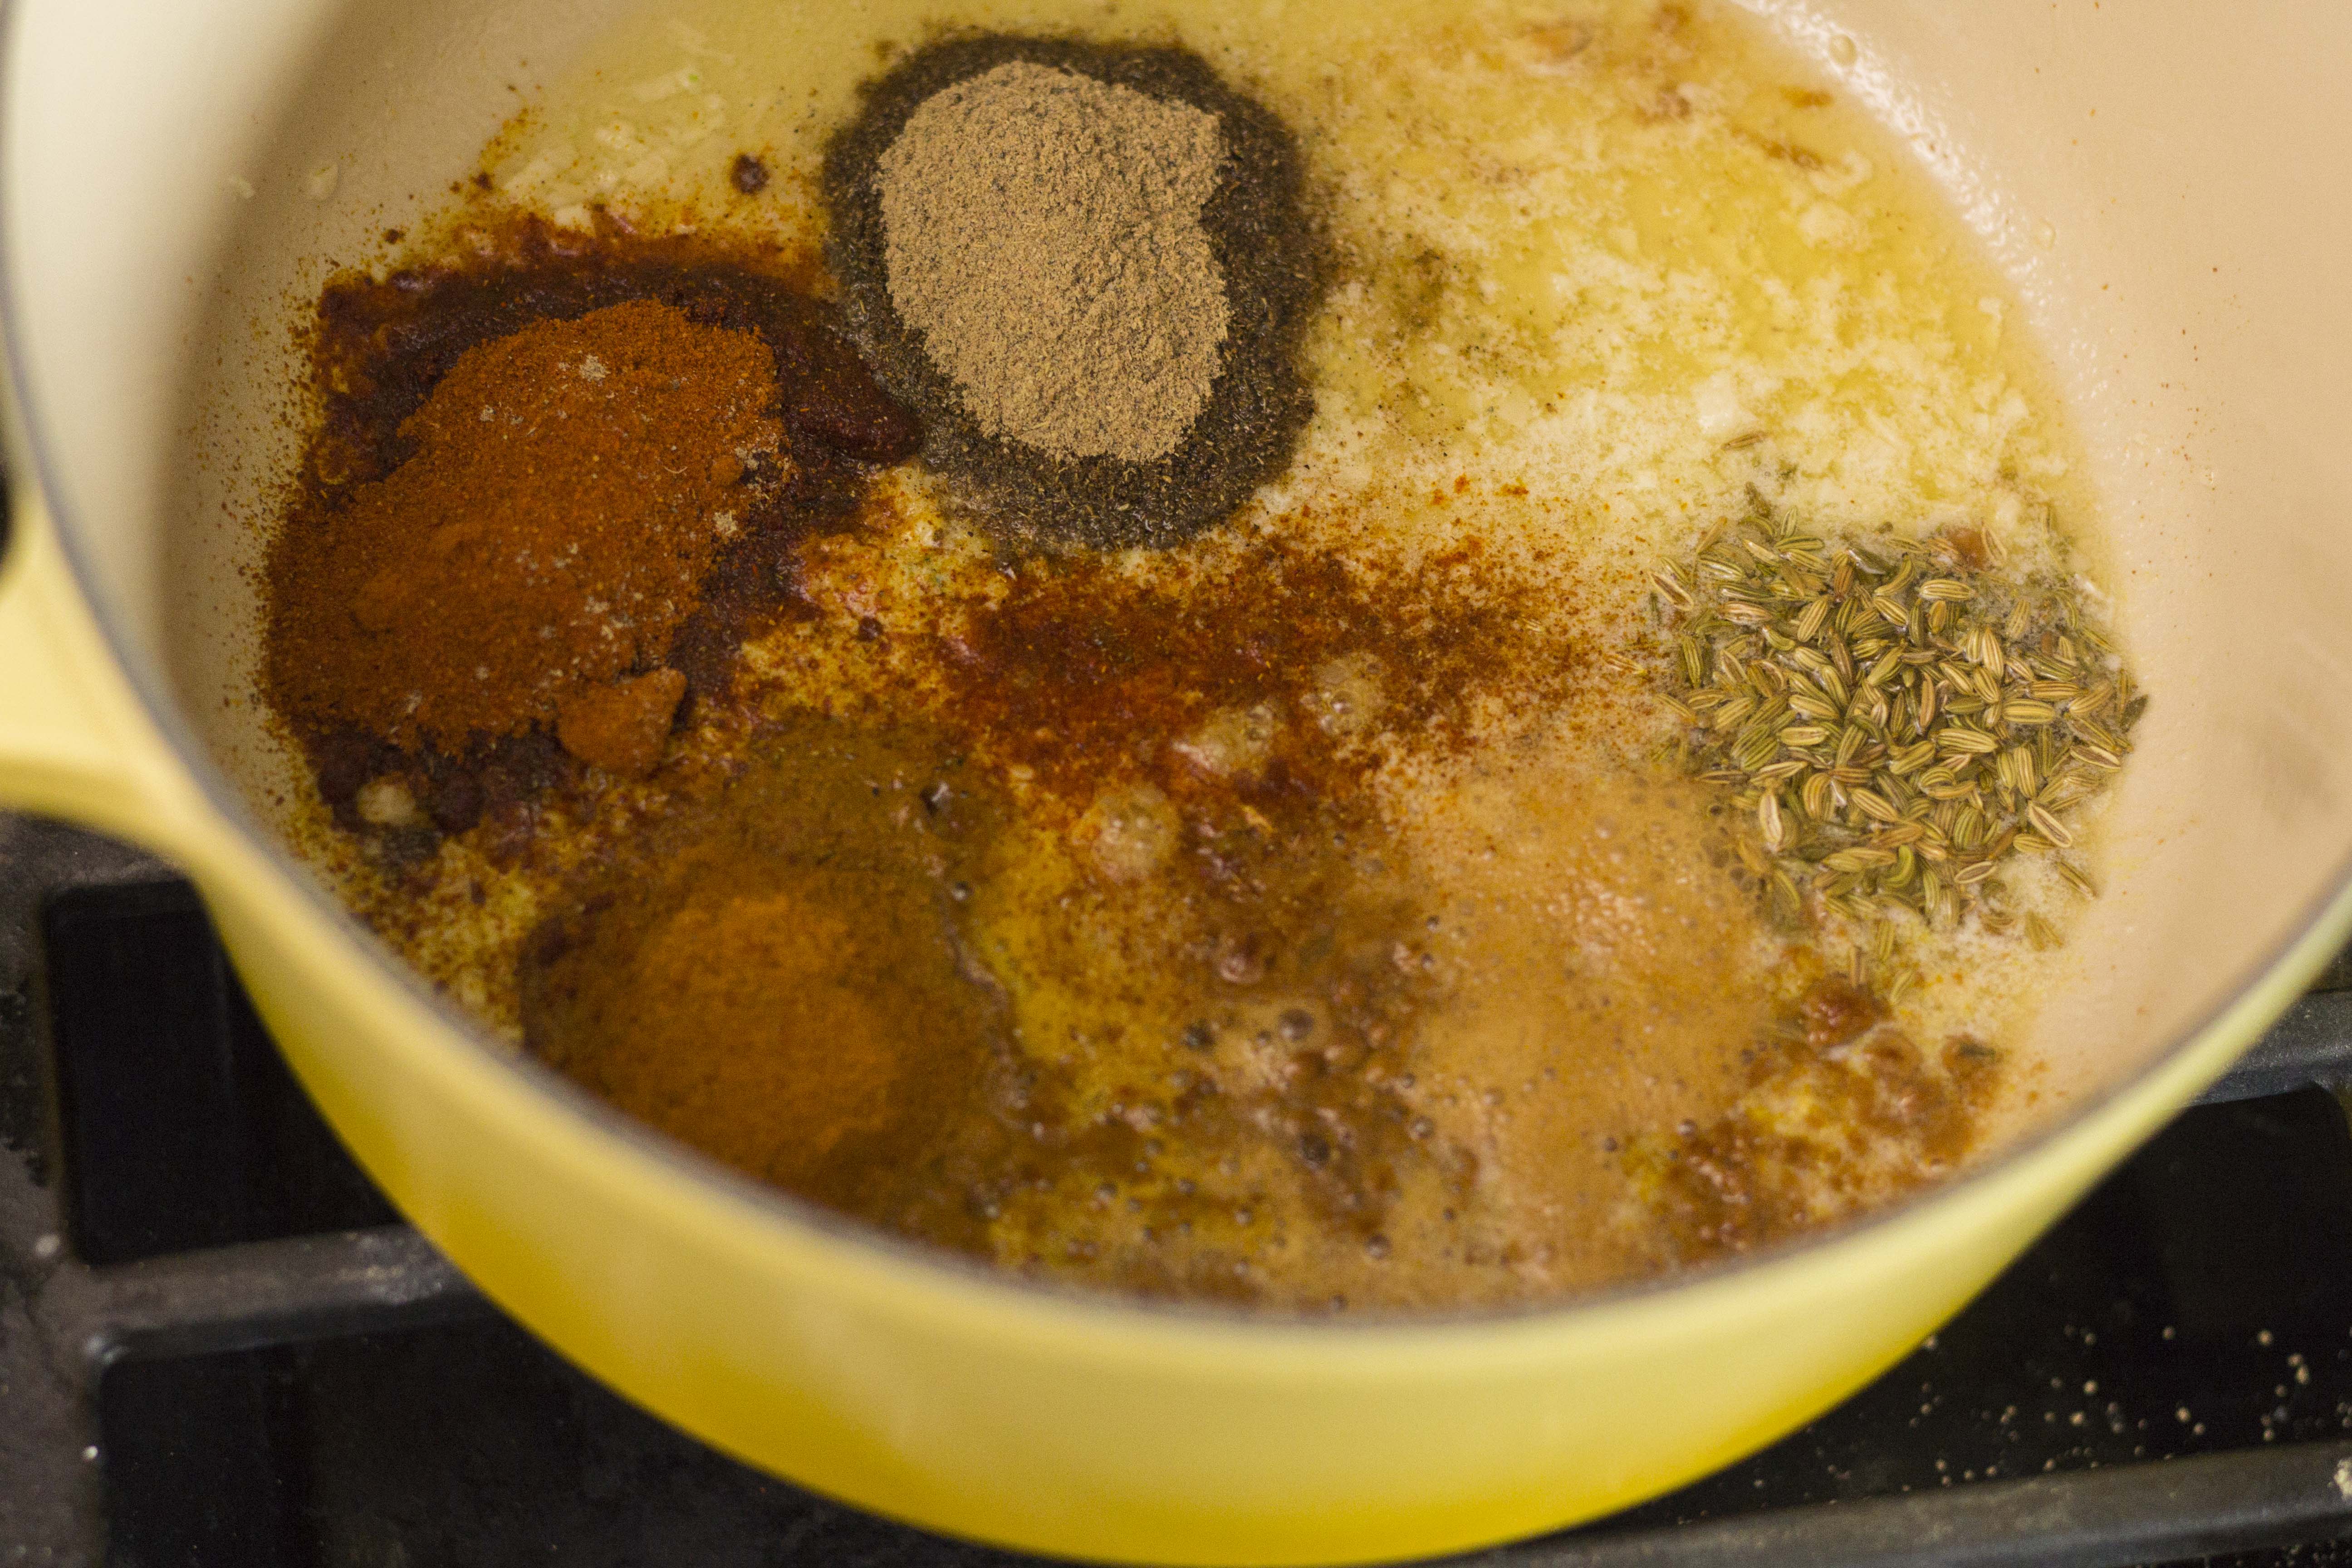
When everything is ready add the seasonings and flour and stir until everything is completely coated. Then we deglaze the fond. I’ve talked about deglazing before and it’s my favorite way to ensure that all the seasonings stay in your dish. Just add a few tablespoons (or splashes, we aren’t fancy here) of your chosen broth to the pot and scrape the bottom until all that delicious brown stuff comes up.

Once it’s all off the pot add half the remaining broth to the pot and stir continuously until it heats and starts to thicken. Then add the remaining broth, stir until combined, and allow it to simmer for about 10 minutes. It’ll start to thicken up and smell delicious. If it doesn’t look thick enough for your tastes at this point simply add some flour to the pot and whisk it until there’s no lumps. Allow to cook for a few more minutes until it thickens.

Add all the milk and allow to heat until barely simmering. Add more salt and pepper as needed and serve while it’s hot! This soup will even save for a few days to add to other recipes you may have (like the aforementioned stroganoff). It actually turned out way better than I thought it would! I’d eat it as it is next time, just because it smelled so delicious!

Link’s Veggie Cream Soup:

  • Fresh Milk
  • Rock Salt
  • Any Mushroom
  • Any vegetable, herb, or flour

Cream of Mushroom Soup

  • Servings: 4
  • Difficulty: easy
  • Print

A savory, fragrant cream of mushroom soup

Ingredients

  • 4 tablespoons salted butter- 1 medium yellow onion- 2 garlic cloves- 1 pound fresh mushrooms (can be white or brown)- 1 teaspoon kosher salt- 1/2 teaspoon black pepper- 1/2 teaspoon oregano (or 1.5 teaspoons fresh oregano)- 1 teaspoon thyme (or 2 teaspoons fresh thyme)- 10 fennel seeds- 1 bay leaf- 1/4 cup all-purpose flour- 4 cups vegetable broth (for vegetarian) or beef broth- 1.5 cups milk

Directions

  1. Chop the mushrooms into bite-size pieces. Dice the onion and mince the garlic. 2. Heat the butter in a pot over medium heat.3. Add the onions and saute until golden and shiny.4. Add the garlic and stir until fragrant, about 1 minute.5. Add the mushrooms and salt and pepper and saute until they start to change color and become soft.6. Add the seasonings and flour and stir until everything is completely coated.7. Deglaze the fond by adding a few tablespoons of your chosen broth to the pot and scrape the bottom until all the brown bits are removed.8. Add half the remaining broth to the pot and stir continuously until it heats and starts to thicken, about 5 minutes. 9. Add the remaining broth, stir until combined, and allow it to simmer for about 10 minutes. If it doesn’t look thick enough at this point simply add some flour to the pot and whisk it until there’s no lumps. Allow to cook for a few more minutes until it thickens.10. Add all the milk and allow to heat until barely simmering. Add more salt and pepper as needed and serve while it’s hot!

Veggie Cream Soup

Veggie Cream Soup

Alright, guys, I think I’m about to throw you for a loop.  After checking recipes, matching BotW photos, and deciding on what I want to make, I’m making a change up to my recipes.  Now, I have a Veggie Cream Soup already made.  But the BotW photo is much more orange, the Cream of Vegetable Soup is more creamy, and I wanted to make cheese soup.  Because, quite frankly, I don’t love Cream of X soup.  I utilize it in other recipes to make other things, but I never actually just eat Cream of X soup.  So I’m renaming my last veggie soup Cream of Vegetable soup, after all, it’s veggies, cream, and soup.  And the new and improved Veggie Cream Soup, is about to follow!

Veggie Cream Soup

time and difficulty

Basically, folks, we are making cheese soup.  And while I have photos one way, I’d really like you all, please, to follow what I say, not what I show!  It’ll make sense when I start describing what’s going on.

Start by chopping all the veggies up into lovely bite-size pieces.  Carrots, broccoli, and cauliflower can go into a bowl together, but keep the onions separate.  When everything is diced heat a heavy-bottom pot (or, I guess, any pot) and add all the butter but 3 tablespoons.  Add the onion and saute for 1 minute.  Then add the other veggies and saute for 2-3 minutes, until shiny and starting to soften.  

shiny veggies

Here’s that part where you get to ignore what I’ve done and pay attention to what I say!  I have you add the extra butter and flour to the sauteed veggies, but the roux really struggled to come together, and without a solid roux, the likelihood that your cheese will break is pretty high.  And, for me, I can handle that, but I don’t want that for you people at all!

So now we’re just going to remove the veggies and put them in a bowl.  Then, add the 3 tablespoons of butter, melt it down, add the flour slowly, and make a nice roux by whisking continuously.  I have photos from the old Veggie Cream Soup…  Pretend like they’re from this recipe.

Add the milk 1 cup at a time and whisk until completely mixed.  This’ll thicken the milk.  Continue with the remaining milk.  Then add the cream and chicken or vegetable stock (your choice to make this vegetarian!) and stir in the veggies, salt, and pepper.  We don’t add a lot of salt because the cheese is salty, so don’t be tempted to add more.  It’ll feel bland at this step.

veggies and liquid


Here’s the next step, and it’s an important one for winding up with a nice, smooth soup instead of a cheesy broken mess.  Don’t let the soup boil.  It should simmer, barely bubbling, to cook the veggies, but it shouldn’t boil.  Keep an eye on it.  If it boils you may not get a great soup.

cheese added

Simmer it for 10ish minutes, or until the veggies are tender and delicious!  Then remove from the heat and let it sit for a few minutes until it cools slightly.  This is like adding chocolate to cream – if you do it while it’s too hot the fat will break out and won’t be able to reform properly, so you end up with a mess.  Cheese into hot things is the same.  So once it’s cooled slightly, add the cheese, 1 cup at a time, and stir until smooth and creamy.  And then eat it all while you can – you won’t really feel like stopping!

close up

Link’s Veggie Cream Soup:

    • Fresh Milk
    • Rock Salt
    • Any Carrot or Pumpkin

Veggie Cream Soup

  • Servings: 4
  • Difficulty: easy
  • Print

A creamy cheese soup with broccoli, cauliflower, and carrots.

Ingredients

  • 1 large broccoli crown – 1/2 head cauliflower – 3 medium carrots – 1 small onion – 1/3 cup plus 3 tablespoons butter – 1/3 cup all-purpose flour – 4 cups milk – 1 cup vegetable or chicken stock – 2 tablespoons heavy cream – 1 teaspoon kosher salt – 1/5 teaspoons black pepper – 3 cups sharp cheddar cheese

Directions

  1. Chop the carrots, broccoli, and cauliflower into bite-size pieces. Place these into a bowl. Dice the onion and keep separate. 2. Heat a heavy-bottom pot on medium and add all the butter but 3 tablespoons.  3. Add the onion and saute for 1 minute. 4. Add the other veggies and saute for 2-3 minutes, until shiny and starting to soften. 5. Remove the veggies and put them in a bowl. 6. Add the 3 tablespoons of butter, melt it, and add the flour slowly. Make a roux by whisking this constantly until thickened and yellow. 7. Add the milk 1 cup at a time and whisk until completely mixed and thickened. 8. Add the heavy cream and chicken or vegetable stock, stir in the veggies, salt, and pepper, and stir until combined. 9. Simmer the soup, barely bubbling, to cook the veggies, about 10 minutes. 10. Remove from the heat and let it sit for a few minutes until it cools slightly. 11. Add the cheese, 1 cup at a time, and stir until smooth and creamy. Serve hot.

Monster Soup

Monster Soup

In spite of all my hopes and plans, this is the one recipe that I was forced to use food coloring.  I tried using, what I had thought, the perfect ingredient for making this soup purple without using any coloring…  But, unfortunately, the purple potatoes not only did NOT make the soup purple, it turned it a horrible shade of brown, meaning I simply had to use coloring to make it a nice, purple shade.  So sad.

Monster Souptime etc

Cut the onions, carrots, and celery into bite size pieces.  Wash and dice the potatoes, too.  Now, we know that I like my vegetables with their skins on, but if you feel so inclined, peel the carrots and potatoes.

In a nice pot heat the butter on medium until melted.  Add the carrots, onions, and celery and saute for 2 minutes, until the raw look is gone.  Add the potatoes and cook, stirring continuously, until the potatoes are “crisp tender”.  This means it’s still hard, but not raw.  This’ll take about 5-8 minutes.

veggies in a pot

veggies and brothAdd all the vegetable broth and bring to a boil, raising the heat if needed.  Reduce the heat back to medium and simmer for about 10 minutes, until the potatoes are starting to soften up.  Then we want to add the milk and flour.  Now, a word of caution about the flour and milk – we want to make sure that the flour is COMPLETELY whisked into the milk before we add it to the soup.  If it’s not you’ll end up with lumpy bits of flour everywhere and it’ll be gross.  Allow everything to simmer for about 5 minutes.  By this time the potatoes should be getting softer.

You’ll need to be extra careful with this next part.  Take out 1/2 of the soup, using a heat-proof container.  Pour the soup into a blender in however many batches you need to make it fit, blend until smooth, and pour back into the remaining soup.  When half of the soup is blended, and all the soup is back together, add the heavy cream.  Stir and heat until hot and then taste for seasonings.  You may want to add the rest of the salt and pepper now…

add coloring

Guys, now it’s time for the part that makes this Halloweeny, but also kinda weird.  Add all the food coloring.  It feels like a lot, I know, but it’ll make it the best color for Monster Soup – and make it not a weird shade of brown… I honestly thought pureeing purple potatoes would make the soup purple, not brown.  But I was wrong.  So if you don’t want to add Monster Extract to your soup, simply use russet potatoes to ensure that your soup is a nice, creamy white instead of a weird brown.

monster soup

Serve with grated cheese, sour cream, and fresh chives.  Also, if you’re using this at a Halloween party, serve it in a small cauldron for a great touch!

Link’s Monster Soup recipe:

    • Fresh Milk
    • Tabantha Wheat
    • Goat Butter
    • Monster Extract

Monster Soup

  • Servings: 5-6
  • Difficulty: easy
  • Print

Potato Soup with purple coloring for a lovely Halloween effect


Recipe adapted from Perfect Potato Soup by Ree Drummond from The Pioneer Woman

Ingredients

  • 1 pound purple potatoes (or russet for a white soup instead of purple soup)
  • 4 medium carrots
  • 3 celery stalks
  • 1 medium yellow onion
  • 8 cups vegetable stock
  • 3 Tablespoons butter
  • 3 Tablespoons all-purpose flour
  • 1 cup milk (substitute almond milk to make this vegan)
  • 1/2 cup heavy cream (or more almond milk for a vegan recipe)
  • 1/2 – 1 teaspoon kosher salt
  • 1/4 – 1/2 teaspoon black pepper to taste
  • 1/2 – 1 teaspoon paprika
  • 1/2 – 1 teaspoon purple gel food coloring
  • grated cheese, fresh chives, and sour cream to garnish

Directions

  1. Cut the onions, carrots, and celery into bite size pieces. Peel, if you desire.
  2. Wash and dice the potatoes, again, peeled if you desire.
  3. Heat the butter on medium in a pot until melted.
  4. Add the carrots, onions, and celery and saute for 2 minutes, until the raw look is gone.
  5. Add the potatoes and cook, stirring continuously, until the potatoes are crisp tender, about 5-8 minutes.
  6. Add all the vegetable broth, and the first amounts of salt, pepper, and paprika, and bring to a boil, raising the heat if needed.
  7. Reduce the heat back to medium and simmer for about 10 minutes, until the potatoes start to soften.
  8. Whisk together the milk and flour until completely combined. Add to the soup and simmer for about 5 minutes, until the potatoes are nearly soft.
  9. Using caution, remove 1/2 of the soup, using a heat-proof container. Pour the soup into a blender and blend until smooth. You may need to blend in batches if your blender is small. Pour the blended soup back into the pot and stir to combine.
  10. Add the heavy cream and stir and heat until lightly simmering.
  11. Taste for seasonings, adding the remaining salt, pepper, and paprika if desired.
  12. Add the first amount of the food coloring. Stir until completely combined and the soup begins to change. If a darker purple is desired, continue adding coloring until the color you’re looking for is achieved.
  13. Serve with grated cheese, sour cream, and fresh chives.

Vegetable Curry

Vegetable Curry

Let’s talk about sheer dumb luck for a second.  By that, I mean the sheer dumb luck I’ve been having making some of these recipes.  Guys, a lot of this stuff I’ve never made before.  Ever.  Some of these recipes have, by some miraculous intervention, worked out perfectly first try.  Yeah, yeah, some of that is the skills and knowledge I’ve built up over years of binge-watching cooking shows and always being willing to try new techniques.  But honest, some of it has to be luck.  Perfectly-placed-one-shot-to-a-guardian’s-eye-when-he’s-flying-all-over-the-place luck.  I’ve always dreamed about making Indian food, but I’ve never been brave enough to pull the trigger.  When I finally decide it’s time to start and I find a recipe that I feel like I can tweak and love, it turns out not only amazing, but incredible.  I surprised myself by how much I loved this recipe.  Goodbye $30.00 take-out once every other week because we love Indian food that much.  Hello homemade curry for half or less that cost and so many leftovers we begged people to come eat it… True story.

One time my brother-in-law told me that Breath of the Wild helped him finally gain the confidence he needed to tackle D.I.Y. projects around the house.  Video games aren’t just about playing a game, trying a new media, or even experiencing a new story.  The skills people learn from gaming can shape their lives in a very positive way.  My entire life I’ve been excellent at puzzles and problem solving.  It’s one of the reasons I became a scientist.  Now, part of that is personality and the brain I was born with.  But a decent helping of it came from countless hours playing puzzle-based games, like Zelda, which helped train my brain to solve complex ideas with limited resources.  And having the confidence to try new things, fiddle with ideas, and tackle your fears is what we gamers do best!  So guys, don’t be scared.  I promise there are very few ways you can screw up this recipe.  Give it a shot and I’m betting you’ll have a new staple for your weekly meal rotation… or however you determine dinner menus….

Vegetable Currytime and difficulty

First thing’s first – I forgot a overhead shot of all the ingredients.  Sorry!  I got so caught up in cooking everything was used and unphotographable before I realized it…

We start by getting everything ready.  It’s really the very best place to start.  Ooh! Also, this recipe is based on a coconut kurma, my absolute favorite Indian curry.  In case you were wondering what we were going to make!  Chop the veggies into large, but still bite size pieces (guys, I’m recognizing a theme over the last few posts…).  Cauliflower, green beans, onions, and carrots.  We’ve talked about the other veggies so often I think you’ve got it.  If not, check out the Veggie Cream Soup recipe.  It’ll go into plenty of detail.  However, the green beans are new.  You can use frozen but it’s starting to become summer around here and beans will very soon be nice and fresh!  So if you buy fresh beans, simply chop off the ends and cut into inch-ish long pieces.  That easy.

mincing garlic

Now for mincing the garlic.  I’ve kindly posted a video of how to do this, but let’s describe it, too.  Hold the garlic steady between two fingers.  Carefully slice the garlic into small strips, leaving the very end attached to each other (so the strips don’t separate).  Rotate the garlic 90° and repeat the process.  Then simply dice the garlic into very small pieces.  Mince by rocking your knife through the pile several times and in several directions.  Done!

melted butterOnce everything is ready melt the butter on very low heat.  We want it to be set to low.  This is not a joke.  We want to, as my very good friend says it, give the garlic and spices a nice Jacuzzi before we actually start to cook them.  It’ll give the garlic more time to sweat without burning and will bring out a lot more of the flavor.  It’s a slower process but absolutely worth it!

spices in butter

After the butter is melted add all the spices, including the garlic.  Stir around until everything is combined and allow to heat for several minutes.  You’re house will, at this point, start to smell amazing and you’ll start to get very hungry.  Continue cooking on low and stirring every minute or so for about 5ish minutes.

Once the spices are ready add the onion and slowly start to turn up the heat, a degree at a time every minute, until you get to medium.  Sweat the onions until translucent and covered in spices.  Some of the spices may stick to the bottom of the pan at this point.  Not to worry!  We’ll deglaze it off!

saute onion

While the spices and onions are cooking we need to do one thing: puree the tomatoes.  Wash the tomatoes well and place them in a blender or food processor (maybe?  I don’t know if you can puree tomatoes in a food processor).  Blend until pureed.  Complicated, right?  If you really insist on using only canned goods for everything just follow the same process but with canned tomatoes.  You’ll need one can for this.  But it’s so easy with fresh you may as well get the delightful flavor of fresh for just as much work!

If you’re unfamiliar with deglazing you really should check out the Prime Meat Stew recipe for details.  But it can be boiled down to this:  when the pan is hot add room temp liquid and scrape the bottom of the pan.  Add more liquid as necessary and all those spices will come right up!  So slowly add the tomato puree and deglaze the pan!

add all the liquid

Next add all the coconut milk and heavy whipping cream in one go.  Whisk until completely combined.  Add the brown sugar, whisk, and bring to a boil.  Once it’s there simply lower to a simmer and add the green beans, carrots, and cauliflower.  Simmer for about 15 minutes, stirring occasionally to prevent it from sticking to the bottom.

While the curry starts to simmer start the rice.  One of these days I’ll learn, and then share, how to cook rice in a pot on the stove.  But for now let’s stick with the rice cooker.  And, quite frankly, I use so much rice in these recipes if you’re going to make them you should invest in one yourself.  Jasmine or Basmati rice is particularly good for Indian food.  However, I’m so set in my sushi rice ways I just use Calrose for everything.  So experiment if you want, but it’s okay to stick with the classics.  Simply wash the rice several times, fill it up to your first knuckle when your finger rests on top of the rice, cover and hit the start button.  It’s that easy.

simmer for 15 minutes

When your 15 minute timer is up it’s time to add the peas (frozen, so they cook slower and don’t get mushy), cashews, and golden raisins.  The raisins’ll get nice and plump because they’ll soak up all that delicious liquid and the cashews will soften up nicely.  Simmer until the rice is done, stirring every so often.  Again, we don’t want anything to burn!

close up of curry

Serve over (or if you want to be picture accurate) next to your rice and enjoy!

Link’s Vegetable Curry

    • Any carrot or pumpkin
    • Hylian Rice
    • Goron Spice

Vegetable Curry

  • Servings: 4-6
  • Difficulty: moderately easy
  • Print

Vegetables in a creamy coconut kurma curry sauce

Recipe adapted from North and Mouth’s “New and Improved Bombay House Chicken Coconut Kurma”

Ingredients

  • 1/2 head of cauliflower
  • 2 medium carrots
  • 1 small onion
  • 3 teaspoons minced garlic
  • 1 handful fresh green beans (very scientific, I know)
  • 1.5 cup frozen peas
  • 1 cup golden raisins
  • 1 cup roasted cashews
  • 2 teaspoons ground ginger
  • 1.5 teaspoons tumeric
  • cayenne/red pepper, 1/4 tsp for mild, 3/4 tsp for medium, 1.25 tsp for hot
  • 2 teaspoons fennel seeds
  • 3 teaspoons garam masala
  • 2 teaspoons salt
  • 3 teaspoons ground coriander
  • 2 tablespoons brown sugar
  • 15 ounces pureed tomato, about 3 medium tomatoes
  • 1 15oz can coconut milk, full fat
  • 1.5 cups heavy whipping cream
  • white rice to serve, about 2 cups uncooked and 5 cups of water

Directions

  1. Chop the cauliflower and carrots into large, bite-sized pieces. Dice the onion into small pieces. Cut the ends of the green beans and cut into 1 inch pieces.
  2. Finely mince the garlic by holding the garlic steady between two fingers.  Carefully slice the garlic into small strips, leaving the very end attached to each other (so the strips don’t separate).  Rotate the garlic 90° and repeat the process.  Dice the cut strips into very small pieces.  Mince by rocking your knife through the pile several times and in several directions.
  3. In a heavy-bottomed pot melt the butter on low heat.
  4. When the butter is completely melted add all the spices, including the garlic.  Stir until combined and allow to heat for several minutes. Continue cooking on low and stirring every minute or so for about 5 minutes.
  5. Add the onion and slowly turn up the heat, a degree at a time every minute, until you get to medium.  Sweat the onions until translucent and covered in spices.
  6. While the spices and onions are cooking puree the tomatoes.  Wash the tomatoes well and place them in a blender or food processor.  Blend until pureed.
  7. When the onions are translucent add a small amount of pureed tomato to the pan and scrape hard to deglaze the spices from the bottom. Repeat until all spices are removed from the bottom and are mixed in to the puree.
  8. Add all the coconut milk and heavy whipping cream.  Whisk until completely combined.  Add the brown sugar, whisk, and bring to a boil.
  9. Once the mixture is boiling lower heat to a simmer. Add the green beans, carrots, and cauliflower.
  10. Simmer for about 15 minutes, stirring occasionally to prevent it from sticking to the bottom.
  11. While the curry is cooking make the rice. Wash rice three times in water, fill with water to the first knuckle when your finger rests on top of the rice, cover and hit the start button on your rice cooker.
  12. When your curry has simmered for 15 minutes add the frozen peas, cashews, and golden raisins.
  13. Simmer until the rice is done, stirring every so often.
  14. When the rice is cooked serve curry over the rice and enjoy!

Omelet

Omelet

Let’s start with the basics.  A) because in order to make a good omelet in the future it’s good to know the basic skills from the start, and B) because it’s the end of the week and I still haven’t done a recipe for the week…. Hey, at least I’m being honest, right?

This recipe is super easy to get right and super easy to get wrong.  Eggs are notoriously easy to overcook and you really want to pull them off the heat before they’re completely cooked.  Since they continue cooking after you take them off the heat you can prevent overcooking simply by following that one rule.  So, let’s make sure you get it right and get right down to the recipe!

Omeletomelet meter

Let’s start with prepping everything.  Since eggs cook so quickly it’s important to keep everything right at hand at all times.  A few seconds can be the difference between rubbery, overcooked mush and a perfect, fluffy, delicious omelet.  So gather your eggs, salt, pepper, olive oil, and butter and let’s go!

omelet ingredients

Heat your heavy-bottomed pan over medium heat.  Now, the pan size will make a difference with how many eggs you use.  This recipe calls for 3 eggs and an 8 inch-ish pan.  This will make for a fluffier, thicker omelet.  If you use 2 eggs, you obviously use less butter, but it will make a big difference to the final product to use a smaller pan, as well.  The second thing to note is that we cook eggs on medium.   This is an important step.  Yes, it takes longer to cook things on medium but cooking eggs any higher runs the risk of burning, overcooking, cooking too quickly, and a sub-par breakfast.   Who knew a pan could make such a big difference with something as simple as eggs, right?  Lightly oil the pan by pouring some oil in and using a paper towel to sweep it around the entire pan and mop up any if you happen to pour in too much (as I usually do!).  Add the butter and gently tilt the pan to coat the pan with melting butter.

While the butter is melting crack your eggs and whip some air into them with a fork.  Just break the yolks and keep whisking until well-mixed.  There shouldn’t be any long stretches of any yolk or albumen remaining.

Once the butter is bubbling add the eggs all at once.  Tilt the pan to evenly distribute the eggs and allow to cook for 1-2 minutes.  Every once in a while gently tilt the pan to distribute the egg that hasn’t set yet.

When the eggs are nearly set add the salt and pepper.  Now, when I say nearly set I mean there’s a bit of a wobble to them.  There shouldn’t be any raw-looking bits but it shouldn’t be stiff or completely cooked through yet.  This is that all-important step I mentioned in the beginning.  Overcook at this point and your omelet won’t impress.

As soon as you add the salt and pepper tilt the pan away from you and, using a spatula, fold the edge closest to you over the rest of the omelet.  Once the omelet is flipped it won’t unstick from itself but who cares what it looks like as long as it’s delicious!  And with practice, flipping will produce perfectly shaped omelet’s every time!  Now, one last thing, when you add the omelet to the plate don’t get any of the butter.  It’ll just make the omelet taste like butter instead of eggs.  So gently lift the omelet out of the pan, leaving all the butter, and place it on your plate.  Enjoy with toast, muffins, fried tomatoes, whatever your heart desires and enjoy!

final omelet

Link’s Omelet

    • Bird Egg

Basic Omelet

  • Servings: 1
  • Difficulty: easy
  • Print

A basic omelet with salt and pepper


Ingredients

  • 3 eggs
  • 1 tablespoon butter
  • 1 teaspoon olive oil
  • Salt and pepper to taste

Directions

  1. Heat a heavy-bottomed pan over medium heat. For three eggs a good size pan would be 8 inches. Lightly oil the pan by pouring in the olive oil and sweeping it around the entire pan using a paper towel.
  2. Add the butter to the pan and gently tilt the pan to coat the pan with melting butter.
  3. While the butter is melting, crack your eggs and whip some air into them with a fork.  Whisk until completely mixed.
  4. Once the butter is bubbling add the eggs all at once.  Tilt the pan to evenly distribute the eggs and allow to cook for 1-2 minutes.  Every once in a while gently tilt the pan to distribute the egg that hasn’t set yet.
  5. When the eggs are nearly set add the salt and pepper.
  6. As soon as you add the salt and pepper tilt the pan away from you and, using a spatula, fold the edge closest to you over the rest of the omelet. Serve with your favorite breakfast foods!

Veggies Cream Soup and New Year Resolutions

Veggies Cream Soup and New Year Resolutions

I’m back!  But this time I’m not just attempting to be back because I’ve made a goal/new year resolution to get back into this.  I’ve never really been a resolutions kind of girl.  I’ve always had the opinion that if you have a goal then start now, don’t wait for the new year and risk losing momentum before you’ve even started!  But this year (mostly because of timing, partly because of my intense need to organize everything perfectly to fit in time grids) I’ve decided to start my very own set of resolutions.

One of my best friends from high school started making goals in sets of 4 and I think it’s incredibly clever to do it this way!  It gives you enough to make changes in every aspect of your life, but not so much that you give up.  They are goals in mental (i.e. knowledge), spiritual, physical, and social health.  So what are my goals, you ask?  They are:

Mental/Wisdom: Master all the Tartine and Tartine No. 3 bread recipes

Spiritual: Actually, I don’t really want to share this here, as it’s pretty personal and would take a very long time to explain.  But suffice it to say that I have one!

Physical: The proverbial “Get Healthy”, but I actually have a plan for how to do this, so it’s not just a plea in the dark

And last but not least, Social, the reason I’m boring you with all of this: My goal is to improve my blog and my community here by being more regular in recipes, in the quality of my work, and being committed to the schedule I’m about to propose.  They always say you’re more apt to accomplish goals if you tell people what they are so this is me requesting that you hold me accountable!  The new sort-of-schedule is going to be:

A new recipe each week

One “Thankful” recipe per month

One Gaming Thoughts post per month

And, potentially, if I’m able to keep all those other posts regular, one collaboration per quarter.

Yeah, it doesn’t seem like a lot, but it’s a schedule I think I can stick to and a schedule I feel comfortable making a commitment to.  Also, there will be an element of surprise to it all, since I’m not specifying posting days this time!  Let’s see if that works and if it does maybe I’ll go back to specific days…  So hopefully you guys can help me stick this goal through and I hope this will produce a better blog for you to give your limited time to and a better chance for me to be a part of your community!

And now, after all that, your recipe.

Veggie Cream SoupHeader and Meter

ingredients photo

Lets start with stripping the herbs and cutting up all the veggies.  When you’re using fresh herbs they need to be taken off the stems.  This can seem incredibly daunting but i promise, it’s actually not that bad.  If you’re using dried herbs, just skip this step and move on!  Start by washing (obviously) and shaking dry the herbs as much as you can.  Place the edge of your knife against the herb stem below the leaves, tight, but not cutting through.  Once you’re in place simply pull the stem and drag the leaves along the blade of the knife.  Don’t move the knife, just the stem.  The leaves will strip off and the stem will pull through!  Easy peasy!  Any more questions, just watch this video:

Strip the herbs

Next, we cut the vegetables.  Just slice and dice them into bite-size chunks, larger or smaller depending on your preferences.  I prefer large chunks.  I feel like you get a better flavor from them!

Once everything is prepped add a tiny bit of butter (or oil) to a pan with some height.  We are going to be simmering in it later, so we want to make sure there’s enough room for the liquid.  Start by frying the onion until it’s tender and opaque.  Then add all the fresh veggies and saute for about a minute or two, just until they are all shiny.  And guys, I know my photos have the zucchini added at this step.  My advice, don’t follow the photos!  While it was easy, it made the zucchini a little overcooked, which is not what we’re going for.  We’ll add it later.  Promise.

Add broth to the veggies

Once everything is nice and shiny add the vegetable broth and simmer for about 15 minutes.  We want everything nice and tender before we add it to the sauce!  If you’re using fresh peas and corn (because it’s summer or you’re very lucky) go ahead and add them to the simmering veggies.  If not, I used frozen peas and canned corn.   I like the taste of canned corn better in soup, but you can use frozen if you prefer.  While your fresh veggies are simmering just heat up the peas and corn.  Make sure all the water is drained and set them aside for later.

Next, we make a roux.  We talked about the pitfalls of making a roux when we made Fish Pie, so I won’t go over them in detail again.  Let’s just do the basics.

Melt your butter in a heavy-bottomed saucepan over medium heat.  Wait until the butter is completely melted and bubbly.  Once it is, whisk in half the flour.  Once all the flour is incorporated and the mixture starts to melt and become a bit liquidy again add the remaining flour.  Whisk is continually until it starts to melt again.  Whisk constantly for 2 minutes until your roux reaches the blond stage.

Once your roux is ready we start slowly adding the milk.  Add about half the milk at a time.  The roux may ball up on itself when you do but just keep whisking and it’ll sort itself out!  Whisk until the mixture is homogeneous and slightly thick.  Add the remaining milk and repeat.  If the mixture is too thick you may have added too much flour.  Add regular milk until it reaches a gravy-like consistency.

Once your sauce is ready simply add all the veggies (including the zucchini, peas, and corn at this point!), herbs, and remaining broth to the sauce, stir until well combined, and let it simmer for 10-15 minutes to allow the flavors and spices to combine!  If you skip this part the herbs won’t have done their job and it’ll be a bit bland.  Be patient.  It’ll be worth it!

close up of stew

P.S. I don’t recommend adding a raw carrot at the end… The price we pay for matching photos, right?

Link’s Veggie Cream Soup

    • Fresh Milk
    • Rock Salt
    • Any Carrot or Pumpkin

Veggie Cream Soup

  • Servings: 8-10
  • Difficulty: moderately easy
  • Print

Vegetables in a thick, creamy soup


Ingredients

  • 3-4 medium carrots
  • 2 medium zucchini
  • 1 head cauliflower
  • 1 small onion
  • 1 15 oz can of corn
  • 2 cups frozen peas
  • 1.5 tablespoons fresh thyme (or 3/4 tablespoon dried thyme)
  • 1.5 tablespoons fresh oregano (or 3/4 tablespoon dried oregano)
  • 1 tablespoon fresh chives (or 1/2 tablespoon dried chives)
  • 1.5 teaspoons salt
  • 1 teaspoon pepper
  • 1 tablespoon butter
  • 1/4 cup flour
  • 3 cups milk
  • 3 cups vegetable broth

Directions

  1. If using fresh herbs, strip the oregano and thyme from their stalks and finely dice the chives. Set aside.
  2. Slice the carrots and zucchini into large, bite-sized pieces. Remove the stalk and leaves of the cauliflower and chop into large bite-sized pieces. Dice the onion.
  3. Add a small amount of oil or butter to a pan and heat on medium until the fat is hot. Add the onion and cook until translucent and tender. Add the cauliflower and carrots and saute until shiny. Add all the vegetable broth and simmer for 15 minutes.
  4. While the vegetables are simmering thaw the peas and drain the corn and peas. Set aside.
  5. Begin the roux by melting the butter in a heavy-bottomed saucepan over medium heat. When the butter is completely melted and bubbling whisk in half the flour.  Whisk continually until all the flour is incorporated and the mixture starts to melt and become a bit liquidy again. Add the remaining flour and repeat. Once all the flour is incorporated whisk constantly for 2 minutes until your roux reaches the blond stage.
  6. Slowly add half the milk and whisk until the mixture is thick.  Add the remaining milk and whisk until the mixture has thickened to a gravy-like consistency.
  7. Add all the simmering vegetables and broth, corn, peas, zucchini, herbs, salt, and pepper to the sauce and stir until well combined. Bring to a simmer and allow to simmer for 10-15 minutes to allow the flavors and spices to combine.