While the basics for this recipe are fairly straight-forward it had so much potential for embellishment that I’ve been chomping at the bit to make this one. I decided to spice up Link’s recipe by adding a delicious garlic ginger sauce. I’ve never used fish sauce before so when I found this recipe I was really unsure. But with a little tweaking I was able to get something that I really loved. And it made my house smell amazing for days.
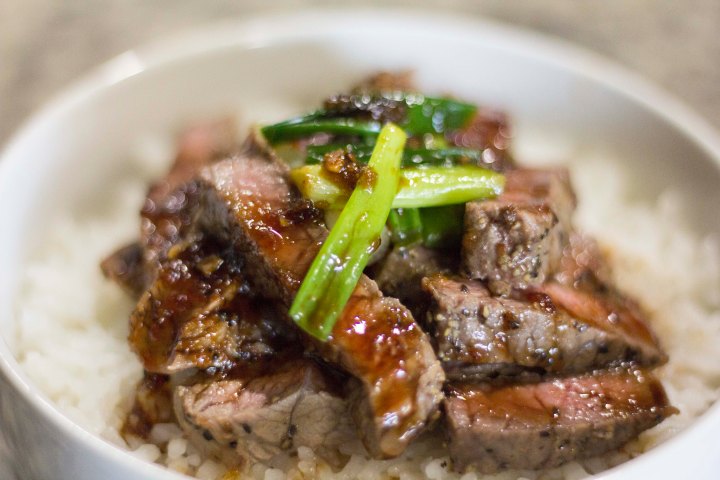
Meat and Rice Bowl
This is the regular old meat and rice bowl so I decided to use sirloin, the easiest and, generally speaking, least expensive cut of steak. But just because it’s less expensive and less tricky doesn’t mean it’s any less delicious when done right. Pan-seared is the easiest and also my new favorite way to cook a steak and it lets me use my cast iron a lot more. Let the steak come to room temperature – it sears a lot easier and cooks more evenly that way.
 Start the rice while the steak is warming up. It’ll take the longest to cook and you want it to be ready and hot when your steak is done! Definitely only use traditional Asian sticky rice. I only use sticky rice exclusively for everything because it’s legitimately the only rice worth knowing. I use Calrose Botan rice, but you can use any sticky rice in your market. If you choose to use a rice cooker a nice trick to using sticky rice is to wash it several times before you cook it. Rinse it under warm water, drain the water, and repeat until the drained water starts to look a little more clear. Add water to the rice cooker until it comes up to the first knuckle joint of your index finger when your finger is resting on top of the rice… does that make sense? If not, here’s a photo:
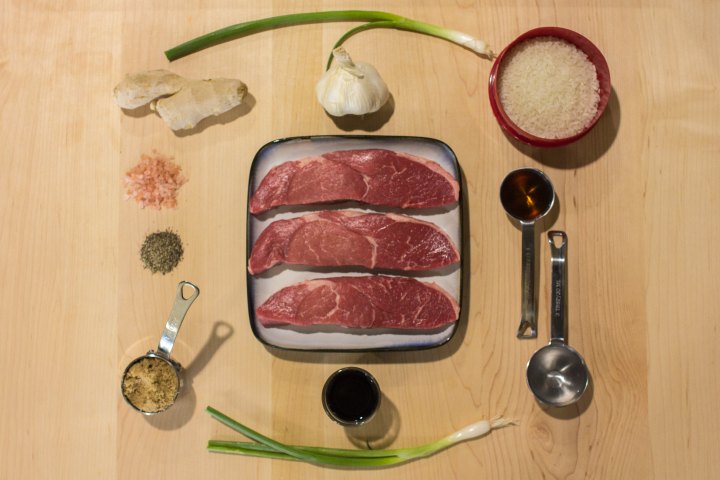
While everything else is cooking/getting ready to cook start chopping the other ingredients. Using frozen ginger seriously makes it 1,000% easier to work so just pop the ginger in the freezer about an hour before you want to use it and it’ll be ready to go! Mince the garlic, measure out the sauces, and grate the ginger using a zester (best option) or the small side of a cheese grater (good enough option). Cut the green onions into 3/4-1 inch pieces and make sure the slab of butter is ready and you’re all set!


When the steak isn’t cold use a paper towel to dry the steak as much as you can and then rub it with rock salt and pepper. Drying the steak is a great trick to making it sear much better. Trust me, it’s worth the extra effort.
Add all the ingredients for the sauce to a pot, whisk thoroughly, and bring to a boil. Lower the heat to simmer for about 5-7 minutes. At this point you can start cooking the steak if you feel comfortable. Otherwise let the sauce thicken and blend and remove from the heat. We will heat it back up after the steak is done.
While the steak is marinating for a minute in the salt and pepper, heat up the pan until piping hot (this is where the cast iron comes in handy). When it’s ready add a little oil, but really, make sure it’s just enough to barely coat the bottom of the pan! We don’t want our steaks swimming in oil. It’ll ruin the beautiful sear. Add the steak to the pan, laying it down away from you to prevent any oil splashes and painful burns.
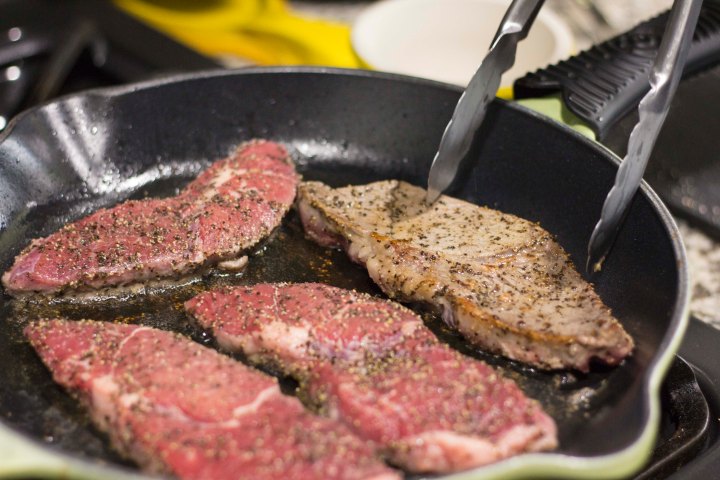
After the steak has seared for a minute or two turn the steak to caramelize the fat by placing them fat-side-down in the pan for a minute or two. Then swap to all the other sides, following the same protocol of searing, turning, searing. Finally lay the steak down flat on the last raw side and let it sear for a few minutes. The remainder of cooking the steak is based on several factors: 1) how thick your steak is and 2) how well done you want it. If your steaks are on the thinner side or you want your steak a little more raw you may be ready to spoon on the butter at this point. If your steaks are thick or you like them well-done alternate cooking them on each of their flat sides until they are medium rare to medium. Add the butter and onions all at once and start spooning the melted butter and cooking onions over the steak. When the steaks are medium (or cooked to your preference, I just prefer medium!) remove them from the pan, cover with foil, and let rest for a few minutes. Continue cooking the onions in the butter until they are done and remove them from the heat.
Phew. Take a deep breath, you’ve finished the most nerve-wracking part of the recipe! Take it a little easy for a minute and, while the steaks are resting, quickly re-heat the sauce. When you slice the steak slice it against the grain. It’ll make a smoother, easier, and much more aesthetically pleasing cut! Spoon out the rice into a bowl, add the steak, drizzle on the sauce, and enjoy!
Link’s Meat and Rice Bowl
-
- Any raw meat or bird drumstick
- Rock salt
- Hylian rice
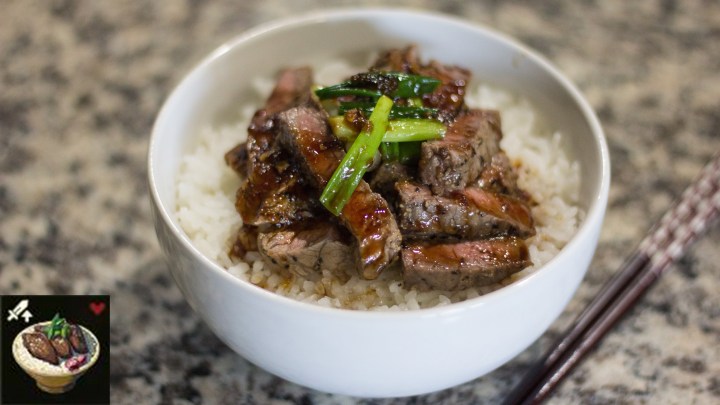
Meat and Rice Bowl
Sirloin steak with sticky rice and a garlic ginger sauce
Steak
- 4 Sirloin steaks, warmed to room temperature
- 2-3 Green onions, sliced into 1 inch pieces
- 1-2 tablespoons rock or kosher salt
- 1-2 teaspoons pepper
- 1 tablespoon oil
- 1-2 tablespoons butter
- 2-3 cups sticky rice
- Enough hot water to cover the rice
Sauce
- 1/2 cup brown sugar
- 2 tablespoons grated ginger
- 3 medium garlic cloves, minced
- 1/3 cup soy sauce
- 1 1/2 tablespoon fish sauce
- 1 1/2 tablespoon white vinegar
Directions
- Start cooking the rice
- Dry the steaks with a paper towel and rub with the rock salt and pepper until well coated.
- Add all the sauce ingredients to a sauce pan, whisk thoroughly, and bring to a boil. Reduce heat and allow to simmer 5-7 minutes until thickened.
- Heat the cast iron pan until piping hot. Add the oil and then add the steaks to the pan, laying it down away from you to prevent any oil splashes.
- Allow the steak to sear for a minute or two and then turn the steak on it’s side, fat side down. Allow the steak to sear until the fat is caramelized.
- Repeat step 5 on all sides until the steak is completely seared.
- If the steak needs more time to cooks due to thickness or how you’d like it cooked, continue turning the steak every few minutes until it is nearly done.
- When the steak is nearing completion add the butter and green onions to the pan. Spoon the melted butter over the steaks until they are the appropriate temperature.
- Remove the steaks from the pan and cover with foil to let them rest.
- Continue cooking the onions until wilted and then remove them from the pan.
- Slice the steak into strips against the grain and serve over rice. Drizzle the sauce over the steak and rice and enjoy!


 Heat up your nice, heavy pan and add the oil and butter. Cook the onion until it’s nice and tender and get ready for the fun/exciting/scary/hot part: the rice.