As I’ve mentioned before, my mom lived in Taiwan for a few years in her twenties (for more information about why, feel free to DM me on Instagram or Twitter). This means that, not only did she come home with some amazing experiences, but she came home with some amazing small-town, authentic Taiwanese/Chinese recipes. But this one is my favorite. And in a post dedicated to my wonderful mother, what better recipe to share than my favorite thing she taught me to make.
My mother is incredible. She’s easily one of the most dedicated, hardworking people I’ve ever met. She had a successful career, raised several kids, and always managed to find time to get things done around the house. Her energy and willpower seem limitless. It’s quite inspiring to watch her (and also a little daunting)! She’s strong and opinionated, determined and fierce. And she’s my hero. I mean, I’m pretty sure my mom is Wonder Woman (*recently confirmed by my dad). She doesn’t see it- she’s always got one reason or other for how she can do everything and still find time to read about 2-3 dozen books a year – but I know the truth. And while I can’t be her and do everything under the planet successfully and efficiently, I’ve learned so much about the person I can be from her. So this post is dedicated to my mom, for the example she is and the life she taught me to live. Thanks, mom.
Mom’s Beef and Broccoli
Guys, this recipe is really easy. In fact, it may seem so easy that you’ll wonder if it’s even worth eating. Yeah, it’s a little basic – like all good homemade classics are – but I think it’s so good I’ll literally find excuses to drink the leftover sauce. It’s so good you’ll probably stop eating beef and broccoli at restaurants because it won’t taste quite like this…
First, and always, we start the rice. Come on, you’re old hats at this by now! Rinse the rice, add water up to your first knuckle, turn on the rice cooker. Again, if you don’t have one of those Christmas is just around the corner… Maybe it’s time to splurge on the most-used gadget in my kitchen.


Then let’s slice the steak into long, thin strips. Preferably about 1-2 inches long and 1/8-1/4 inch thick. To make it easy, slice against the grain. You see the way the muscle lines flow? Slice perpendicular to that. It’ll make a cleaner, easier cut. Place all the meat in a bowl and add enough soy sauce to submerge, but not drown the meat. It’s a fine line.


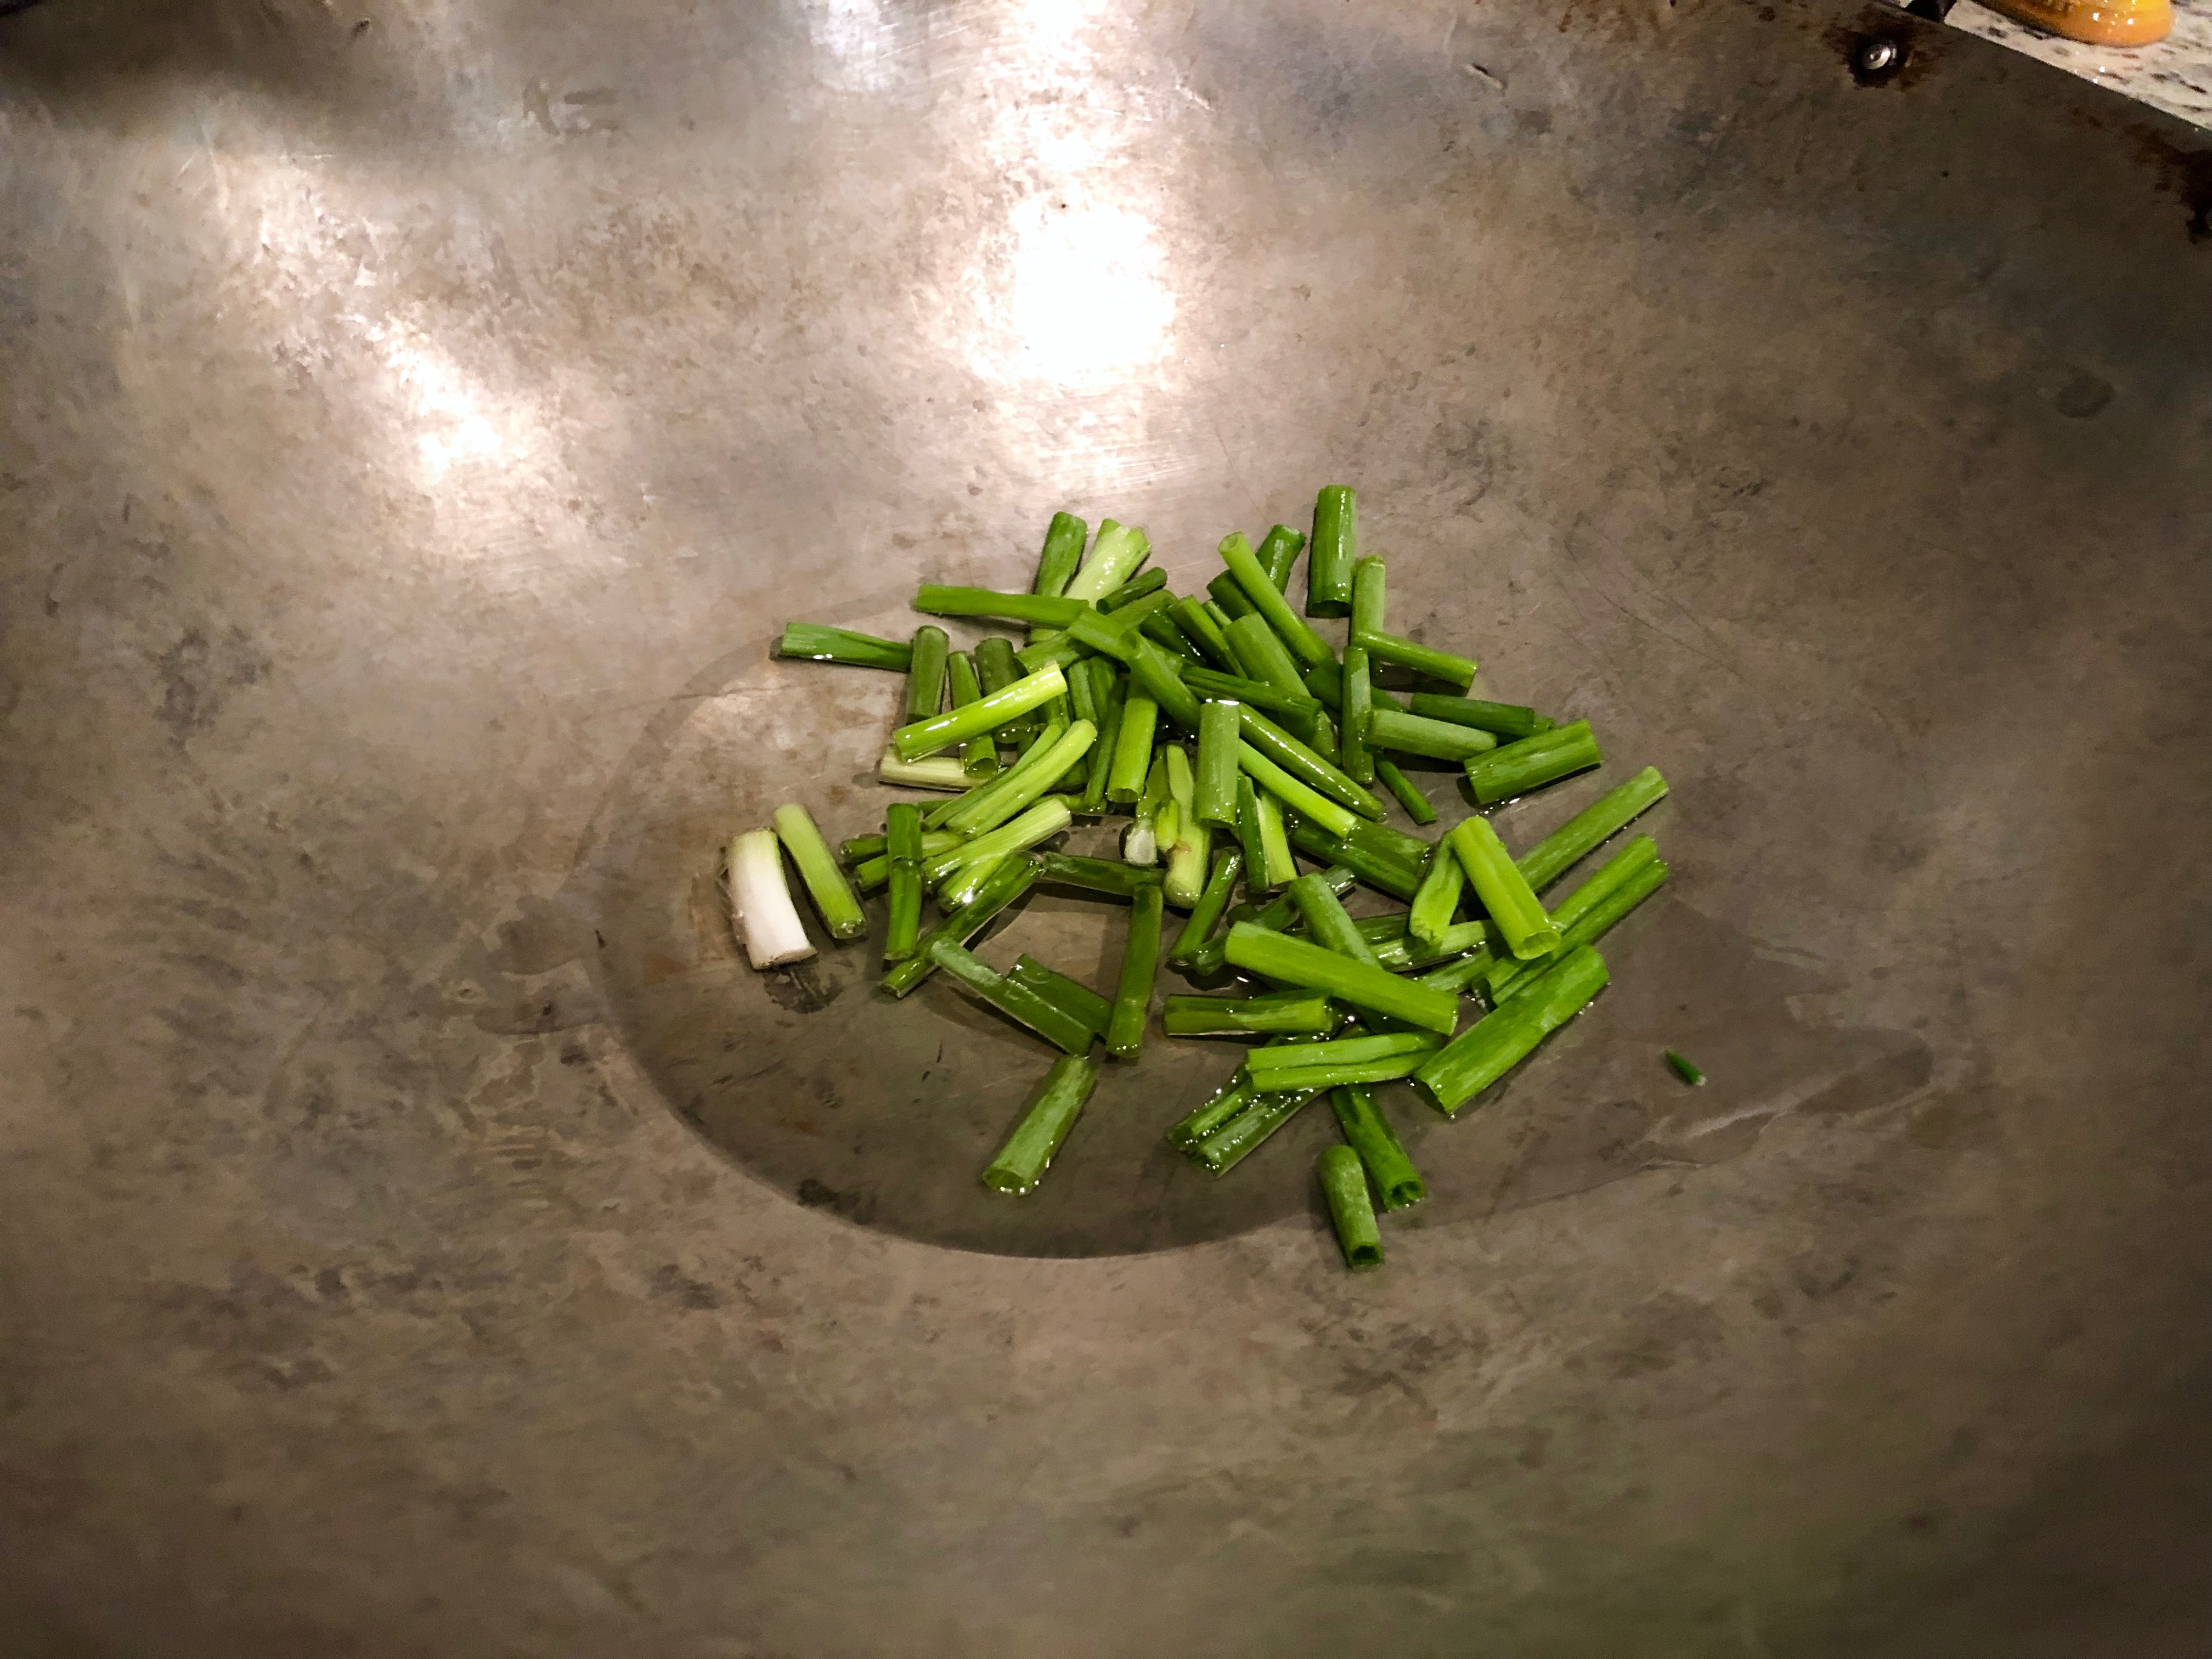
Wash everything (knife, cutting board, counter) so there’s no cross contamination. Then rinse and cut the broccoli. We want to keep just the florets in bite-size pieces. I usually cut the stalk off and then break the broccoli up. When you cut broccoli, sometimes the floret breaks apart, so this is my recommendation. You can remove or leave as much of the stalk as you want – me, I remove as much as I can. Place the broccoli in a separate bowl. Then wash and dice the green onions into 1 inch pieces and separate into 2 piles.
When the rice is done (or nearly so) get out your trusty wok. I guess you could try and make this in a frying pan, but it won’t cook the same and it may not taste the same. Also, it’ll probably take way longer to cook. But if you try it, let me know!
 Anyway, add half the vegetable oil to your wok and turn the heat on as high as it’ll go. Two things about this are important: 1) turn the heat up as high as it’ll go. Trust me. A proper stir fry, a proper wok, is cooked over very high heat. Because of the way a wok works, things’ll get mushy and take forever if you cook it low. And 2) use vegetable, canola, avocado, or some other high heat oil. DO NOT cook this with olive oil. The oil can’t handle those temperatures and it’ll burn, baby burn.


Add half the green onions to this oil and wait until the onions start to sizzle and pop. When they do, you know the oil is ready. Add all the meat and soy sauce together (it should be nicely marinated by now) and cook, stirring frequently/continuously, until the steak is brown on the outside, but still probably pink on the inside. Depending on how much liquid you added you may need to push the meat up out of the liquid onto the sides. We don’t want the meat to boil, we want it to fry. This’ll take between 2-4 minutes.
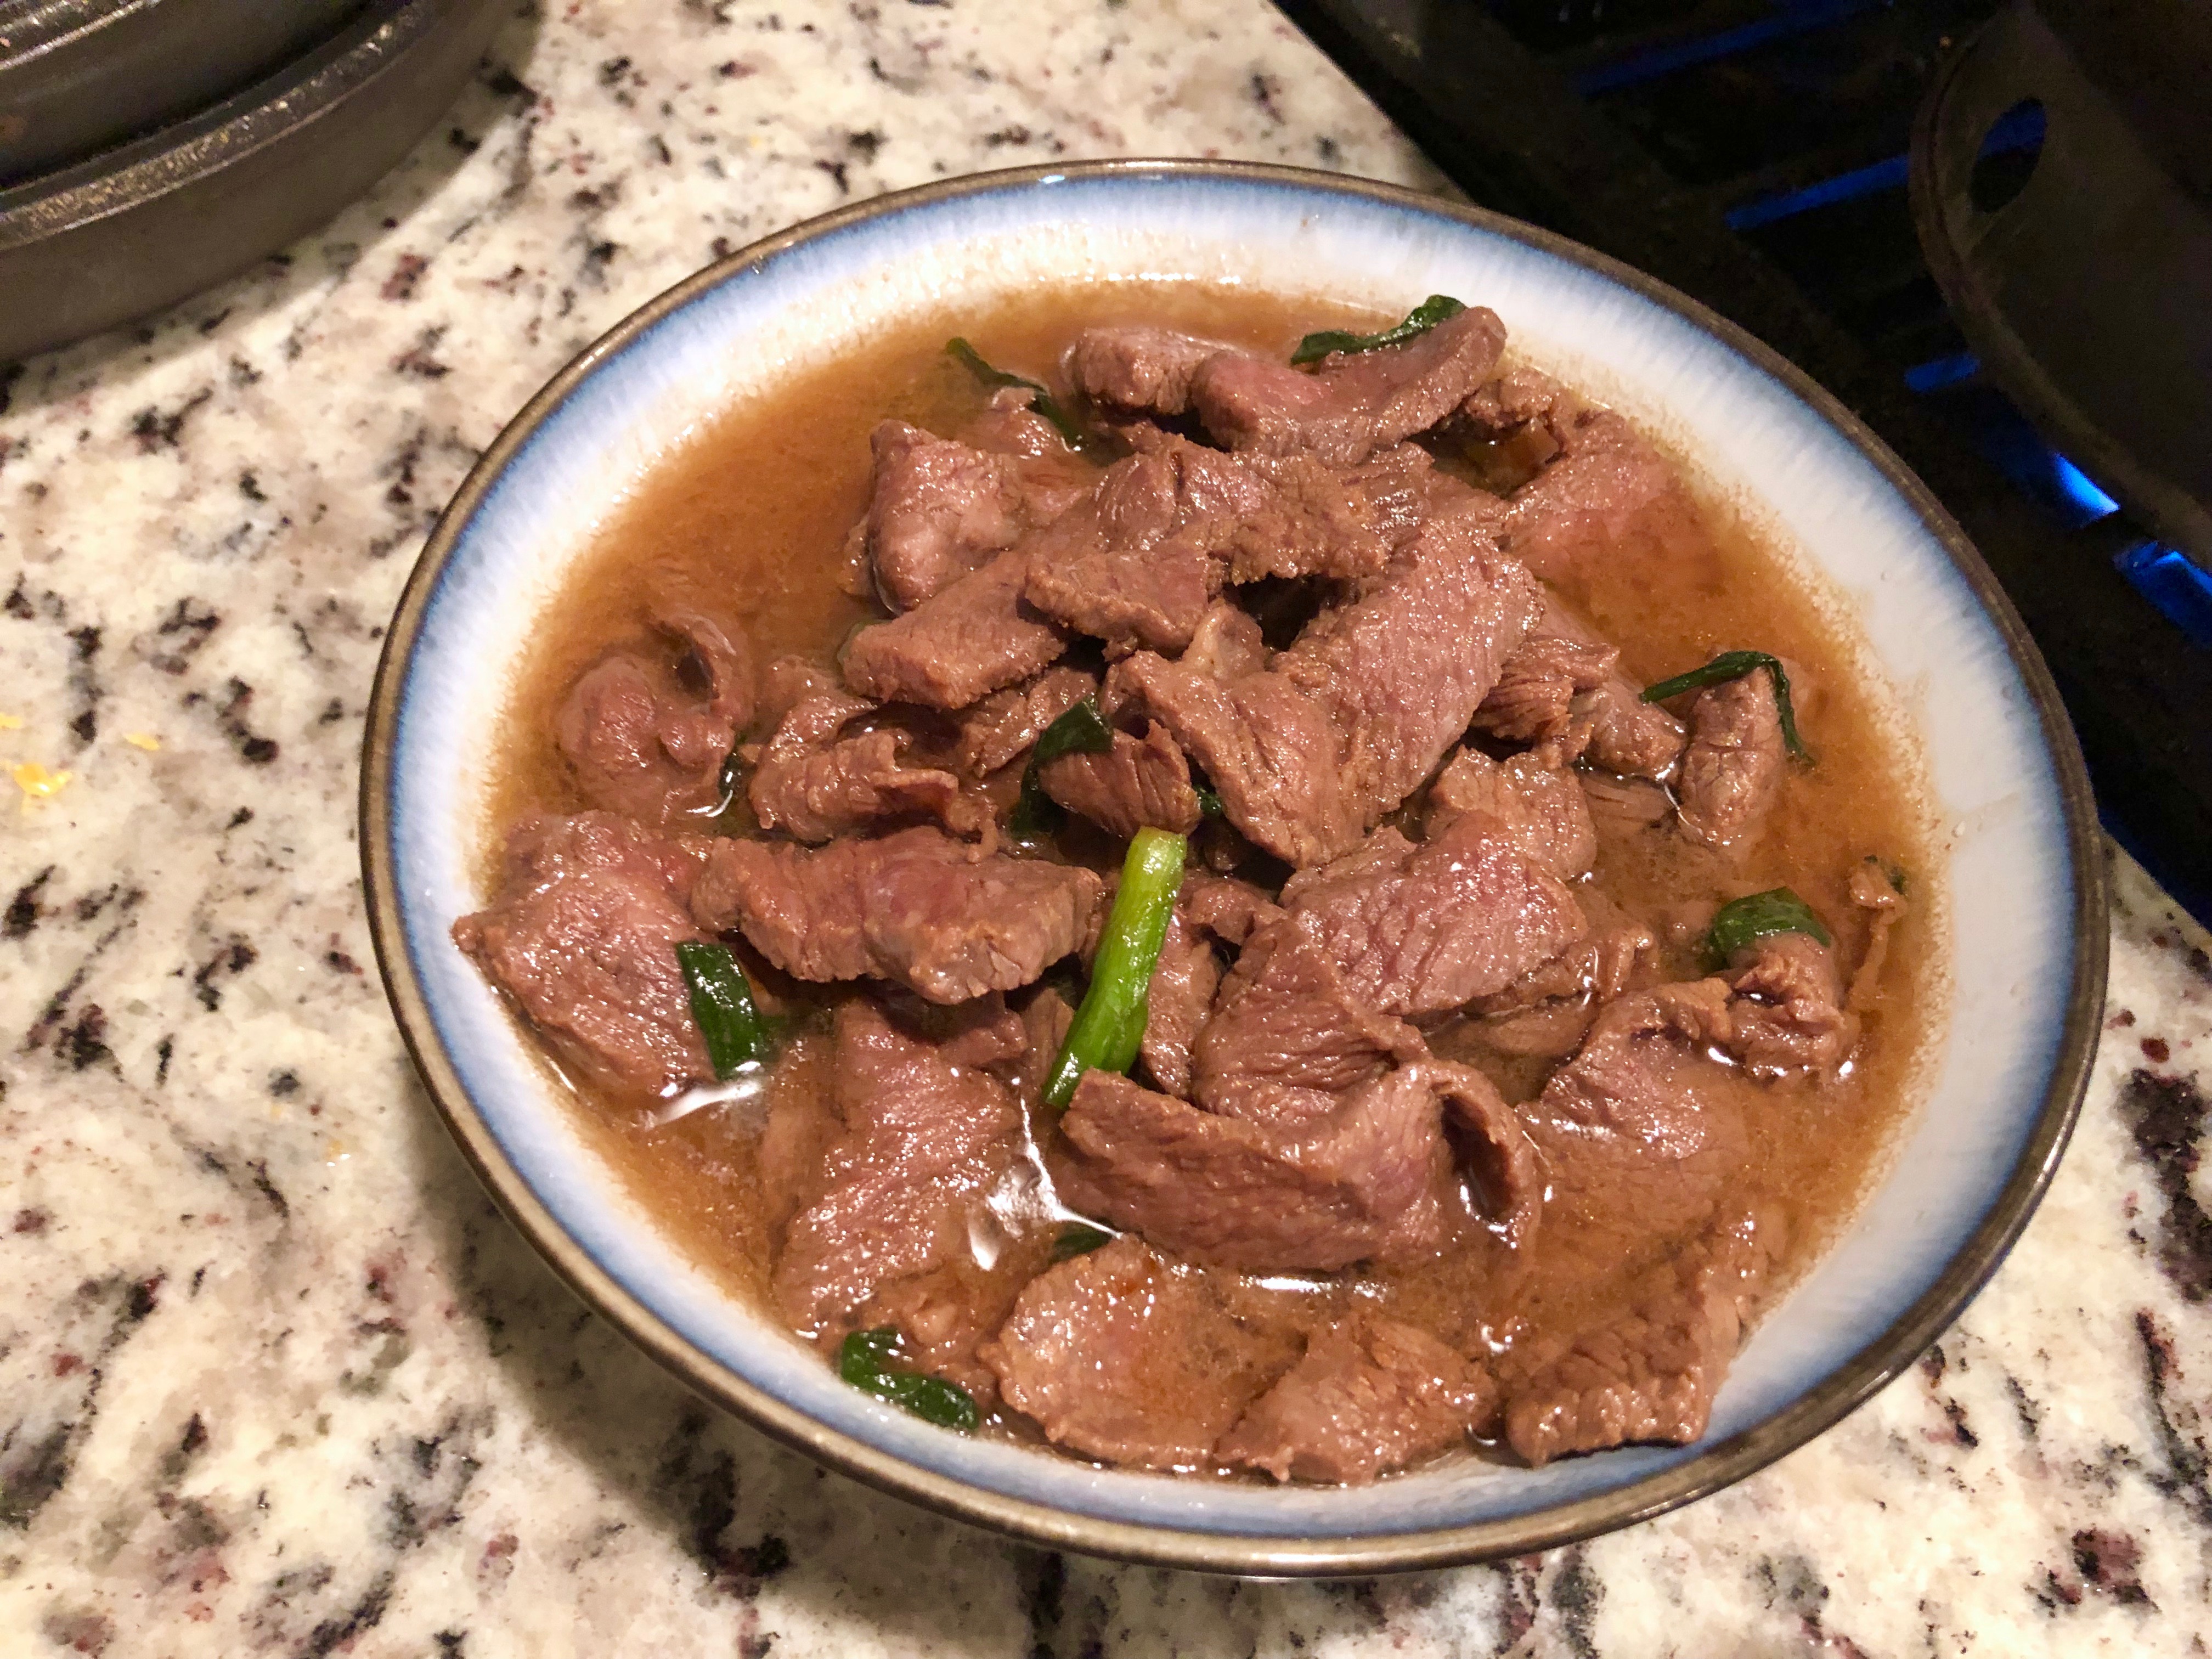
Remove the steak carefully, I don’t want any burns on my conscience, and put it into a new bowl – or the same bowl, but washed. Again, no cross contamination here! Add the remaining oil and green onions and wait for the sizzle and pop.


When you hear it, add the broccoli and stir until it’s completely shiny, about 1 minute. At this point, make a well in the middle of the broccoli so the wok shows through and add all the cold water at once. Quickly cover and allow the broccoli to steam for several minutes, or until tender. Check after 3 and see how it’s doing – add more water if necessary, but be quick, we don’t want the steam escaping!

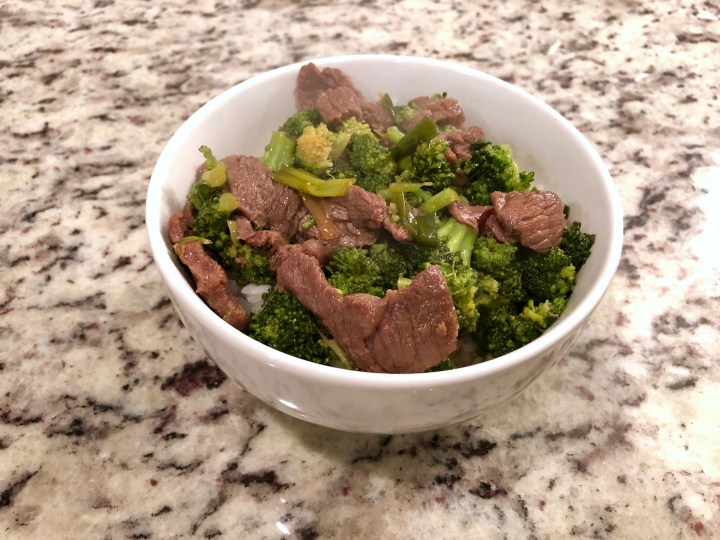
When the broccoli is ready add the steak and sauce back to the wok and stir until everything is well-mixed. Allow to cook for 2-3 minutes so the broccoli can soak up all that delicious soy sauce. Serve over rice and enjoy!

Mom's Beef and Broccoli

Delicious beef with broccoli in a soy sauce marinade
Ingredients
- 1 pound london broil or sirloin steak – 1-1.5 cups soy sauce – 4-5 large broccoli crowns – 1 bunch green onions – 1 cup very cold water – 4 tablespoons vegetable or canola oil – 3 cups calrose or other sticky rice – enough water to cover the rice to your first knuckle
Directions
- Rinse the rice and add water so that it comes to your first knuckle when your finger rests on top of the rice. Add the lid and turn on the rice cooker. 2. Slice the steak into long, thin strips, preferably about 1-2 inches long and 1/8-1/4 inch thick. 3. Place all the meat in a bowl and add enough soy sauce to submerge, but not drown the meat. It’s a fine line. 4. Wash and cut the broccoli into bite-size florets. Place the broccoli in a bowl. 5. Wash and dice the green onions into 1 inch pieces and separate into 2 piles. 6. When the rice is done (or nearly so) add half the vegetable oil and half the green onions to your wok and turn the heat on as high. 7. When the onions start to sizzle and pop add all the meat and soy sauce together and cook, stirring frequently/continuously, until the steak is brown on the outside, but still pink on the inside. You may need to push the meat up out of the liquid onto the sides. This will take between 2-4 minutes. 8. Remove the steak carefully and put it into a new bowl – or the same bowl, but washed. 9. Add the remaining oil and green onions and wait for the sizzle and pop. 10. Add the broccoli and stir until it’s completely shiny, about 1 minute. 11. Make a well in the middle of the broccoli so the wok shows through and add all the cold water at once. Quickly cover and allow the broccoli to steam for several minutes, or until tender, about 5-8 minutes. You may need to add more water halfway through. 12. When the broccoli is ready add the steak and sauce back to the wok and stir until everything is well-mixed. Allow to cook for 2-3 minutes so the flavors can meld together.
Serve over rice and enjoy!


 First, we make the rice. Now, my wok is huge. My mom had one of her friends in Taiwan purchase a traditional wok for me for my birthday a few years ago and it can hold massive amounts of food. I’m guessing you weren’t that lucky. So I’ve toned down this recipe to fit a wok (or frying pan… sigh…) half the size of mine. That should (fingers crossed) work out alright. So let’s make rice, using the same directions I always post, but list in detail in the


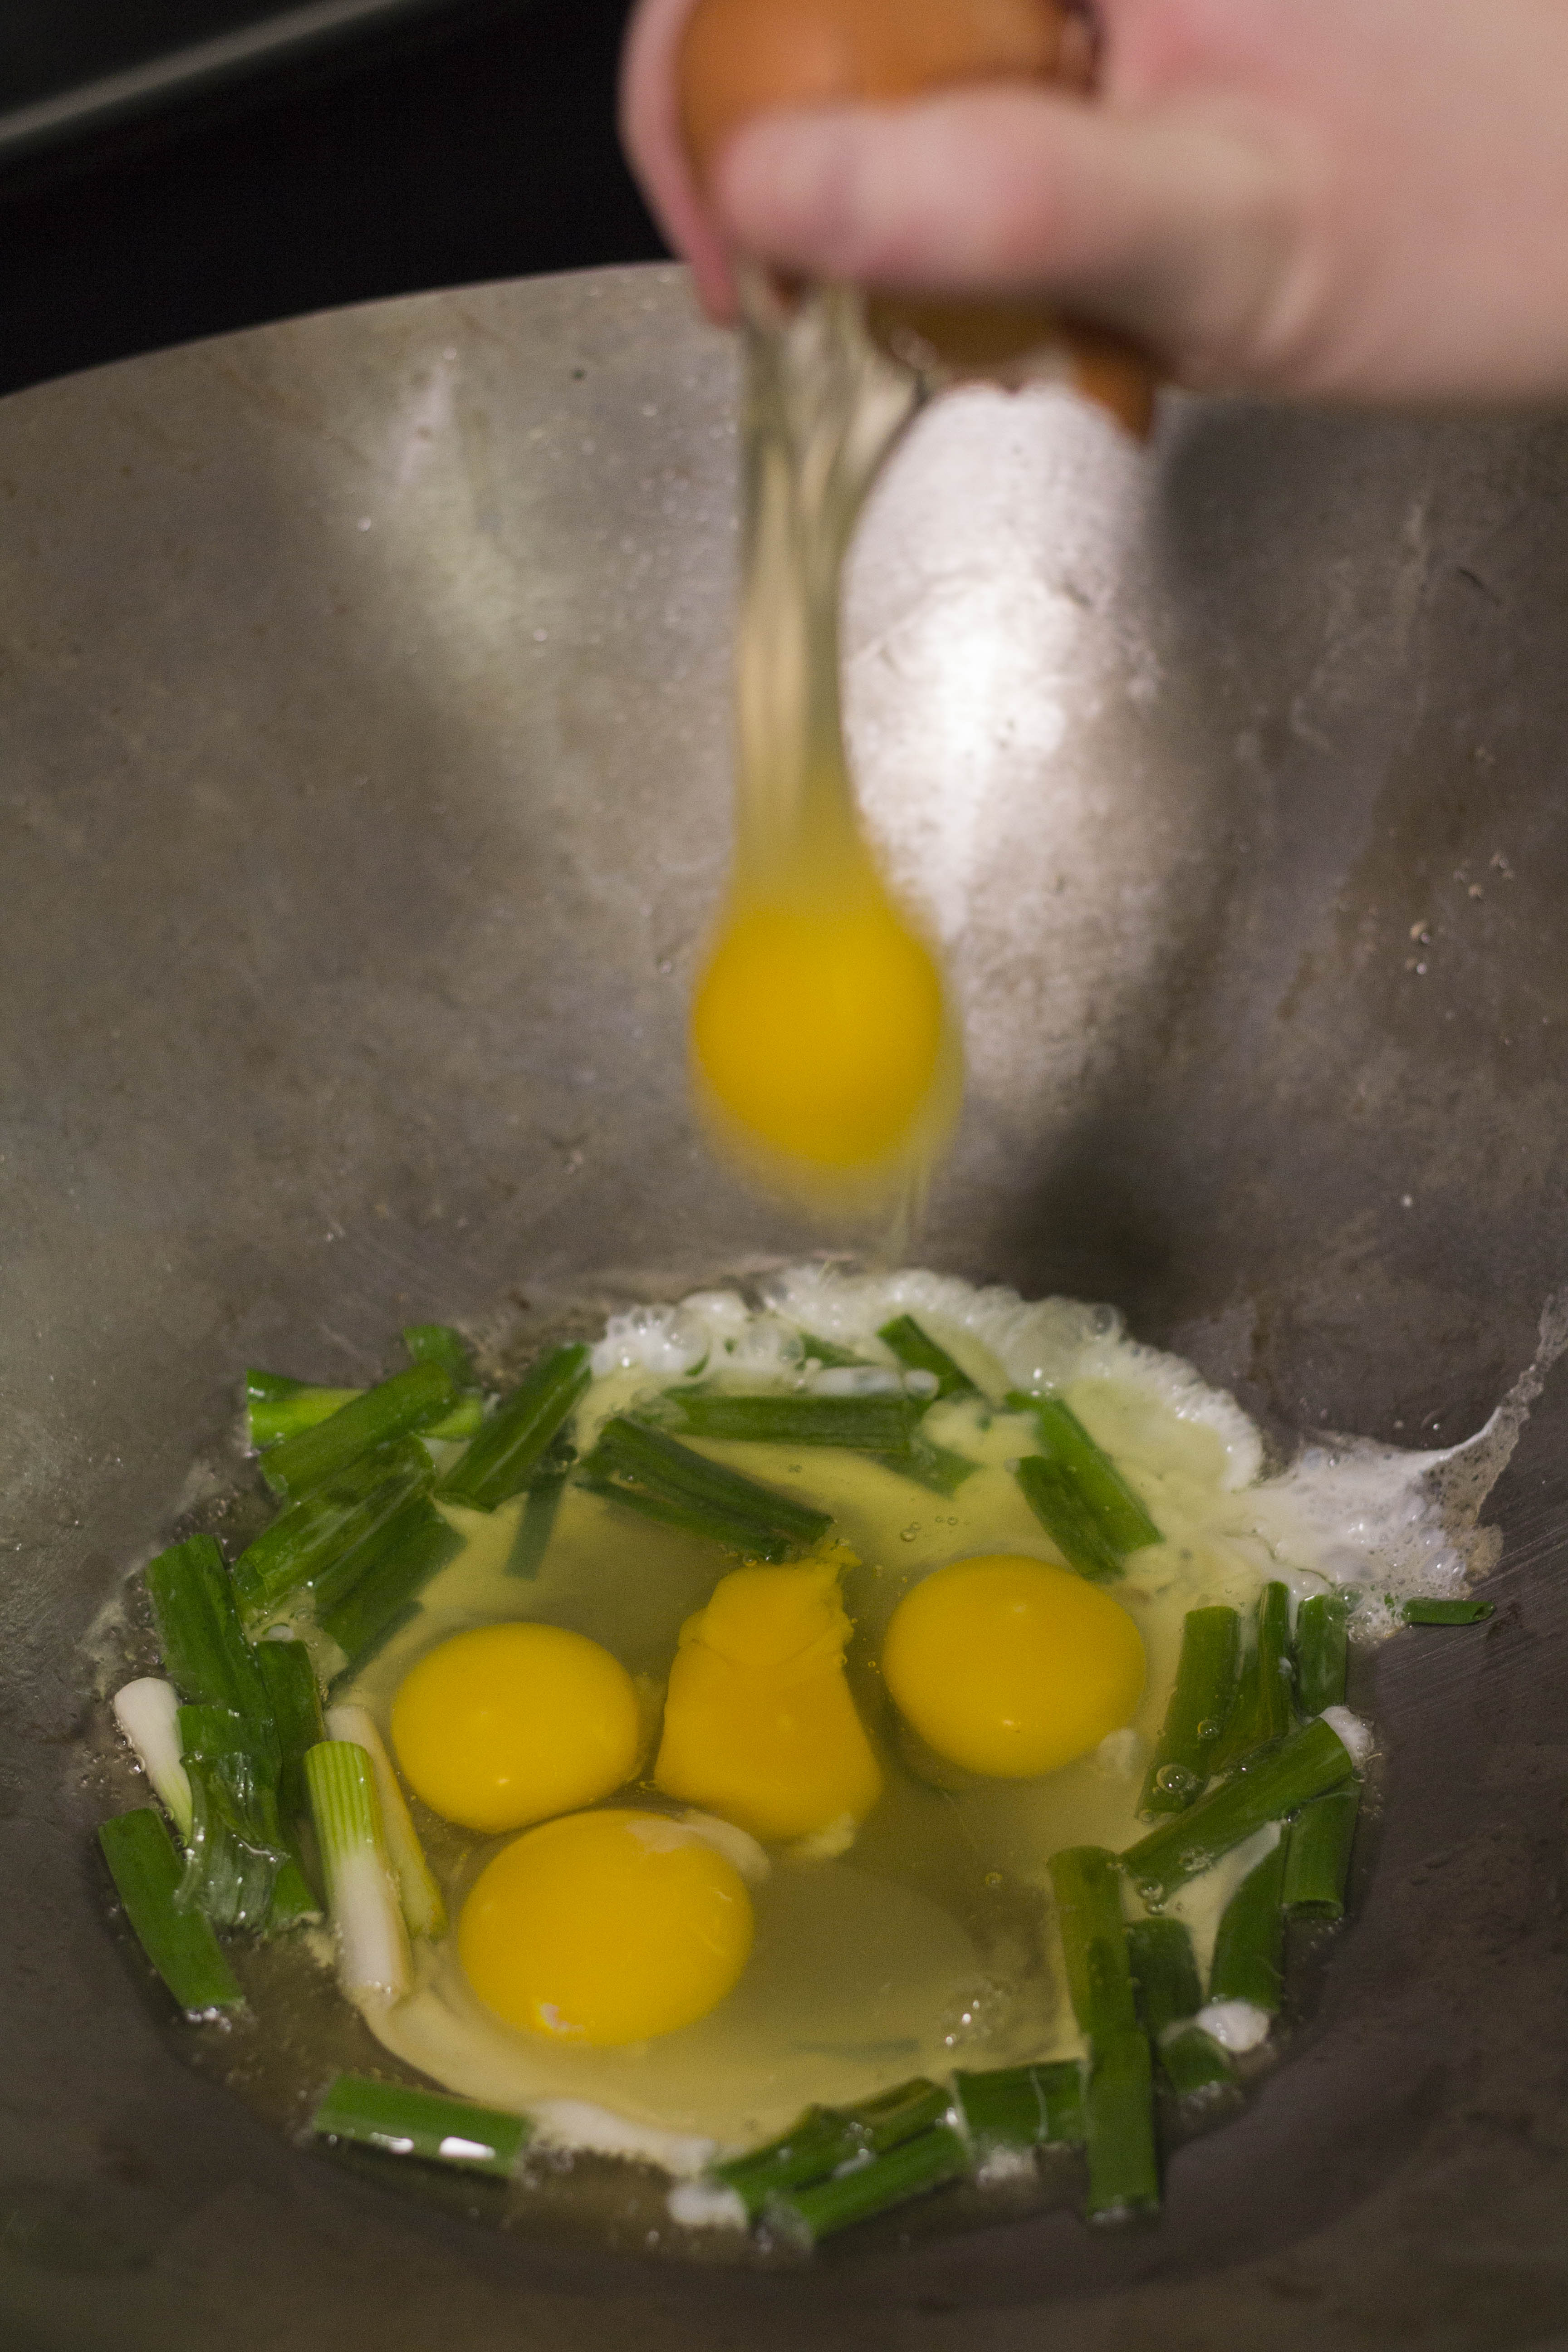 As soon as the rice is cooked heat your wok (or frying pan) on high, as hot as your stove will go. Add about 1-2 tablespoons oil and half the green onions. Now, it’s important you use the right kind of oil. You need a vegetable oil, an avocado oil, canola oil, something like that. Olive oil has a lower smoke point so it can’t handle the high heat we’re going for. When the green onions start popping add all the eggs and scramble until cooked. Don’t overcook them, we still want them soft and slightly squishy. Take them out of the pan/wok and set them aside.