Guys- I’m sorry about the whole “no post thing” yesterday. I’m currently preparing for a vacation on top of several fires at work and I completely forgot it was Tuesday…
Link sure has some serious pastry and cooking skills. This recipe, while not exactly difficult, was a bit strange. I don’t know about you guys, but I’ve never had fish pot pie before. I’ve never had fish anything pie before. And while I learned that a lot of people make seafood pie, hardly anyone uses fish – it’s typically crab, shrimp, or a combination of both. And if they do make fish pie, it’s made with a puff pastry crust, which isn’t quite as malleable and shape-able as shortcrust. But, from past general experience and a whole lotta luck, I bring you fish pie.
Fish Pie
This recipe gets a involved kinda fast. It feels like it starts off easy and then all of a sudden food is ready to be turned, you weren’t paying attention to correct cooking order and you’re dirtying extra pans just to make it all work, your crust starts to get too warm and difficult to roll out, and children start crying. At least, mine did! But you got this – because we are going to do this together.

First, in order to make things easier in the future, put a large cookie sheet in the fridge. Having something cold to put your crust shapes on while you roll everything else out will make sure they stay nice and flaky! Then we start with the filling.
 Dice carrots and onion and get those peas thawed. You can do this by either microwaving for a minute or simply running them under water. The peas don’t need to be cooked, or even warm, since they will go through a few more heat steps before you eat them! Heat your pan on medium and then add your oil. Add your onions and saute (a fancy word for cooking in a minimal amount of fat over relatively high heat) until slightly tender and they turn translucent. Add your carrots and cook for a few minutes or until the carrots are tender. Add the peas next and cook until warm and mixed thoroughly. Remove your veggies from the pan to a plate or bowl and put your pan back on the heat.
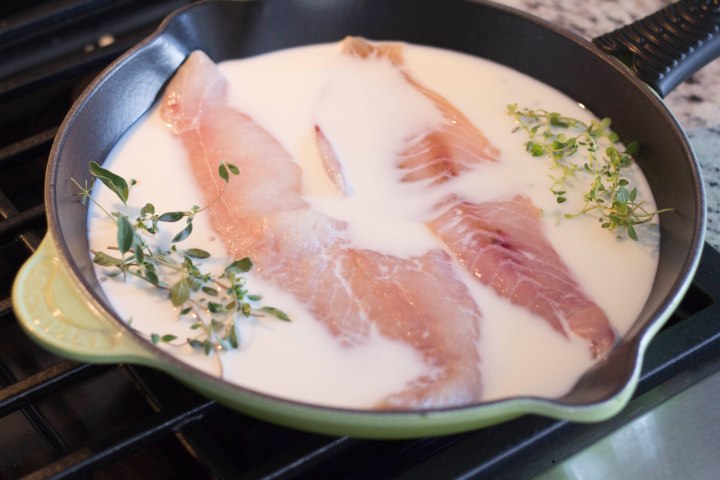
Make sure your fish is thawed properly if it was frozen and, for the first time ever, we don’t need to warm it up to room temp or even pat it down! Add all your milk, your fish, and half the thyme, oregano, and dill to the same pan you cooked your vegetables in. Keep the heat on medium and allow to come to a boil. Once it’s boiling drop the heat a bit so it simmers. Simmer your fish for 2-3 more minutes on this side and then flip them and simmer for an additional 3 minutes. You don’t want to overcook it or the fish will get rubbery and gross in the pie. Remove the fish to a plate, and, if you did it right, it’ll be flaky and beautiful and still a bit glistening on the inside. Break the fish up on the plate into bite size pieces.
Now we start the roux. Roux can be seriously hard, especially if you’ve never done it before. I became really good at it when I was determined to make homemade mac and cheese. It took me a long time to get it right and I had to throw out a lot of batches before I really nailed it down. Here are my tips for a perfect roux:
Melt your butter in a heavy-bottomed saucepan over medium heat. You could probably use a regular saucepan, but I always use my enamel dutch oven since it keeps the heat nice and even. Wait until the butter is completely melted and bubbly. Once it is, whisk in half the flour. This is important! If you try and do it all at once it probably won’t melt back down. Once all the flour is incorporated and the mixture starts to melt and become a bit liquidy again add the remaining flour. Whisk is continually until it starts to melt again. At this point start timing – you’ll want to whisk continually for at least 2 minutes or until you reach the blond stage of a roux (a little darker than when you added it. you want all the flour taste to be gone!). Once the butter/flour mixture is melty and blond start slowly adding the milk that you left in the pan. Add about half the milk – the flour/butter may ball up on itself but just keep whisking. Just keep whisking, just keep whisking, just keep whisking, whisking, whisking… It’ll sort itself out! Whisk until the mixture is homogeneous and slightly thick. Add the remaining milk and repeat. If the mixture is too thick you may have added too much flour. Add regular milk until it reaches a nice, gravy-like consistency.
If you are unlucky and screw up your roux this is how you’ll know:
- The flour and butter never reach that nice, melty stage after any flour addition
- The flour/butter balls up when you add the milk and never mixes properly.
Don’t worry! If one of these things happen just throw it out and start again. Especially the first one – you can sometimes come back with even more vigorous whisking from the second but it’s very difficult to fix the first.

Once you have nice sauce add veggies, the remaining spices, and the fish. Stir until combined, adjust spices for taste, and remove from the heat. This we will set aside until the crust is ready!
Phew – all done with step one. Now on to step two… which is just as long and just as rough.
Start by adding ice cubes to a cup or two of water. You want the water to be as cold as possible! Add all the flour and salt for the shortcrust (which, for those of you who are normal people, is pie crust) to a large bowl and whisk to mix. Use butter flavored shortening (for a better flavor) and cut it into large chunks. Mix in the shortening, using your hands, by rubbing the shortening into the flour until it’s combined into a nice, crumbly texture with some pea-sized clumps.
From this point forward you’ll want to handle your crust as little as possible. The more you fiddle with it the tougher and denser the crust will be. And we want a light, flaky crust because that’s the delicious way! Slowly add the water 2 tablespoons at a time and combine it with the flour mixture. I mix by hand because I have a better grasp on how the dough is actually doing. Only add water until the mixture is just combined with some flour mixture not perfectly mixed in. Too much water and you’ll be left with a tough, dense crust. Take your cookie sheet out of the fridge and lightly flour a surface. Take about 1/4 of the dough, mash it into a ball, and roll it out. You’ll want it to be nice and thin, at least 1/8-1/4 inch, or it won’t cook evenly and your distribution of crust to filling will be weird.
 At this point I took a knife and, using a template I made before I started, cut out the base of the fish. If your rolled out piece isn’t big enough just tack on more from the bowl and roll it out with the piece you’re working with to make it bigger. Place this on the cookie sheet, gather up the scraps and lay them to the side, and repeat for another 1/4 of the dough. Repeat two more times until you have 4 base pieces, which will be enough for two pies. Take all the scraps, mash them into a ball, and roll them out together. From this there should be enough, if you angle properly, to cut out all your designs perfectly. Lay them to the side (or leave them where they’re at).

Fill two of the fish shapes to within 1/2 inch of the edge – don’t fill them too high and don’t fill that gap or your pie won’t close properly and it’ll leak. Wet the edges with water (I use my finger because I’m super fancy), place the other fish shape on top, and press down along the edges. Crimp each edge with a fork to help seal the dough. Repeat for the second pie. Wet the back of each of the designs and place it down on the fish shape where you’d like it. Using a fork, poke a few holes in the top crust, ensuring it pokes all the way through to the center. This will help the steam escape and keep your pie from exploding! Beat and egg and brush the tops of each pie with it. Place in the oven and bake for 40 or so minutes until the crust is golden brown!

If you want my honest opinion this pie #1) tastes way better with tartar sauce smothered on top, and #2) is more work than it’s worth. Unless you want to make something extra special and pretty I’d just cover a pie dish with your shortcrust, add the filling, cover the top, seal, and bake that way! It’ll be much easier! But this way definitely turned into a show-stopper for looks!
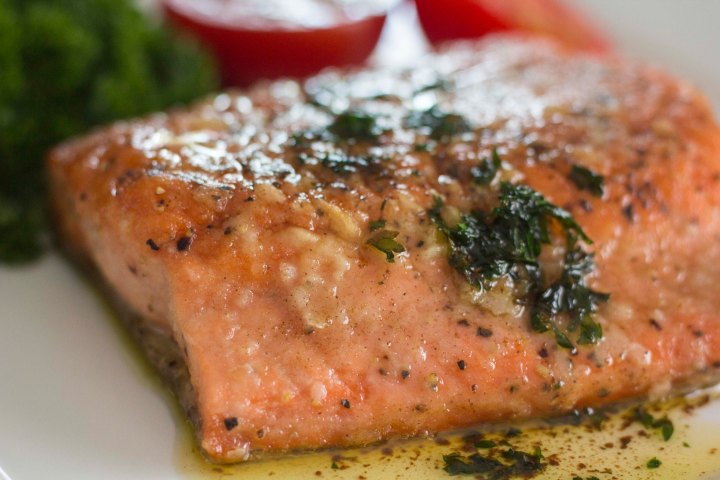
Link’s Salmon Meunière
-
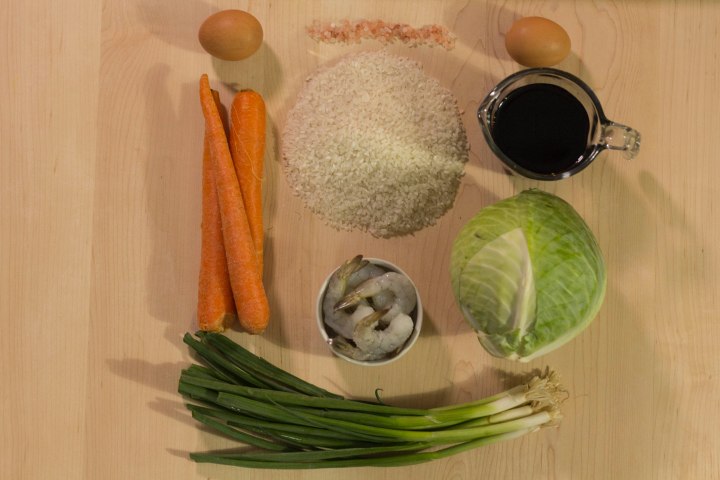
- Tabantha Wheat
- Goat Butter
- Rock Salt
- Any Seafood
Fish Pie
White fish pot pie with vegetables
Filling
- 3/4 lb white fish of any kind
- 2 cups milk
- 1-2 teaspoons pepper
- 1.5 tsp thyme
- 1 tsp oregano
- 1/2-1 tsp dill
- 2-3 tsp salt
- 1/2 cup carrots, diced
- 1/2 cup yellow onion, diced
- 1/2 cup peas, thawed
- 1 tablespoon unsalted butter
- 3 tablespoons flour
- 2 tablespoons oil
Shortcrust
- 3 cups flour
- 1 cup butter flavored shortening
- 4-9 tablespoons ice water
- 1/2 tsp salt
- 1 egg, beaten, for egg wash
Directions
- Put a large cookie sheet in the fridge or freezer.
- Dice the carrots and onion.
- Thaw the peas by microwaving for 1 minute or running them under water for 1 minute.
- Heat the pan on medium. Add the oil and onion and saute until slightly tender and translucent. Add the carrots and cook for 3-5 minutes or until tender. Add the peas and continue cooking until warm and mixed thoroughly.
Remove your veggies from the pan to a plate or bowl and put your pan back on the heat.- Add all your milk, your fish, and half the thyme and oregano to the same pan you cooked your vegetables in. Keep the heat on medium and allow to come to a boil. Once boiling, drop the heat to a simmer. Simmer your fish for 2-3 minutes on this side. Flip the fish and simmer for an additional 3 minutes.
- Remove the pan from the heat, leaving the milk in the pan, and place the fish on a plate and break it into small pieces.
- Melt butter in a heavy-bottomed saucepan over medium heat. When the butter is completely melted and bubbly whisk in half the flour. Once all the flour is incorporated and the mixture starts to melt and become a bit liquidy again add the remaining flour. Whisk continually until it starts to melt again. Continue whisking for about 2 minutes or until you reach the blond stage of a roux (a little darker than when you added it but not brown).
- Once the butter/flour mixture is melty and blond start slowly add half the milk from the pan. Whisk until the mixture is homogeneous and slightly thick.
The flour/butter may ball up on itself but just keep whisking. Add the remaining milk and repeat. If the mixture is too thick you may need to add an additional few tablespoons of milk. Whisk until the mixture reaches a nice, gravy-like consistency.- Add the veggies, remaining spices, and fish to the sauce and stir until combined. Adjust spices for taste and remove from the heat.
- Add several ice cubes to a cup of water and set aside.
- Add all the flour and salt for the shortcrust to a large bowl and whisk to mix.
- Cut the shortening into large cubes. Add it to the flour and, using your hands, mix them together by rubbing the shortening into the flour until it’s combined into a nice, crumbly texture with some pea-sized clumps.
- Make a small well in the center of the flour mixture and slowly add the water 2 tablespoons at a time. Using your hand mix the water and flour together until combined. Continue adding water until the mixture is just combined but not perfectly mixed in. Don’t add too much water and don’t overmix or the crust will be dense and chewy.
- Take your cookie sheet out of the fridge and lightly flour a surface. Take about 1/4 of the dough, mash it into a ball, and roll it out to 1/8-1/4 inch thin. Using a template (or freehanding it) cut the base of the fish out with a knife. If your rolled out piece isn’t big enough just tack on some more from the bowl and roll it out with the piece you’re working with to make it bigger.
Place this on the cookie sheet, gather up the scraps and lay them to the side.- Repeat step 14 3 more times to make 4 fish shapes.
- Take all the scraps, mash them into a ball, and roll them out together. From this there should be enough, if you angle properly, to cut out all your designs perfectly. Lay them to the side (or leave them where they’re at).
- Fill two of the fish shapes to within 1/2 inch of the edge – don’t fill them too high and don’t go in that 1/2 gap or your pie won’t close properly. Wet the edges of the pastry with water, place the other fish shape on top, and press down along the edges. Crimp each edge with a fork to help seal the dough.
- Repeat for the second pie.
- Wet the back of each of the designs and place it down on the fish shape where you’d like it. Using a fork, poke a few holes in the top crust, making sure it pokes all the way through to the center.
- Beat and egg and brush the tops of each pie with it.
- Bake for 40 minutes at 425°F. Allow to cool for several minutes before serving.


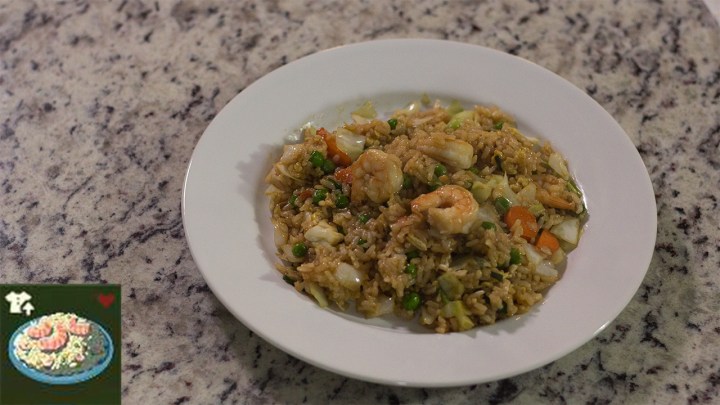

 First, we make the rice. Now, my wok is huge. My mom had one of her friends in Taiwan purchase a traditional wok for me for my birthday a few years ago and it can hold massive amounts of food. I’m guessing you weren’t that lucky. So I’ve toned down this recipe to fit a wok (or frying pan… sigh…) half the size of mine. That should (fingers crossed) work out alright. So let’s make rice, using the same directions I always post, but list in detail in the


 As soon as the rice is cooked heat your wok (or frying pan) on high, as hot as your stove will go. Add about 1-2 tablespoons oil and half the green onions. Now, it’s important you use the right kind of oil. You need a vegetable oil, an avocado oil, canola oil, something like that. Olive oil has a lower smoke point so it can’t handle the high heat we’re going for. When the green onions start popping add all the eggs and scramble until cooked. Don’t overcook them, we still want them soft and slightly squishy. Take them out of the pan/wok and set them aside.


 If you do get unlucky enough to have to debone the fish yourself it’s really easy. Just annoying. Wash a pair of pliers with hot water and soap. Carefully push the flesh of the salmon in and grasp the tip of the pin bone. Pull it as carefully as you can to prevent the flesh from ripping. It’s not bad if it does, it just isn’t as pretty anymore. Make sure you get all the bones – you’ll be able to feel them if you gently run your hand down the length of the fish. If you are doubly unlucky and they didn’t remove all the scales just flip the salmon over to skin side up. Run the blade of the knife down the fish and watch all the clear, inedible scales pop off. But you can always skip both these steps by choosing a better store! Which I will do for all my fish from now on.


 When you’re ready to cook pat the salmon dry and season with kosher salt and pepper. Turn your burner on to medium, add your oil, and get your pan nice and hot. When the pan is hot add the butter. Be really careful, the butter will splatter and pop as the water cooks out of it! We add the salmon when the butter stops popping so when the mixture starts to calm down spread the flour out on a plate and dip and pat the salmon into the flour to completely coat it. This is called dredging and it’s a pretty awesome technique to get a nice, crispy, almost fried skin. Make sure you don’t dredge too early or the flour just gets soaked into the fish and it doesn’t fry quite as well.


 Add the new butter and smashed garlic and wait for it to melt and cook down. It will take 2-3 minutes to turn brown and nutty and delicious. Remove the pan from the heat (don’t follow my photo example and just turn off the heat. It’s not good enough!). Add the lemon and parsley and stir to combine. Again, use caution, this mixture may splatter as well. Uncover the fish, pour the sauce over, and serve immediately. PS- if your pan is still really hot your parsley may brown pretty quickly and it’ll make your sauce look a bit burned. I promise, if you use this recipe it won’t burn and will still taste good!