
This is it. My first “Thankful” post. I really wanted a way to highlight the people/recipe’s in my life that have made me who I am, made me a better chef/baker, blogger, or even gamer. I want to take a minute and tell people how grateful I am for those people or those experiences. And these posts are my way of doing that. And it only seems fitting that I start with the woman who taught me how to bake.
Growing up with my parents meant I learned how to cook but I didn’t learn to bake. My mom used box mixes (which isn’t a bad thing!) and we affectionately called her rolls “lead balls”. So when I met my husband and his mom made rolls from scratch I was blown away and promptly begged her to teach me how. I can trace my absolute love of baking bread, this obsession that I’ve cultivated and one of my favorite hobbies, to that moment in my life. My mother-in-law, Becky, is a wonderful person. She’s always so focused on helping people learn and supporting her children through thick and thin. Her patience with me has been astronomical and I am so glad and grateful to be a part of her family. So, for the passion she inspired in me and the person she is, this post is dedicated to her.
Becky’s Rolls
Let’s chat for a second about types of dough. Now, raise of hands, how many of you have heard of enriched bread vs. non-enriched bread? Every buy bread from the store and it says “enriched” on it? This simply means there’s some kind of fat source (like butter or oil) and usually other ingredients (i.e. eggs, milk, etc…). If it’s not enriched it means there are 4 ingredients; flour, water, salt, and yeast. So what kind are Becky’s rolls? They are enriched, using milk and butter to add a light, delicate, and delicious flavor.
Now, when people think about bread they get a little flustered. Why? It’s the flour, water, and yeast. The three essential ingredients in bread. But I promise, there’s nothing to be afraid of!
First, let’s chat about water. Contrary to popular belief, water temperature, while affecting time to rise, won’t make or break your bread (unless it’s boiling hot). Cooler water will increase your rise time, taking longer than you expect. Warmer water will decrease your rise time. For enriched breads, where most of the flavor comes from the extra bits, a shorter rise time is fine. For unenriched bread a longer rise time is preferred to develop flavor in the dough.
Second is yeast. Yeast is a microorganism, a tiny little thing that grows when there’s a food source. And it’ll grow and grow and keep on growing. Add yeast to water at any temperature (again, as long as it’s not burning hot) and it’ll eventually come around. Because it’s a living thing you just have to be patient and let it do it’s thing. It’s not on a perfect schedule. Be patient and it’ll eventually (or sooner) do exactly what you need it to do.
And then the flour. The trickiest part of making bread is not adding too much flour. If you add too much flour it soaks up all the water. Then, when it comes time to bake, the water is already soaked up, leaving very little to evaporate, which makes your bread very dry. The trick is to get the bread at that perfect stage of tacky, so it slightly sticks to your hands, the counter, etc. but not sticky enough to stay on your hands, the counter, etc. Does that make sense? If it sticks and pieces remain on your hands, it’s too wet. If it doesn’t even cling it’s too dry. Find the balance.


The recipe itself is pretty straight forward. Add melted butter and powdered milk to the water. Now, for this instance, if you can manage it, get your water to be “bath” hot. Like, normal person bath hot, not scalded skin bath hot. Since this is an enriched dough we don’t need a long first proof (called fermentation). Whisk this together and then add the yeast, salt, and sugar. Whisk a bit to get it all combined and then let it rest for about 5 minutes. This rest step will get the yeast rising and active, making the fermentation step even shorter. See, it’s not so bad!

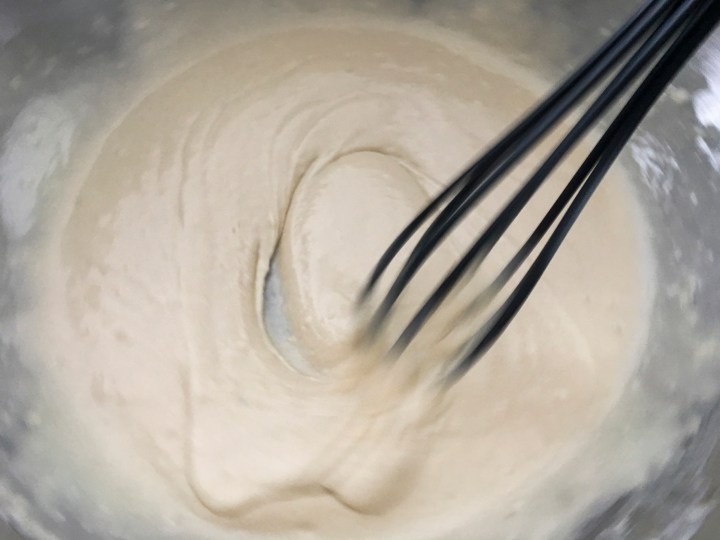
Once your yeast mixture is bubbly and happy add about 1.5 cups of flour and whisk until it’s smooth. After it’s completely smooth whisk for about 2 minutes.
Add flour, one cup at a time, until you get a kneadable dough. It should take between 1-2 cups. Then add more flour slowly as you need if and only if you need it. Remember, dough should be tacky but not sticky. If it slightly sticks to your hands, it’s perfect.


Knead the dough for 2 minutes or until it passes the “windowpane test”. To knead, simply press the heal of your hand into the bulk of the dough, fold the dough in half, turn it a quarter turn, and do it again. Repeat, using one or both hands, until it feels nice and firm. If you know what the windowpane test it, then you can check your bread this way. Otherwise, we are just going to skip it until I make the Wheat Bread for a BotW recipe.


Put a small bit of oil in the bottom of a bowl and rotate the dough in the oil to coat all sides. Keep the dough in the bowl and cover with a towel or cloth to ferment until double. Now, this time will be different based on elevation of where you live, humidity, and room temperature. In Utah, where I live, this step only takes 40 minutes. In coastal California, it could take and hour. The important thing is to watch the dough and only move on when it’s doubled. If you do anything before it’s doubled the rolls will be dry and difficult to swallow.


Once it’s doubled cut the dough in half. Gently fold over the dough to make a circle, then roll it out into a circle. Cut the dough (I use a pizza cutter because it’s easy!) into 8 triangles. Then just roll up the trianges into crescent shapes and place it on a greased baking sheet. Lather, rinse, repeat for the remaining dough. You should have 16 beautiful rolls!


Cover these with a kitchen towel and allow to proof until double, again. While they are proofing, preheat the oven to 425F. Once the rolls are ready just pop them in the oven for about 8-10 minutes, or until golden brown.

Enjoy warm with large amounts of salted butter or however you like! It’s rolls… you can’t really go wrong.
Becky's Rolls
Soft, white dinner rolls
Ingredients
- 1/4 cup sugar
- 1 teaspoon salt
- 1.5 tablespoons dry active yeast
- 1/4 cup melted butter
- 1.5 cups hot (bath temperature) water
- 1/8 cup plus 1.5 tablespoons powdered milk
- 2.5-4 cups all-purpose flour
Directions
- Stir together the Add melted butter, powdered milk, and water. Whisk in yeast, salt, and sugar.
- Allow mixture to rest for 5 minutes. It should be bubbly at the end of the rest period.
- Add about 1.5 cups of flour and whisk until it’s smooth. After it’s completely smooth whisk for about 2 minutes.
- Add flour, one cup at a time, until you get a kneadable dough. It should take between 1-2 cups. Then add more flour slowly if needed. The dough should be tacky but not sticky.
- Knead the dough for 2 minutes or until it passes the windowpane test. To knead, simply press the heal of your hand into the bulk of the dough, fold the dough in half, turn it a quarter turn, and do it again. Repeat, using one or both hands, until it feels nice and firm.
- Put a small bit of oil in the bottom of a bowl and rotate the dough in the oil to coat all sides. Keep the dough in the bowl and cover with a towel or cloth to ferment until double.
- Once it’s doubled cut the dough in half. Gently fold over the dough to make a circle, then roll it out into a circle. Cut the dough into 8 triangles. Roll up the trianges into crescent shapes and place it on a greased baking sheet. Repeat until you have 16 rolls.
- Cover the rolls with a kitchen towel and allow to proof until double.
- While rolls are proofing, preheat the oven to 425F. Once the rolls are ready pop them in the oven for about 8-10 minutes, or until golden brown.

These look amazing.
LikeLike
Such a lovely introduction to this post – and another fan recipe. 🙂
LikeLiked by 2 people
Thanks! I’m glad I get to share them. These really are the reason I became passionate about baking!
LikeLiked by 1 person