To Thine Own Self Be True

To Thine Own Self Be True

It may be hackneyed, I know, and quite honestly, this particular phrase can be digested into a thousand meanings, both for your good and to promote selfishness…  But in spite of those facts, and possibly because Hamlet is my second-favorite Shakespeare play (any guesses which is first?), I still think this quote embodies what I want to talk about today.

To thine own self be true.  Be true to who you are, who you want to be, and what you intend for your life.  This has been the theme of my therapy sessions for the last, oh I don’t know, forever.  And guys, this is the big one, the massive post I hinted about around Thanksgiving.  The post where I finally talk about gaming, shame culture, letting go of judgement, and accepting myself.  So who wants to dive into the deepest recesses of my depression?  ooh, ooh, me!  Cool.  Let’s get going.

Once upon a time, as a child, I didn’t have a lot of friends.  It was pretty hard to be a girl who loved gaming, sports, fantasy, science, and reading and either no one could relate to me or everyone pretended they couldn’t.  Even if I finally found a new friend I’d usually wind up losing them after only a few months when they realized I was way nerdier than they were willing to put up with.  It was lonely.  It was hard.  It lasted until my senior year of high school.  And it helped me develop a desperate need to feel wanted and accepted by those around me and an absolute fear of abandonment.

Cut to years later and I still had that overwhelming need to be liked, wanted, and praised.  Because if people were praising me, liking me, wanting to be like me, and telling me that the things I did were great, then maybe that person would stick around.  And while this is not healthy behavior I was always able to keep it under control because deep down, I knew I was an achiever.  And the constant series of accomplishing tasks and goals in my job, hobbies, and personal life helped fill the gaps left by my loneliness.

But then the baby came.  All of a sudden I was 20 pounds heavier than I’d ever been in my life (and, frankly, as a very tall girl with a medium build I’d never been good on the whole “body image” front), a mother with massive new emotional and financial responsibilities, unable to find time to do the dishes or grocery shop, and without the energy to really excel at any and all projects, professionally or personally.

And at the very moment that I started to lose myself it seemed like everyone else found themselves.  It was the time when my in-laws all decided who they were going to be, where their lives were going, and somehow still had the energy to accomplish everything they wanted.  It was when my sister solidified that her calling in life is to teach others and help them learn as she raised and babysat both her little girl and my son, still finding the time to seemingly have it all together.  It was the time all my friends seemed to “grow up”.  Everyone’s Instagram feeds were full of the “socially acceptable” adventures and hobbies they’d discovered.  It was at this point that my anxiety and depression were uncontrollable by myself alone.  So I found help by seeking out a trained professional and, after digging up so much of the past and pushing so much toward the future, I think I can finally say that I know who I want to be.

While it isn’t the biggest issue I’ve faced, accepting my hobbies and my love for them have been one of the major obstacles I’ve needed to overcome.  You’ve seen the media, you’ve all been watching the news, and the idea that “gaming is bad” is a constant issue we, as gamers, have to face.  Several of the bloggers who I really admire and look up to have done posts on this recently.  One, in particular, stood out so well.

NekoJonez, some of the best emotional support you’ll ever find in a community, ranted about non-gamer’s perceptions of gamers.  When people around me started deciding who their “grown up selves” were going to be I started hearing this a lot more.  Or maybe I’d just never listened before, because I didn’t care that person X didn’t like my choice of hobbies.  When my anxiety started coming to a head I started questioning every single hobby I’d ever had.  Was it too childish?  Did I need to grow up?  Was I supposed to fit in the current culture and live life like literally everyone else on Instagram/Facebook/insert social media platform of your choice?  How could I like games and still be accepted and appreciated?  And even among gamers, how could I exclusively enjoy Nintendo and not be mocked as “childish”?

It wasn’t until my brother-in-law, an absolute saint, metaphorically sat down with me (we were on the phone), and had a long chat about the fact that he has struggled through, and come out the victor, in these exact issues that I started to feel like maybe I was going to be okay.  Maybe other’s impressions of my choices and my life didn’t matter.  Maybe loving something, even if other people don’t approve, was more important than being who I was “supposed” to be.  By sharing his advances in determining how he wanted to play games and the benefits he derived from them, and the emotional and physical support he and his wife have showered on me, I gain confidence in my own struggles with this perception of gamers and, ultimately, of myself.

It’s a tough road, guys.  There’s so much out there telling you that you’re unhealthy, lazy, wasting time, childish, promoting whatever gaming is supposed to be ruining nowadays, addicted, a part of the problem with society, missing  the fullness of life, not enough of a gamer, not the right kind of gamer, not playing the right things, etc… Whatever mean thing someone can think of, trust me, they will.  If they can shame you into feeling like you’re not good enough, hey, maybe you’ll change and validate their lifestyle.  It’s so hard not to buy into what they’re saying.  They have the support of the current societal norms on their side, after all.  How can we overcome this bombardment on our personal choices?

So, while I don’t need to go into all the gory details, let’s talk about how I’ve learned to cope with these fears and stressors.  Because ultimately, this post isn’t so I can tell you all my personal life stories.  It’s to help others who may be feeling the same fears and thoughts.  Who may be going through their own young, mid-life crisis.

There is NOTHING wrong with your hobbies.  Gaming or otherwise.  There’s nothing wrong with choosing to continue gaming, or choosing new hobbies, or heck, doing both!  Nostalgia Trigger, a fantastic blog you should definitely follow, wrote an incredible post about a year ago talking about these very things.  Gaming is a hobby, it isn’t a lifestyle.  And so is every other passion and pursuit you turn to.  Yeah, it can consume you, it can be your number one thing, but it doesn’t define who you are, what you stand for, and your value as a human being.  It’s a hobby.  And it’s just fine to fall in love with your hobby.  Everyone has them.  And no one hobby is better than another.  So accept yourself, accept your hobbies, and be happy that you’ve found things you love to do.  Not everyone has.

Just because you found something (or somethings) you’re passionate about at a young age doesn’t make them childish.  It makes you lucky.  4 out of my 5 favorite hobbies are things I adored as a child.  Gaming is one of them.  My entire family are gamers, it’s something we did as a family, something we pursued on our own, and something nearly all of us have continued as we’ve grown.  Just because it’s something I did as a child does not make it childish.  I’ve had decades of loving who I am and enjoying one of my favorite hobbies.  That’s years longer than so many people.  How lucky am I?  Decades of refining my tastes, discovering my niche, and really knowing what’s worth my time and what isn’t.  That isn’t childish, that’s maturity.

Stop the comparison, take away the judgement.  One of my biggest problems is that I judge myself incredibly harshly.  I compare and, instead of being jealous, I simply find some way of turning that comparison into a criticism of who I am/am not.  I find ways to devalue myself based on these perfect boundaries I’ve decided I have to fit inside.  Well guess what?  No one is perfect.  Which means I constantly break those boundaries and rules and, when I do, I leave myself open to me saying some of the meanest things anyone has ever said of me.  Do you have this problem?  Are you, quite literally, your harshest critic?  While it’s 1000% easier said than done, stop the criticism and take away the judgement.  Everyone makes mistakes, you face problems you can’t overcome or set-backs that completely take you away.  But instead of turning it into a rant about the horrible, terrible human being you aren’t, take away the judgement and make it about accepting you for your faults and the growth that you achieve when you fail.  No one achieved anything through perfect success.  It’s only through failure that we learn.

So what if so-and-so thinks you’re silly for gaming?  Instead of taking what they’ve said to heart simply accept any critiques that may be true and throw the rest in the garbage.  Don’t use it as fuel on your fire to be harsh and unkind to yourself.  Instead of judging ourselves on whether we spent 6 hours doing playing a game or 6 hours doing any other hobby, simply accept that you did something that brought you pure joy and move one.  Instead of allowing someone’s belief about how you should spend your time ruin your night simply brush it aside and do the things you love.  Accept that you are who you are and leave the judgement where it belongs-nowhere near you.

It’s taken me a full and solid year to finally start comprehending some of these facts.  I love video games.  I love tabletop games.  I’d rather spend every night of my week watching Overwatch League than anything else.  I’m obsessed with the Legend of Zelda and have an entire shelf of LoZ games and books to prove it.  I’m proud of the fact that one of my son’s favorite things is Mario.

It’s okay to love yourself.  It’s okay to be yourself.  You don’t have to look like person X, because you never will.  You’re not them, from your DNA to your beliefs.   So stop trying.  Just accept who you are, pants size and everything.  It’s okay to enjoy gaming.  No one person’s hobbies will ever be better than another’s.  They are a portion of all the wonderful things that make you who you are.  They shape your ability to change your world.  The world needs gamers, and hikers, and readers, and sports enthusiasts, and every other possible hobby.  Because those things help build a civilization that works.  Embrace the differences and accept yourself.  Because you are, and will always be the very best at being you.

Vegetable Curry

Vegetable Curry

Let’s talk about sheer dumb luck for a second.  By that, I mean the sheer dumb luck I’ve been having making some of these recipes.  Guys, a lot of this stuff I’ve never made before.  Ever.  Some of these recipes have, by some miraculous intervention, worked out perfectly first try.  Yeah, yeah, some of that is the skills and knowledge I’ve built up over years of binge-watching cooking shows and always being willing to try new techniques.  But honest, some of it has to be luck.  Perfectly-placed-one-shot-to-a-guardian’s-eye-when-he’s-flying-all-over-the-place luck.  I’ve always dreamed about making Indian food, but I’ve never been brave enough to pull the trigger.  When I finally decide it’s time to start and I find a recipe that I feel like I can tweak and love, it turns out not only amazing, but incredible.  I surprised myself by how much I loved this recipe.  Goodbye $30.00 take-out once every other week because we love Indian food that much.  Hello homemade curry for half or less that cost and so many leftovers we begged people to come eat it… True story.

One time my brother-in-law told me that Breath of the Wild helped him finally gain the confidence he needed to tackle D.I.Y. projects around the house.  Video games aren’t just about playing a game, trying a new media, or even experiencing a new story.  The skills people learn from gaming can shape their lives in a very positive way.  My entire life I’ve been excellent at puzzles and problem solving.  It’s one of the reasons I became a scientist.  Now, part of that is personality and the brain I was born with.  But a decent helping of it came from countless hours playing puzzle-based games, like Zelda, which helped train my brain to solve complex ideas with limited resources.  And having the confidence to try new things, fiddle with ideas, and tackle your fears is what we gamers do best!  So guys, don’t be scared.  I promise there are very few ways you can screw up this recipe.  Give it a shot and I’m betting you’ll have a new staple for your weekly meal rotation… or however you determine dinner menus….

Vegetable Currytime and difficulty

First thing’s first – I forgot a overhead shot of all the ingredients.  Sorry!  I got so caught up in cooking everything was used and unphotographable before I realized it…

We start by getting everything ready.  It’s really the very best place to start.  Ooh! Also, this recipe is based on a coconut kurma, my absolute favorite Indian curry.  In case you were wondering what we were going to make!  Chop the veggies into large, but still bite size pieces (guys, I’m recognizing a theme over the last few posts…).  Cauliflower, green beans, onions, and carrots.  We’ve talked about the other veggies so often I think you’ve got it.  If not, check out the Veggie Cream Soup recipe.  It’ll go into plenty of detail.  However, the green beans are new.  You can use frozen but it’s starting to become summer around here and beans will very soon be nice and fresh!  So if you buy fresh beans, simply chop off the ends and cut into inch-ish long pieces.  That easy.

mincing garlic

Now for mincing the garlic.  I’ve kindly posted a video of how to do this, but let’s describe it, too.  Hold the garlic steady between two fingers.  Carefully slice the garlic into small strips, leaving the very end attached to each other (so the strips don’t separate).  Rotate the garlic 90° and repeat the process.  Then simply dice the garlic into very small pieces.  Mince by rocking your knife through the pile several times and in several directions.  Done!

melted butter
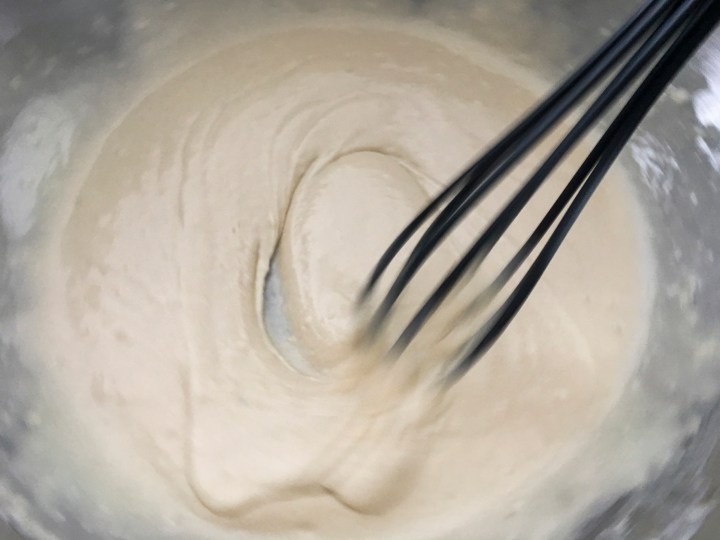
Once everything is ready melt the butter on very low heat.  We want it to be set to low.  This is not a joke.  We want to, as my very good friend says it, give the garlic and spices a nice Jacuzzi before we actually start to cook them.  It’ll give the garlic more time to sweat without burning and will bring out a lot more of the flavor.  It’s a slower process but absolutely worth it!

spices in butter

After the butter is melted add all the spices, including the garlic.  Stir around until everything is combined and allow to heat for several minutes.  You’re house will, at this point, start to smell amazing and you’ll start to get very hungry.  Continue cooking on low and stirring every minute or so for about 5ish minutes.

Once the spices are ready add the onion and slowly start to turn up the heat, a degree at a time every minute, until you get to medium.  Sweat the onions until translucent and covered in spices.  Some of the spices may stick to the bottom of the pan at this point.  Not to worry!  We’ll deglaze it off!

saute onion

While the spices and onions are cooking we need to do one thing: puree the tomatoes.  Wash the tomatoes well and place them in a blender or food processor (maybe?  I don’t know if you can puree tomatoes in a food processor).  Blend until pureed.  Complicated, right?  If you really insist on using only canned goods for everything just follow the same process but with canned tomatoes.  You’ll need one can for this.  But it’s so easy with fresh you may as well get the delightful flavor of fresh for just as much work!

If you’re unfamiliar with deglazing you really should check out the Prime Meat Stew recipe for details.  But it can be boiled down to this:  when the pan is hot add room temp liquid and scrape the bottom of the pan.  Add more liquid as necessary and all those spices will come right up!  So slowly add the tomato puree and deglaze the pan!

add all the liquid

Next add all the coconut milk and heavy whipping cream in one go.  Whisk until completely combined.  Add the brown sugar, whisk, and bring to a boil.  Once it’s there simply lower to a simmer and add the green beans, carrots, and cauliflower.  Simmer for about 15 minutes, stirring occasionally to prevent it from sticking to the bottom.

While the curry starts to simmer start the rice.  One of these days I’ll learn, and then share, how to cook rice in a pot on the stove.  But for now let’s stick with the rice cooker.  And, quite frankly, I use so much rice in these recipes if you’re going to make them you should invest in one yourself.  Jasmine or Basmati rice is particularly good for Indian food.  However, I’m so set in my sushi rice ways I just use Calrose for everything.  So experiment if you want, but it’s okay to stick with the classics.  Simply wash the rice several times, fill it up to your first knuckle when your finger rests on top of the rice, cover and hit the start button.  It’s that easy.

simmer for 15 minutes

When your 15 minute timer is up it’s time to add the peas (frozen, so they cook slower and don’t get mushy), cashews, and golden raisins.  The raisins’ll get nice and plump because they’ll soak up all that delicious liquid and the cashews will soften up nicely.  Simmer until the rice is done, stirring every so often.  Again, we don’t want anything to burn!

close up of curry

Serve over (or if you want to be picture accurate) next to your rice and enjoy!

Link’s Vegetable Curry

    • Any carrot or pumpkin
    • Hylian Rice
    • Goron Spice

Vegetable Curry

  • Servings: 4-6
  • Difficulty: moderately easy
  • Print

Vegetables in a creamy coconut kurma curry sauce

Recipe adapted from North and Mouth’s “New and Improved Bombay House Chicken Coconut Kurma”

Ingredients

  • 1/2 head of cauliflower
  • 2 medium carrots
  • 1 small onion
  • 3 teaspoons minced garlic
  • 1 handful fresh green beans (very scientific, I know)
  • 1.5 cup frozen peas
  • 1 cup golden raisins
  • 1 cup roasted cashews
  • 2 teaspoons ground ginger
  • 1.5 teaspoons tumeric
  • cayenne/red pepper, 1/4 tsp for mild, 3/4 tsp for medium, 1.25 tsp for hot
  • 2 teaspoons fennel seeds
  • 3 teaspoons garam masala
  • 2 teaspoons salt
  • 3 teaspoons ground coriander
  • 2 tablespoons brown sugar
  • 15 ounces pureed tomato, about 3 medium tomatoes
  • 1 15oz can coconut milk, full fat
  • 1.5 cups heavy whipping cream
  • white rice to serve, about 2 cups uncooked and 5 cups of water

Directions

  1. Chop the cauliflower and carrots into large, bite-sized pieces. Dice the onion into small pieces. Cut the ends of the green beans and cut into 1 inch pieces.
  2. Finely mince the garlic by holding the garlic steady between two fingers.  Carefully slice the garlic into small strips, leaving the very end attached to each other (so the strips don’t separate).  Rotate the garlic 90° and repeat the process.  Dice the cut strips into very small pieces.  Mince by rocking your knife through the pile several times and in several directions.
  3. In a heavy-bottomed pot melt the butter on low heat.
  4. When the butter is completely melted add all the spices, including the garlic.  Stir until combined and allow to heat for several minutes. Continue cooking on low and stirring every minute or so for about 5 minutes.
  5. Add the onion and slowly turn up the heat, a degree at a time every minute, until you get to medium.  Sweat the onions until translucent and covered in spices.
  6. While the spices and onions are cooking puree the tomatoes.  Wash the tomatoes well and place them in a blender or food processor.  Blend until pureed.
  7. When the onions are translucent add a small amount of pureed tomato to the pan and scrape hard to deglaze the spices from the bottom. Repeat until all spices are removed from the bottom and are mixed in to the puree.
  8. Add all the coconut milk and heavy whipping cream.  Whisk until completely combined.  Add the brown sugar, whisk, and bring to a boil.
  9. Once the mixture is boiling lower heat to a simmer. Add the green beans, carrots, and cauliflower.
  10. Simmer for about 15 minutes, stirring occasionally to prevent it from sticking to the bottom.
  11. While the curry is cooking make the rice. Wash rice three times in water, fill with water to the first knuckle when your finger rests on top of the rice, cover and hit the start button on your rice cooker.
  12. When your curry has simmered for 15 minutes add the frozen peas, cashews, and golden raisins.
  13. Simmer until the rice is done, stirring every so often.
  14. When the rice is cooked serve curry over the rice and enjoy!

Prime Meat Stew

Prime Meat Stew

I realize I totally fell off the goal train last month.  I’m sorry for not writing as many posts as I claimed I would.  I got pretty caught up in the goal I was focusing on for February and sort of ignored EVERYTHING else.  Not good, I know, but at least hopefully understandable?  But it’s okay because this month is focusing on my social goal a.k.a. focusing here!  YAY!  I’m working on getting a backlog of recipes (for when I don’t have time to post), organizing my thankful recipes (for the upcoming months), and writing a couple of thoughts posts.  I’m also working on being better about reading on commenting on all of your wonderful blogs.  I know that community is the thing I struggle most with… and for that I am sorry!  You guys are all so great to be here and I want to be there for you, too.

One more thing I’m working on for this month?  Brainstorming a way to get videos to you all so you can follow along with me and learn some new skills.  After my poll, where a Twitch stream was the overwhelming favorite, I feel like I actually do want to help everyone up their cooking game.  This isn’t about making it pretty or cutting out vital pieces to make a succinct video.  It’s about teaching you the techniques I use to help the people who keep commenting “they can’t cook” feel like they can.  Because trust me, if my self-taught self can do this, so can you!

Oh! And one last thing before we get one with it.  You guys are the best.

Prime Meat Stewdifficulty and time

One of my favorite things about these BotW recipe’s is trying to take some really strange additions to normal meals and make them into a reality.  This recipe is no exception.  Why on earth would you add wheat to a stew?  And how can I make a beef stew with something like milk?  It’s just weird, people.  Weird.  But that’s what makes it fun!  So get ready for a surprisingly delicious recipe. P.S. this recipe makes a lot.  I like having stew for leftovers for days.  If you don’t, you’ll want to scale it back.

ingredients photo for prime meat stew

This recipe started when I accidentally purchased the most expensive roast of my life.  Here’s how it went.

Me: Do you have chuck roast in your Prime beef?

Butcher: Nope.  We have rib roast, though.  Would you like that?

Me, super naively: Sure!  Is that like a regular roast?

Butcher: Yep.

Me: Let’s do it.

Cut to him handing me the 2 pound package of roast.

Me: *Checks price on package.  Price says $45.00* Oh.

So, while the beef was definitely insanely delicious, I don’t recommend doing what I did.  However, with the information we learned about the different levels of quality with beef in this Salt Grilled Prime Meat recipe, I knew I needed prime… Do I recommend using it to you readers?  Only if you have a lot of money you like to very quickly eat away.  Will I ever do this again?  Well, it’s a bit too rich for my bank account.  But it was amazing.  So what should you use instead?  Any rump, chuck, or stew roast will do nicely.  That’s what I usually use and it turns out like a dream.

So now that we’ve got the “Prime” out of the way we needed to figure out how to add those strange Breath of the Wild ingredients.  The first one: Tabantha Wheat.  It feels like a bit of a cheat but I simply dredged my meat in flour before searing it.  Have you ever had a stew where the meat breaks up into tiny little pieces because it’s perfectly braised?  Annoying because you can’t get a full piece of meat, but delicious, right?  Well, dredging prevents it from breaking up into tiny pieces.  It gives the meat a bit of a crust to stew in and holds it together until you decide to chew, leaving you with the perfect, falling apart bite.  So let’s start with cutting the roast into cubes, about an inch squared.  Then add flour, salt, and pepper to the cubes and roll them around to completely coat each one.  It’s pretty easy.  You can totally do this.

Add the oil to the bottom of a heavy-bottom pan.  I used a pot because I was silly.  A pan works just as well.  As I’ve mentioned in… pretty much all of my previous posts, I love cast iron and use it almost exclusively for pans.  But a regular pan will work just fine as long as it can handle high heat and then sustained low heat… so, like, a regular pan with a lid.  Heat the oil on medium high and, once it’s hot, starting adding the dredged meat.

dredged meat to pan

Don’t add it all together.  We really need to shake off the excess flour, because excess flour sticks to the bottom and makes it even more of a mess to clean than it already will be. Oh!  By the way, this will be a mess to clean.  So grab a handful of meat, shake it to remove excess flour, add it to the pan, queue to 3rd grade boys laughing hysterically.  Continue doing this until all the meat is added.  Then stir continuously with a plastic or wood (never metal) spatula until all the beef is browned and beautiful.

add liquid and scrape to remove fond

During this process you will get a brown crust sticking to the bottom of the pan.  That’s totally normal.  It’s called a fond (French for “bottom”) and provides some of the best flavor to any sauteed or braised meat.  If you stirred continuously and scraped the bottom of the pan often, like you should have, the fond won’t be a thick layer.  If you didn’t… like me… you’ll get stuck with a thick fond, which is harder to handle.  The way to scrape up this delicious flavor and add it to the stew is to deglaze the pan.  It’s easy.  The next step has us adding beef broth to the pan to braise the meat for an hour.  To deglaze, simply add a few tablespoons only at a time.  When you do that it sizzles and creates steam.  While it’s sizzling scrape the bottom of the pan.  The fond will scrape up and leave you with some nice flavor.  If the liquid gets soaked up before you’re done scraping just add a little more, and, while it sizzles, scrape the rest.  If you have a thick layer it’ll more difficult (maybe even impossible) to scrape it all up.  That’s fine.  It just makes clean up harder.  If you have a thin layer it’ll be a piece of cake.

add liquid to browned meat

Once the fond is scraped and removed from the pan add 2-3 cups of broth, until the meat is barely covered, and bring to a boil.  Once it’s boiling, lower the heat to a rolling simmer, cover, and allow to simmer for an hour.  During this hour make sure you check at least every 10 minutes to stir the meat (so it doesn’t stick and burn) and to make sure all the broth hasn’t boiled off.  If it’s getting low, simply add more.

While the meat is cooking cut up the veggies.  We just want to dice the carrots, onion, and celery into large, bite size pieces, like I have you do in my Veggie Cream Soup.  If you’re using fresh herbs strip them from the stalks and mince.  Again, let’s not belabor something I’ve already taught you so check out the Veggie Cream Soup if you want to remember how.  I don’t dice up the potatoes until the very end because potatoes exposed to oxygen will turn black (an oxidation of the starchy liquid, for those science nerds out there).  If you do want to dice the potatoes now simply place them in a bowl and cover them entirely with water.  It’ll act as a barrier to the oxygen so they shouldn’t go black.

making a roux

When the hour is almost up let’s move on to how I added milk to this recipe.  I’ve never, in my life, added milk to a beef stew.  It was a puzzle worthy of being it’s own shrine (though not dungeon).  So I turned to an old-fashioned roux.  But instead of using a roux to thicken the stew with broth (which is the normal route, for heaven’s sake, Link) we are going to use a little milk and then finish it up with broth.  Complicated, but necessary to include that odd ingredient.

I feel like I mention it so often you don’t need the link, but for instructions on how to make a roux, check it out in Fish Pie.  Heat butter on medium in a heavy-bottom saucepan, add flour a bit at a time once the butter has melted completely, whisk until thickened and bubbly.  Now add the milk all at once and whisk until combined, smooth, and thick.  At this point add 3 cups of beef broth, 1 cup at a time, and whisk until thick and smooth.  Once that mixture is ready dump all the beef and remaining liquid from your meat into the sauce.  Be careful.  Since everything is hot you don’t want to get splashed and burned.  Add the vegetables, herbs, and more salt and pepper to taste.  Add another cup of beef broth and stir until homogeneous.  Bring liquid to a boil and then lower to a gentle simmer for 20-30 minutes, or until the vegetables are soft and cooked through.  Serve and be delighted!  P.S. this recipe goes really well with Becky’s Rolls.

close up

Link’s Prime Meat Stew

    • Rock Salt
    • Hylian Rice
    • Hearty Blueshell Snail or any Porgy

Prime Meat Stew

  • Servings: 8-10
  • Difficulty: moderate
  • Print

Roast beef stew with carrots, celery, and potatoes


Ingredients

  • 2 pounds chuck, rump, or other stew roast
  • 6 celery stalks
  • 5 medium carrots
  • 4 medium potatoes, any variety
  • 1 tablespoon dried oregano or 2 tablespoons fresh oregano
  • 1 tablespoon dried thyme, or 2 tablespoons fresh thyme
  • 1 medium onion
  • 8-10 cups beef broth
  • 1 cup milk
  • 3 tablespoons butter
  • 1/4 cup flour, plus 3-4 tablespoons for dredging
  • 2-3 tablespoons vegetable or canola oil
  • salt to taste
  • pepper to taste

Directions

  1. Cut the roast into 1 inch square cubes
  2. Add the 3-4 tablspoons dredging flour, about 1/2 teaspoon salt, and 1/4 teaspoon pepper to the cubes and roll them around to completely coat each one.
  3. Add oil to the bottom of a heavy-bottom pan. Heat the oil on medium high.
  4. Add the dredged meat, one handful at a time, first shaking off the excess flour. Continue until all meat has been added.
  5. Stir continuously with a plastic or wood spatula until all the beef is browned.
  6. Remove the fond by adding 2-3 tablespoons beef broth to the pan and remove the fond by scraping. Repeat until all the fond has been removed.
  7. Add 2-3 cups of water, until the beef is barely covered, and bring to a boil.  Once it’s boiling, lower the heat to a rolling simmer, cover, and allow to simmer for an hour.  During this hour make sure you check at least every 10 minutes to stir the meat. If the broth level is getting low simply add more.
  8. While the meat is cooking cut up the carrots, onion, and celery into large, bite-sized pieces. If you’re using fresh herbs strip them from the stalks and mince. Dice the potatoes when the meat has stewed for nearly the entire hour to prevent oxidation.
  9. Heat, on medium, a large 6-7 quart heavy-bottom dutch oven or pot. Add the butter.
  10. Once the butter is melted and bubbling, add half the flour and whisk continuously until it’s completely incorporated and thick. Add the remainder of the flour and repeat until combined and bubbling slightly.
  11. Add the milk to the flour mixture and stir until homogeneous and thickened. Add 3 cups of beef broth, 1 cup at a time, and whisk until thick and smooth between each addition.
  12. Once the sauce is ready add all the meat and the braising liquid to the sauce. Stir until combined.
  13. Add the vegetables, herbs, and salt and pepper to taste to the stew and stir to combine. If there isn’t enough liquid to cover the vegetables add the remainder of the broth and stir until combined.
  14. Bring stew to a boil and lower to a gentle simmer for 20-30 minutes, or until the vegetables are soft and cooked through.  Serve and be delighted!

Seafood Fried Rice

Seafood Fried Rice

It’s the first of two recipes this week!  Since my mom lived in Taiwan for a few years when she was in her 20s we grew up eating Asian food (mainly Chinese and Taiwanese) made from scratch at home.  Talk about an amazing childhood, right?  Because of that I’m super picky about my Chinese and I usually just prefer to make it myself.  Sounds complicated and too much to do, right?  I mean, how do you take a delicious ethnic food and make it yourself?  Well it’s actually super easy.  Most east Asian food is just a combination of 4 things: sauce, veggies, a protein, and rice.  Keep them separate and you’ve got the vast majority of Asian foods.  Cook them together and you’ve got fried rice.  So strap in, folks.  We’re making the most delicious fried rice you’ve ever had!

Seafood Fried Ricetime and difficulty

I hate to say it, but in reality you’re going to want a very big wok for this.  I try not to force you to purchase new equipment for these recipes, but if you’re going to make proper and delicious Asian food at home, you’re going to need a wok.  Large frying pans are the next best choice, but they’ll need to be awfully big to make up for a lack in wok.  Pots won’t work at all – while there’s going to be plenty of space to keep all the ingredients, there’s not enough surface space to fry everything.  You can heat a wok on high heat and, because of the way the wok is designed, the distribution will keep things from burning, but also keep everything hot enough to stir-fry instead of boil/burn/overcook.  A wok is generally large enough to hold all the ingredients you’ll need to make really good Asian food, unlike most saute pans.  And, lastly, a wok makes for a very healthy cooking surface – because of the way the wok is shaped you need less oil to cook than in a traditional saute pan.

So now, after that one paragraph, I’ve talked you into it and you’ve purchased the best wok you can afford, right? Good!  Then congratulations!  You are now the proud owner of one of my most-used pieces of kitchen equipment (note to self, that would be a great post someday).  Wait – you’re telling me I didn’t convince you? Blast…  Well you can still using a frying pan, it just won’t work as well.  Pick the biggest one you’ve got (not a pot, just a frying pan) and let’s chat about ingredients.

ingredients

Guys, I know you all wanted to see me make this with actual snails.  But in reality, I’m not going to.  Based on the photo and where Link picks these things up, I’m guessing they’re meant to just be shellfish.  So, from now on, any recipe containing any of the variety of snails will be substituted with shellfish, usually shrimp.  Trust me, you’ll thank me for that.  And just like the Creamy Heart Soup we have to fudge a little in the real world.

Amount of Water To Add to Rice
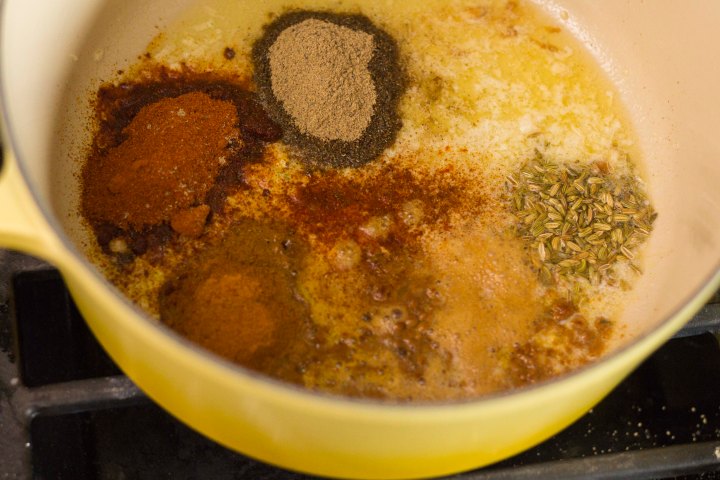
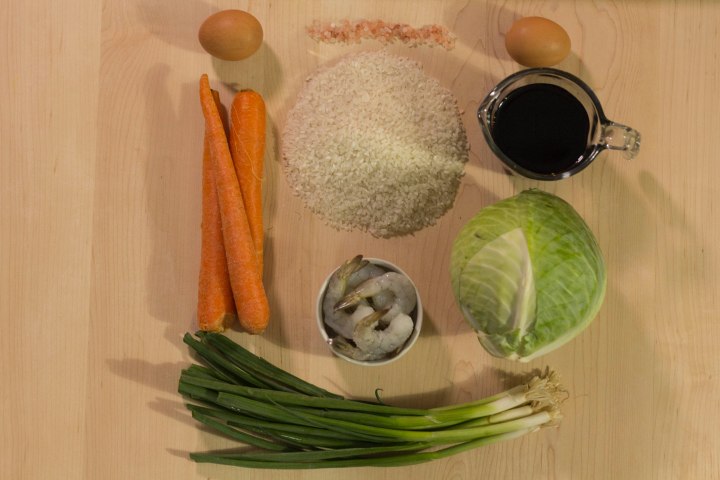
First, we make the rice.  Now, my wok is huge.  My mom had one of her friends in Taiwan purchase a traditional wok for me for my birthday a few years ago and it can hold massive amounts of food.  I’m guessing you weren’t that lucky.  So I’ve toned down this recipe to fit a wok (or frying pan… sigh…) half the size of mine.  That should (fingers crossed) work out alright.  So let’s make rice, using the same directions I always post, but list in detail in the Meat and Rice Bowl recipe.  Rinse the rice several times in water, fill it up with water to your first knuckle with your finger resting lightly on top of the rice, and turn on the rice cooker. One of these days I’m going to figure out how to make rice in a pot so I can teach you all how… but it is not this day! This day we use a rice cooker!  For Gondor!

While the rice is cooking let’s chop the veggies.  Measure out your peas (they don’t need to be thawed), wash your carrots, green onions, and cabbage, and let’s get going.  Chop the carrots into larger bite-size pieces.  Peel the outer leaves off the cabbage (this may just be a personal thing) and cut the cabbage in half.  Slice into strips, turn the strips, and chop into small squares.  Cut the green onions into inch long pieces and let’s do the shrimp.

Until recently I was incredibly nervous about working with raw shrimp.  I was always afraid I would undercook it and get sick and die.  As a microbiologist raw seafood is NOT on the menu.  But once I discovered how easy it is and how delicious well-cooked shrimp is I’ll never go back.  Most shrimp is frozen and farmed.  It’s really the only way to get sustainably-sourced shrimp nowadays.  That’s totally fine.  Try to find something that still has it’s tail on but it deveined.  While I know how to devein a shrimp I can’t go into it here.  I don’t have any photos, you see, to show you.  So take your properly thawed (put them in the fridge the night before in a ziplock bag.  It’s as easy as that) shrimp and rinse them gently under cold water.  Now take each shrimp and pull the tail off.  Just place your knife along the tail, right up to where the tail meets the shell inside (so at the end of the flippers… fins?  Then just pull.  It’s super easy.  Place them all in a bowl together and now we wait.

eggs, green onions, and oilAs soon as the rice is cooked heat your wok (or frying pan) on high, as hot as your stove will go.  Add about 1-2 tablespoons oil and half the green onions.  Now, it’s important you use the right kind of oil.  You need a vegetable oil, an avocado oil, canola oil, something like that.  Olive oil has a lower smoke point so it can’t handle the high heat we’re going for.  When the green onions start popping add all the eggs and scramble until cooked.  Don’t overcook them, we still want them soft and slightly squishy.  Take them out of the pan/wok and set them aside.

Add more oil and the rest of the onions.  Add the carrots, frozen peas, and cabbage.  Stir fry (literally just stir as you fry) until the carrots are slightly tender, but not mushy.  This’ll take anywhere from 5 minutes (if you have a wok) to 10 minutes.  Take them out of the wok and again, set aside.

Add a smidgen more oil and, after 30 second or so, add the raw shrimp.  Cook for several minutes (about 3) or until they are completely pink but not overdone.  If they’re totally pink and really curling in a circle they’re probably a little overcooked.  Once they start to show a little pink add the salt and continue to stir frying until pink all the way around.

Add the veggies back in and stir everything together.  Add the rice and eggs and stir and mix until completely combined.  Add all the soy sauce and stir until well-mixed.  It’ll seem like a lot of soy sauce until it’s mixed completely.  Once it is, maybe a minute or two, it’ll even out and be much better.

Serve and get ready for the compliments!

final close up

Link’s Seafood Fried Rice

    • Rock Salt
    • Hylian Rice
    • Hearty Blueshell Snail or any Porgy

Seafood Fried Rice

  • Servings: 4 large servings
  • Difficulty: moderate
  • Print

Fried rice with shrimp, cabbage, carrots, eggs, and peas


Ingredients

  • 1.25 cups calrose (or other sushi) rice
  • water to cook rice
  • 3 eggs
  • 2 carrots
  • 1/3 head of cabbage
  • 1 bunch green onions
  • 1 cup frozen peas
  • 15-20 raw shrimp, tail on, deveined
  • 1 teaspoon salt
  • 3 or so tablespoons vegetable or canola oil
  • 1/2 cup soy sauce

Directions

  1. Rinse the rice several times in water. Level the rice, place your forefinger gently on top of the rice, and add water until the level is up to your first knuckle. Cook in a rice cooker until done.
  2. While the rice is cooking prepare the other ingredients. Measure out the peas and leave them frozen. Wash the carrots, green onions, and cabbage.
  3. Slice and chop the carrots into large bite-size pieces. Peel the outer leaves off the cabbage and cut off the top third. Slice that third into strips, turn the strips, and chop into small squares. Cut the green onions into inch long pieces.
  4. Ensure the shrimp has been thawed properly. They should be thawed in the fridge overnight in a sealed bag. Rinse the shrimp gently under cold water. Remove the tails by placing the edge of your knife along the tail, right up to where the tail meets the shell inside. Pull gently but firmly to remove the entire shrimp from the shell. Place all the shrimp in a bowl.
  5. As soon as the rice is cooked heat your wok (or frying pan) on high, as hot as your stove will go.  Add about 1-2 tablespoons oil and half the green onions. When the green onions start popping add all the eggs and scramble until cooked.  Don’t overcook them, we still want them soft and slightly squishy.  Take them out of the pan/wok and set them aside.
  6. Add more oil and the rest of the onions. Add the carrots, frozen peas, and cabbage.  Stir fry (literally just stir as you fry) until the carrots are slightly tender.  This will take anywhere from 5 minutes to 10 minutes.  Take them out of the wok and again, set aside.
  7. Add more oil and, after 30 second or so, add the raw shrimp.  Cook for several minutes (about 3) or until they are completely pink but not overdone.  If they’re totally pink and really curling in a circle they’re probably a little overcooked.  Once they start to show a little pink add the salt and continue stir frying until pink all the way around.
  8. Add the veggies back in and stir everything together.  Add the rice and eggs and stir and mix until completely combined.  Add all the soy sauce and stir until well-mixed. Serve and enjoy!

Secret Valentine: Reaper Interactive

Secret Valentine: Reaper Interactive

Happy Valentine’s Day, everyone!  Now, having said that I have to admit that me and my husband rarely, if ever, celebrate Valentine’s Day.  We never have (after the first embarrassing year we were dating and he ignored me completely as some kind of prank he and his friends concocted) and we probably never will.  Living in a college town for most of our relationship completely turned us off of going on dates with 1000 of our closest friends.  Having both birthdays in the same month means that yet another holiday to spend money on for gifts is not happening for budgetary reasons.  And being a complete matter-of-fact scientist means I’m not really the romantic sort (luckily, neither is he!).  However, one thing I really do love about this holiday is the fact that everyone seems just a little bit nicer to the people around them.  I always find ways to be more appreciative of those I care about and the people around me on days like today.  And with that in mind I wanted to take place in Adventure Rule’s newest community challenge: the Secret Valentine.

He took everyone who signed up, and (I’m guessing) randomly drew names from a pot to determine who was getting whom.  It was then the blogger’s job to go to their secret valentine’s blog, read their articles, and write a few kind words about them.  I was given the wonderful blog of Reaper Interactive, where the amazing @ReaperActive reigns supreme.

copyright

This is actually a blog I hadn’t read before.  I follow him on social media but hadn’t delved into his blog.  But boy am I glad I did!  This blogger is a delight to read.  He thoroughly researches his topics and is able to provide good, meaningful advice in his series articles.  For example, he wrote an article called Legals 101: Copyright and Fair Use Policy in which he delves into how bloggers, particularly game reviews can legally use images and stills from games.  He discusses copyright infringement, copyright do’s and don’t’s, and how to apply that to our blogs.  Having spent a lot of time researching copyright for my Etsy shop, and being very good friends with a lawyer who takes an interest in copyright, I was incredibly impressed by his knowledge and his ability to turn something very complex into something relatively simple for people looking for answers.  I think everyone should read this article if you’ve never thought about the legality of how you use someone else’s work.  I can’t wait for the rest of this series!

social media

He also has a great little article on traffic to your blog.  In Blogging 101: Why Your Blog May Not be Attracting Views he delves into some of the greatest mistakes we, as bloggers, can make.  These things tend to keep us away from the big views and out of the spotlight we, usually, so desperately want.  Now, a lot of times these kinds of articles are general, non-specific advice where the author is trying desperately to have something to contribute to a major blogging conversation.  Not Reaper, though.  As always with his 101 articles he swoops in with some actual, thought out advice to help people figure out a few minor tweaks that’ll make positive changes in their blog immediately.  These articles are so well-researched I really can’t say enough about them.

kindergarten

 But the main focus of Reaper’s blog is his game reviews.  Now, I’ve said before (maybe not here, but definitely said it) that I don’t really read game reviews.  I’m paranoid about story spoilers and I’d rather waste money than read them.  However, Reaper is a solid non-story-spoiler-reviewer.  And after giving in and reading a few of the reviews I love his layout.  He starts with some basic description of what the game is and then every header hits a major point people look for in a game review: Analysis, Features, System Specs required, etc…  He even provides a content warning for articles that may have some non-kid-friendly information.  My absolute favorite of his reviews is Kindergarten Can Be Fun.  It made me laugh really hard and was interesting enough that, were I PC gamer, I would definitely consider buying it.  While he’s a PC game reviewer and I don’t really play PC games (except Overwatch… little bit obsessed with that one and I hate it on PlayStation) his reviews would be top of the list if I were looking for a great new game to waste time on when I should be working.

But what it really boils down to, guys, is that Reaper is a definite blog to check out.  His humor, style, and research all make for fantastic articles and really, he’s a great person to interact with on social media!  Hey, it’s why I wound up following him on Twitter before ever reading his blog!  Happy Valentine’s Day to you, Reaper, and your amazing work!

Quick Poll and an Update

Hey, everyone! Sorry about the whole two-week-in-a-row-without-a-post thing… I’ve been trying to get one together but life keeps getting in the way. To make up for it, get ready for double recipe week! I’ll be posting two awesome recipes (and trying to get a couple in the back burner for weeks I’m swamped) this week!

And second: let’s take a poll. I’ve noticed a lot of you feel like you aren’t skilled enough to attempt these recipes. I think it would be cool to teach you, and therefore give you the confidence you need, to be skilled enough at these recipes! So I’m considering starting a twitch stream, where once a week I’d make a recipe and the instructions and details would be posted here a few days later. Thoughts? Let’s take the poll to find out! And please leave a comment or two if you have some thoughts or suggestions!

Unique Blogger Award!

Unique Blogger Award!

Alright, guys, it’s the end of the month and I haven’t posted a “Gaming Thoughts” post yet for the month of January.  So you get a blog overload this week!  But this is a fun one.  You see, NekoJonez nominated me for the Unique Blogger Award!  Yay! Fanfare, Confetti, and Balloons!  Jonez is, in all honesty, one of the nicest and most supportive bloggers out there.  And his blog is a beauty to read.  He delves deep into games to write riveting reviews and seems to always find games I’ve never heard of!  Which is a blast because it helps expand my horizons.  If you don’t already follow NekoJonez, please go do so right now and enjoy his blog as much as I do!

And now for the award.  Jonez provided we the nominees with three questions and asked us to answer them.  I thought long and hard about my responses, especially because the first question gave me so much trouble!  But I finally figured them out.

Question 1: If you were able to erase all memories from one game to be able to fully experience it again, which game would it be and why?

legend of zelda majoras mask

My first reaction to this question was Ocarina of Time.  But then my gut started to wrench and I panicked.  My childhood, my life, has been shaped by that game and my memories of playing it as a kid.  Everything about me is formed by my adoration for Link and Legend of Zelda.  And I realized I couldn’t possibly give up those memories, even for the amazing experience of getting to experience it, brand new, all over again.

But it didn’t take long to come up with the answer I do want to give: Legend of Zelda Majora’s Mask.  I had been playing OoT nearly nonstop for 2 years.  When Majora’s Mask was released I was ecstatic, thrilled to play another LoZ game.  I honestly can’t remember if I bought it myself or if my parents caved and got it for me (or, more likely, “the family”).  I remember going downstairs on a Saturday morning, opening the packaging, and literally sitting there and playing through the entire game in one day.  I would stop for bathroom breaks and food but otherwise I was glued to that TV.  When I finished it I was disappointed.  I was disappointed at how easy it had been, at the fact that it had only taken me, on a first run and having never read a manual, 13 hours to beat that game.  And I’ve never played it again.

I know it’s people’s favorite game, that it has high acclaim, and a pretty strong following.  People even claim they like it more than Ocarina of Time (the heathens!).  But I have never been able to dump the sour taste my barely-twelve-year-old mind had when I finished a LoZ game that quickly.  I’m sure I was just too young to understand the depth of the story and the complexities of gameplay that mean everyone loves it so much.  And I’d love to have the ability to do it over again.  Experience it fresh.  Having thought a lot about this the last few weeks makes me think I’m going to give it another go this year and try and capture whatever I missed as a child.

Question 2: If you were allowed to help in the production of a game, which role would you take on and why? The role of producer, voice actor, writer, designer…?

budget tempate

This one’s an easy one.  Craft Services!  Right?  Game production has craft services, the amazing people who cater the film, I mean, game… set, I mean studio… Maybe not.  Blast.  Probably not.

While I wish I could say I was super creative and had amazing story ideas/musical composition abilities… I don’t.  What I do have is an incredible attention to detail, mad budgeting skills, some past experience, and an absolute love for a good spreadsheet.  And even if she didn’t know it, LaterLevels in a recent article about game production Dream Teams, pegged the exact position I would take in the production of a game: Producer.  You see, my husband is a film producer, which gives me a bit of an edge.  I know what the position is and what is needed for it.  I’m also incredibly conscientious about money and finances.  I overlook our personal budget nearly every day and, as I like to say it, “do the math” on basically any purchase or financial whim that comes in to my head.  And my scientific background really pushes me to check out the details of how a system works and ensure that all the cogs are rolling along.  So I think that’s what I’d be best at…

Question 3: What is one of the earliest video game memories?

the lion king

My earliest video game memories are of Aladdin, The Lion King, and Sonic and Knuckles on our Sega Genesis.  I would wake up at an obscenely early time on Saturdays to play one of these three games.  As a kid I remember thinking the stampede scene in The Lion King was the most difficult level on any video game ever.  We had an unfinished basement where my parents had set up a small TV with the game systems and my little brother, sister, and I would sit down there, wrapped in blankets, and play until my parents got up, realized where we were, and would force us to come up and do our chores.  Oh, to be a child again…

And now, here are the rules for the nominees:

  1. Display the award. (See above).
  2. Thank the individual(s) who have nominated you and include a link to their blog. A little promotion for their blog is also welcome.
  3. Answer the questions asked by the individual who has nominated you.
  4. Nominate an arbitrary number of bloggers and have them answer three questions you put forth to them.

Here are the questions:

  1. If you could only listen to one game soundtrack for the rest of your life, which would it be and why?  And then pick one track from that soundtrack, which would it be, and why?
  2. Pick one villain to be the main playable character in a new game series.  Which character would you pick and why?
  3. What is one dead IP or game that you’d love to see resurrected and why?

And here are the nominees:

Video Games Nebula

My Passion for Gaming

Gamers United 

Insert Memory Card

Quite frankly, it’s rough going after Jonez because he nominated a significant portion of the people I would have nominated, who then nominated nearly all the rest.  And while it’s awesome that everyone is getting a chance, it leaves me woefully unable to nominate more…  But don’t worry!  I think I found a few who have been skipped!

Becky’s Rolls

Becky’s Rolls

This is it.  My first “Thankful” post.  I really wanted a way to highlight the people/recipe’s in my life that have made me who I am, made me a better chef/baker, blogger, or even gamer.  I want to take a minute and tell people how grateful I am for those people or those experiences.  And these posts are my way of doing that.  And it only seems fitting that I start with the woman who taught me how to bake.

Growing up with my parents meant I learned how to cook but I didn’t learn to bake.  My mom used box mixes (which isn’t a bad thing!) and we affectionately called her rolls “lead balls”.  So when I met my husband and his mom made rolls from scratch I was blown away and promptly begged her to teach me how.  I can trace my absolute love of baking bread, this obsession that I’ve cultivated and one of my favorite hobbies, to that moment in my life.  My mother-in-law, Becky, is a wonderful person.  She’s always so focused on helping people learn and supporting her children through thick and thin.  Her patience with me has been astronomical and I am so glad and grateful to be a part of her family.  So, for the passion she inspired in me and the person she is, this post is dedicated to her.

Becky’s Rollsdifficulty and time

Let’s chat for a second about types of dough.  Now, raise of hands, how many of you have heard of enriched bread vs. non-enriched bread?  Every buy bread from the store and it says “enriched” on it?  This simply means there’s some kind of fat source (like butter or oil) and usually other ingredients (i.e. eggs, milk, etc…).  If it’s not enriched it means there are 4 ingredients; flour, water, salt, and yeast.  So what kind are Becky’s rolls?  They are enriched, using milk and butter to add a light, delicate, and delicious flavor.

Now, when people think about bread they get a little flustered.  Why?  It’s the flour, water, and yeast.  The three essential ingredients in bread.  But I promise, there’s nothing to be afraid of!

First, let’s chat about water.  Contrary to popular belief, water temperature, while affecting time to rise, won’t make or break your bread (unless it’s boiling hot).  Cooler water will increase your rise time, taking longer than you expect.  Warmer water will decrease your rise time.  For enriched breads, where most of the flavor comes from the extra bits, a shorter rise time is fine.  For unenriched bread a longer rise time is preferred to develop flavor in the dough.

Second is yeast.  Yeast is a microorganism, a tiny little thing that grows when there’s a food source.  And it’ll grow and grow and keep on growing.  Add yeast to water at any temperature (again, as long as it’s not burning hot) and it’ll eventually come around.  Because it’s a living thing you just have to be patient and let it do it’s thing.  It’s not on a perfect schedule.  Be patient and it’ll eventually (or sooner) do exactly what you need it to do.

And then the flour.  The trickiest part of making bread is not adding too much flour.  If you add too much flour it soaks up all the water.  Then, when it comes time to bake, the water is already soaked up, leaving very little to evaporate, which makes your bread very dry.  The trick is to get the bread at that perfect stage of tacky, so it slightly sticks to your hands, the counter, etc. but not sticky enough to stay on your hands, the counter, etc.  Does that make sense?  If it sticks and pieces remain on your hands, it’s too wet.  If it doesn’t even cling it’s too dry.  Find the balance.

The recipe itself is pretty straight forward.  Add melted butter and powdered milk to the water.  Now, for this instance, if you can manage it, get your water to be “bath” hot.  Like, normal person bath hot, not scalded skin bath hot.  Since this is an enriched dough we don’t need a long first proof (called fermentation).  Whisk this together and then add the yeast, salt, and sugar.  Whisk a bit to get it all combined and then let it rest for about 5 minutes.  This rest step will get the yeast rising and active, making the fermentation step even shorter.  See, it’s not so bad!

bubbly yeast

Once your yeast mixture is bubbly and happy add about 1.5 cups of flour and whisk until it’s smooth.  After it’s completely smooth whisk for about 2 minutes.

whisked dough

Add flour, one cup at a time, until you get a kneadable dough.  It should take between 1-2 cups.  Then add more flour slowly as you need if and only if  you need it.  Remember, dough should be tacky but not sticky.  If it slightly sticks to your hands, it’s perfect.

Knead the dough for 2 minutes or until it passes the “windowpane test”.  To knead, simply press the heal of your hand into the bulk of the dough, fold the dough in half, turn it a quarter turn, and do it again.  Repeat, using one or both hands, until it feels nice and firm.  If you know what the windowpane test it, then you can check your bread this way.  Otherwise, we are just going to skip it until I make the Wheat Bread for a BotW recipe.

Put a small bit of oil in the bottom of a bowl and rotate the dough in the oil to coat all sides.  Keep the dough in the bowl and cover with a towel or cloth to ferment until double.  Now, this time will be different based on elevation of where you live, humidity, and room temperature.  In Utah, where I live, this step only takes 40 minutes.  In coastal California, it could take and hour.  The important thing is to watch the dough and only move on when it’s doubled.  If you do anything before it’s doubled the rolls will be dry and difficult to swallow.

Once it’s doubled cut the dough in half.  Gently fold over the dough to make a circle, then roll it out into a circle.  Cut the dough (I use a pizza cutter because it’s easy!) into 8 triangles.  Then just roll up the trianges into crescent shapes and place it on a greased baking sheet.  Lather, rinse, repeat for the remaining dough.  You should have 16 beautiful rolls!

Cover these with a kitchen towel and allow to proof until double, again.  While they are proofing, preheat the oven to 425F.  Once the rolls are ready just pop them in the oven for about 8-10 minutes, or until golden brown.

browned and delicious

Enjoy warm with large amounts of salted butter or however you like!  It’s rolls… you can’t really go wrong.

Becky's Rolls

  • Servings: 16
  • Difficulty: moderate
  • Print

Soft, white dinner rolls


Ingredients

  • 1/4 cup sugar
  • 1 teaspoon salt
  • 1.5 tablespoons dry active yeast
  • 1/4 cup melted butter
  • 1.5 cups hot (bath temperature) water
  • 1/8 cup plus 1.5 tablespoons powdered milk
  • 2.5-4 cups all-purpose flour

Directions

  1. Stir together the Add melted butter, powdered milk, and water. Whisk in yeast, salt, and sugar.
  2. Allow mixture to rest for 5 minutes. It should be bubbly at the end of the rest period.
  3. Add about 1.5 cups of flour and whisk until it’s smooth.  After it’s completely smooth whisk for about 2 minutes.
  4. Add flour, one cup at a time, until you get a kneadable dough.  It should take between 1-2 cups.  Then add more flour slowly if needed. The dough should be tacky but not sticky.
  5. Knead the dough for 2 minutes or until it passes the windowpane test.  To knead, simply press the heal of your hand into the bulk of the dough, fold the dough in half, turn it a quarter turn, and do it again.  Repeat, using one or both hands, until it feels nice and firm.
  6. Put a small bit of oil in the bottom of a bowl and rotate the dough in the oil to coat all sides.  Keep the dough in the bowl and cover with a towel or cloth to ferment until double.
  7. Once it’s doubled cut the dough in half.  Gently fold over the dough to make a circle, then roll it out into a circle.  Cut the dough into 8 triangles.  Roll up the trianges into crescent shapes and place it on a greased baking sheet.  Repeat until you have 16 rolls.
  8. Cover the rolls with a kitchen towel and allow to proof until double.
  9. While rolls are proofing, preheat the oven to 425F.  Once the rolls are ready pop them in the oven for about 8-10 minutes, or until golden brown.

Fried Egg and Rice

Fried Egg and Rice

It’s a breakfast kind of few weeks, I guess.  I’ve been slightly ignoring those recipes simply because I like to eat what I make and I really enjoy baking for breakfast.  Muffins, quick breads, waffles, pancakes, biscuits… Eggs aren’t exactly my thing.  But after this recipe eggs may be back on the mark for being my thing.  It was so delicious I even had it for lunch today.  So spoiler alert, if you like eggs and rice and happiness, you’ll love this!

Fried Egg and Ricedifficulty and time

This one is super easy, guys.  I’m going to give you the instructions for a single egg serving since that’s the pretty picture, but in reality you’ll want 2 eggs.  At least, I did.  And while there’s not really a sauce in the photo, I added one because I think eggs need more than just salt and pepper.

ingredients list

Amount of Water To Add to RiceLet’s start with the rice.  It’s as simple as “make your rice.”  Now, getting a little more complicated, I use a rice cooker exclusively.  I usually make about 2 cups of uncooked rice (which fluffs up to about 6 cups) at a time and then just refrigerate the rest for anything.  Tomorrow’s breakfast, fried rice, whatever.  It’s easy to use up extra rice.  But whether you make a lot or a little we are going to follow the instructions I mentioned in Meat and Rice Bowl recipe.  We start with good, proper sticky rice, usually some kind of sushi rice.  My favorite is Calrose from a childhood raised on it.  Rinse your rice three times to get rid of the super starchy outer coat, and then add water up to the first knuckle on your finger.  Turn on your rice cooker and let it go!

Now, we don’t want to start anything else until the rice is done, since the eggs cook so quickly.  So once the rice is done and sitting warm let’s get going!  You can add either butter or oil to the pan.  If oil, just enough to coat the bottom, and if, like me, you choose butter for the flavor and the slight fluffiness it gives eggs, then you’ll want 1/2 tablespoon per egg.  Turn your pan on to a medium low heat.  We don’t want anything too hot or the outer edges of the egg will cook far quicker than the center and you’ll end up with overcooked egg.  Place the butter in the pan and wait until it completely melts.  Once it does very carefully break your egg (or eggs) into the pan.  It’s very important that you are careful, because we want these eggs sunny-side-up, which mean the yolk needs to be intact.  If the yolk breaks, you may want to throw the egg away and start over.  It won’t be nearly as good without a runny yolk!  One way to make sure the yolk stays together is to crack your egg against a flat surface, like the counter, and then use two hands to gently pull it apart and slide it into the pan.  That’s how I do it!  If you break a few, no worries, you’ll get the hang of it!

bubbling egg edges

Once the egg is cracked and cooking we need to keep the heat at the perfect temperature.  It needs to be hot enough that the edges of the egg are bubbling a bit but cool enough that only the edges are bubbling.  Add the salt and pepper at this point, before the egg is set, and cook for 2-3 minutes.  If it looks like the center isn’t cooking at all the the outer edges are cooking too quickly just place a lid on the pan for about 30 seconds-1 minute to steam the center a bit.  Don’t leave the lid on too long or you’ll end up with over-easy eggs, not what we are looking for!

While the eggs are cooking measure out your soy sauce and add the ginger and garlic salt and stir until combined.  Pour the soy sauce on the bottom of a plate.  Add about 1-1.5 cups of cooked rice to the plate on top of the sauce.  When the egg(s) are cooked gently slide them from the pan on to the rice. Sprinkle with fresh, chopped chives.

close up of egg

Enjoy it while it’s hot!  And keep your pan ready… you may want seconds!

Link’s Fried Egg and Rice

    • Bird Egg
    • Hylian Rice

Fried Egg and Rice

  • Servings: 1
  • Difficulty: easy
  • Print

Sunny-side-up eggs over a bed of rice and ginger garlic soy sauce


Ingredients

  • 1 egg (you’ll probably want 2)
  • 1/2 tablespoon butter (1 if you cook 2 eggs)
  • salt and pepper to taste
  • 1/3 calrose rice
  • enough water to cover rice up to first knuckle on finger
  • 1/8 plus 2 tablespoons soy sauce
  • 1/8 teaspoon ground garlic
  • 1/8 teaspoon garlic salt
  • 1 tablespoon fresh chives (or 1/2 tablespoon dried chives)

Directions

  1. Rinse your rice three times. Place your finger gently on top of the rice and add water until the water level reaches your first knuckle joint. Turn on your rice cooker and wait until complete.
  2. Heat your pan on medium low and melt butter.
  3. Carefully crack your egg into the pan, ensuring the yolk stays intact. If the yolk breaks, you may want to throw the egg away and start over.
  4. Keep the heat on medium-low but adjust if necessary. It needs to be hot enough that the edges of the egg are bubbling a bit but cool enough that only the edges are bubbling.
  5. Add the salt and pepper at this point, before the egg is set.
  6. Cook for 2-3 minutes.  If it looks like the center isn’t cooking at all the the outer edges are cooking too quickly just place a lid on the pan for about 30 seconds-1 minute to steam the center a bit.
  7. While the eggs are cooking measure out your soy sauce and add the ginger and garlic salt and stir until combined.
  8. Pour the soy sauce on the bottom of a plate.  Add about 1-1.5 cups of cooked rice to the plate on top of the sauce.
  9. When the egg(s) are cooked gently slide them from the pan on to the rice. Sprinkle with fresh, chopped chives.

Omelet

Omelet

Let’s start with the basics.  A) because in order to make a good omelet in the future it’s good to know the basic skills from the start, and B) because it’s the end of the week and I still haven’t done a recipe for the week…. Hey, at least I’m being honest, right?

This recipe is super easy to get right and super easy to get wrong.  Eggs are notoriously easy to overcook and you really want to pull them off the heat before they’re completely cooked.  Since they continue cooking after you take them off the heat you can prevent overcooking simply by following that one rule.  So, let’s make sure you get it right and get right down to the recipe!

Omeletomelet meter

Let’s start with prepping everything.  Since eggs cook so quickly it’s important to keep everything right at hand at all times.  A few seconds can be the difference between rubbery, overcooked mush and a perfect, fluffy, delicious omelet.  So gather your eggs, salt, pepper, olive oil, and butter and let’s go!

omelet ingredients

Heat your heavy-bottomed pan over medium heat.  Now, the pan size will make a difference with how many eggs you use.  This recipe calls for 3 eggs and an 8 inch-ish pan.  This will make for a fluffier, thicker omelet.  If you use 2 eggs, you obviously use less butter, but it will make a big difference to the final product to use a smaller pan, as well.  The second thing to note is that we cook eggs on medium.   This is an important step.  Yes, it takes longer to cook things on medium but cooking eggs any higher runs the risk of burning, overcooking, cooking too quickly, and a sub-par breakfast.   Who knew a pan could make such a big difference with something as simple as eggs, right?  Lightly oil the pan by pouring some oil in and using a paper towel to sweep it around the entire pan and mop up any if you happen to pour in too much (as I usually do!).  Add the butter and gently tilt the pan to coat the pan with melting butter.

While the butter is melting crack your eggs and whip some air into them with a fork.  Just break the yolks and keep whisking until well-mixed.  There shouldn’t be any long stretches of any yolk or albumen remaining.

Once the butter is bubbling add the eggs all at once.  Tilt the pan to evenly distribute the eggs and allow to cook for 1-2 minutes.  Every once in a while gently tilt the pan to distribute the egg that hasn’t set yet.

When the eggs are nearly set add the salt and pepper.  Now, when I say nearly set I mean there’s a bit of a wobble to them.  There shouldn’t be any raw-looking bits but it shouldn’t be stiff or completely cooked through yet.  This is that all-important step I mentioned in the beginning.  Overcook at this point and your omelet won’t impress.

As soon as you add the salt and pepper tilt the pan away from you and, using a spatula, fold the edge closest to you over the rest of the omelet.  Once the omelet is flipped it won’t unstick from itself but who cares what it looks like as long as it’s delicious!  And with practice, flipping will produce perfectly shaped omelet’s every time!  Now, one last thing, when you add the omelet to the plate don’t get any of the butter.  It’ll just make the omelet taste like butter instead of eggs.  So gently lift the omelet out of the pan, leaving all the butter, and place it on your plate.  Enjoy with toast, muffins, fried tomatoes, whatever your heart desires and enjoy!

final omelet

Link’s Omelet

    • Bird Egg

Basic Omelet

  • Servings: 1
  • Difficulty: easy
  • Print

A basic omelet with salt and pepper


Ingredients

  • 3 eggs
  • 1 tablespoon butter
  • 1 teaspoon olive oil
  • Salt and pepper to taste

Directions

  1. Heat a heavy-bottomed pan over medium heat. For three eggs a good size pan would be 8 inches. Lightly oil the pan by pouring in the olive oil and sweeping it around the entire pan using a paper towel.
  2. Add the butter to the pan and gently tilt the pan to coat the pan with melting butter.
  3. While the butter is melting, crack your eggs and whip some air into them with a fork.  Whisk until completely mixed.
  4. Once the butter is bubbling add the eggs all at once.  Tilt the pan to evenly distribute the eggs and allow to cook for 1-2 minutes.  Every once in a while gently tilt the pan to distribute the egg that hasn’t set yet.
  5. When the eggs are nearly set add the salt and pepper.
  6. As soon as you add the salt and pepper tilt the pan away from you and, using a spatula, fold the edge closest to you over the rest of the omelet. Serve with your favorite breakfast foods!