Veggies Cream Soup and New Year Resolutions

Veggies Cream Soup and New Year Resolutions

I’m back!  But this time I’m not just attempting to be back because I’ve made a goal/new year resolution to get back into this.  I’ve never really been a resolutions kind of girl.  I’ve always had the opinion that if you have a goal then start now, don’t wait for the new year and risk losing momentum before you’ve even started!  But this year (mostly because of timing, partly because of my intense need to organize everything perfectly to fit in time grids) I’ve decided to start my very own set of resolutions.

One of my best friends from high school started making goals in sets of 4 and I think it’s incredibly clever to do it this way!  It gives you enough to make changes in every aspect of your life, but not so much that you give up.  They are goals in mental (i.e. knowledge), spiritual, physical, and social health.  So what are my goals, you ask?  They are:

Mental/Wisdom: Master all the Tartine and Tartine No. 3 bread recipes

Spiritual: Actually, I don’t really want to share this here, as it’s pretty personal and would take a very long time to explain.  But suffice it to say that I have one!

Physical: The proverbial “Get Healthy”, but I actually have a plan for how to do this, so it’s not just a plea in the dark

And last but not least, Social, the reason I’m boring you with all of this: My goal is to improve my blog and my community here by being more regular in recipes, in the quality of my work, and being committed to the schedule I’m about to propose.  They always say you’re more apt to accomplish goals if you tell people what they are so this is me requesting that you hold me accountable!  The new sort-of-schedule is going to be:

A new recipe each week

One “Thankful” recipe per month

One Gaming Thoughts post per month

And, potentially, if I’m able to keep all those other posts regular, one collaboration per quarter.

Yeah, it doesn’t seem like a lot, but it’s a schedule I think I can stick to and a schedule I feel comfortable making a commitment to.  Also, there will be an element of surprise to it all, since I’m not specifying posting days this time!  Let’s see if that works and if it does maybe I’ll go back to specific days…  So hopefully you guys can help me stick this goal through and I hope this will produce a better blog for you to give your limited time to and a better chance for me to be a part of your community!

And now, after all that, your recipe.

Veggie Cream SoupHeader and Meter

ingredients photo

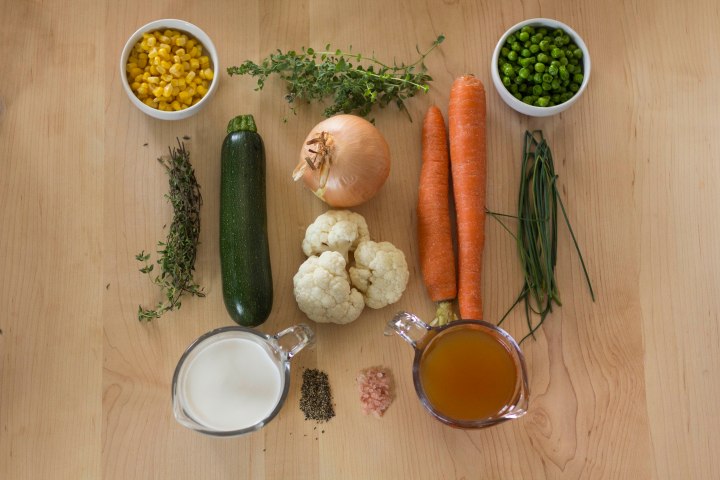
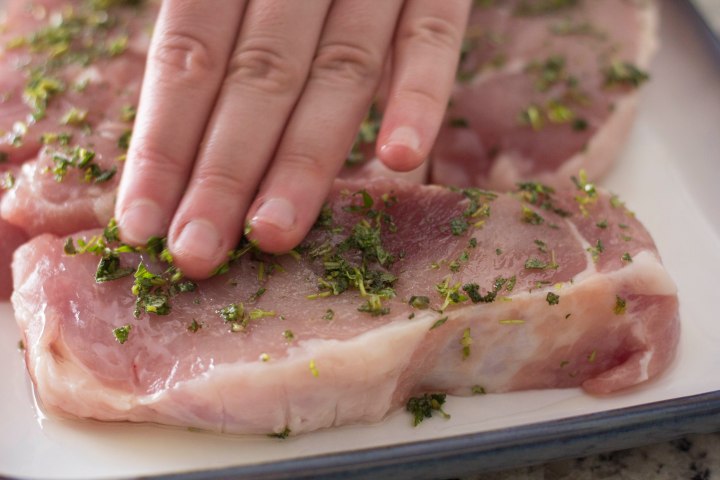
Lets start with stripping the herbs and cutting up all the veggies.  When you’re using fresh herbs they need to be taken off the stems.  This can seem incredibly daunting but i promise, it’s actually not that bad.  If you’re using dried herbs, just skip this step and move on!  Start by washing (obviously) and shaking dry the herbs as much as you can.  Place the edge of your knife against the herb stem below the leaves, tight, but not cutting through.  Once you’re in place simply pull the stem and drag the leaves along the blade of the knife.  Don’t move the knife, just the stem.  The leaves will strip off and the stem will pull through!  Easy peasy!  Any more questions, just watch this video:

Strip the herbs

Next, we cut the vegetables.  Just slice and dice them into bite-size chunks, larger or smaller depending on your preferences.  I prefer large chunks.  I feel like you get a better flavor from them!

Once everything is prepped add a tiny bit of butter (or oil) to a pan with some height.  We are going to be simmering in it later, so we want to make sure there’s enough room for the liquid.  Start by frying the onion until it’s tender and opaque.  Then add all the fresh veggies and saute for about a minute or two, just until they are all shiny.  And guys, I know my photos have the zucchini added at this step.  My advice, don’t follow the photos!  While it was easy, it made the zucchini a little overcooked, which is not what we’re going for.  We’ll add it later.  Promise.

Add broth to the veggies

Once everything is nice and shiny add the vegetable broth and simmer for about 15 minutes.  We want everything nice and tender before we add it to the sauce!  If you’re using fresh peas and corn (because it’s summer or you’re very lucky) go ahead and add them to the simmering veggies.  If not, I used frozen peas and canned corn.   I like the taste of canned corn better in soup, but you can use frozen if you prefer.  While your fresh veggies are simmering just heat up the peas and corn.  Make sure all the water is drained and set them aside for later.

Next, we make a roux.  We talked about the pitfalls of making a roux when we made Fish Pie, so I won’t go over them in detail again.  Let’s just do the basics.

Melt your butter in a heavy-bottomed saucepan over medium heat.  Wait until the butter is completely melted and bubbly.  Once it is, whisk in half the flour.  Once all the flour is incorporated and the mixture starts to melt and become a bit liquidy again add the remaining flour.  Whisk is continually until it starts to melt again.  Whisk constantly for 2 minutes until your roux reaches the blond stage.

Once your roux is ready we start slowly adding the milk.  Add about half the milk at a time.  The roux may ball up on itself when you do but just keep whisking and it’ll sort itself out!  Whisk until the mixture is homogeneous and slightly thick.  Add the remaining milk and repeat.  If the mixture is too thick you may have added too much flour.  Add regular milk until it reaches a gravy-like consistency.

Once your sauce is ready simply add all the veggies (including the zucchini, peas, and corn at this point!), herbs, and remaining broth to the sauce, stir until well combined, and let it simmer for 10-15 minutes to allow the flavors and spices to combine!  If you skip this part the herbs won’t have done their job and it’ll be a bit bland.  Be patient.  It’ll be worth it!

close up of stew

P.S. I don’t recommend adding a raw carrot at the end… The price we pay for matching photos, right?

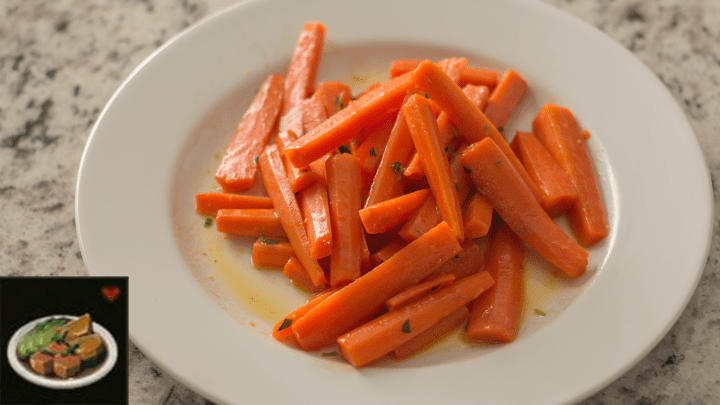
Link’s Veggie Cream Soup

    • Fresh Milk
    • Rock Salt
    • Any Carrot or Pumpkin

Veggie Cream Soup

  • Servings: 8-10
  • Difficulty: moderately easy
  • Print

Vegetables in a thick, creamy soup
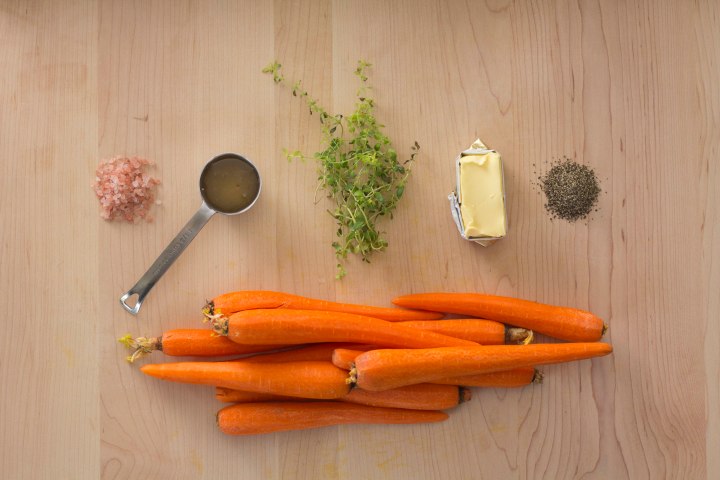

Ingredients

  • 3-4 medium carrots
  • 2 medium zucchini
  • 1 head cauliflower
  • 1 small onion
  • 1 15 oz can of corn
  • 2 cups frozen peas
  • 1.5 tablespoons fresh thyme (or 3/4 tablespoon dried thyme)
  • 1.5 tablespoons fresh oregano (or 3/4 tablespoon dried oregano)
  • 1 tablespoon fresh chives (or 1/2 tablespoon dried chives)
  • 1.5 teaspoons salt
  • 1 teaspoon pepper
  • 1 tablespoon butter
  • 1/4 cup flour
  • 3 cups milk
  • 3 cups vegetable broth

Directions

  1. If using fresh herbs, strip the oregano and thyme from their stalks and finely dice the chives. Set aside.
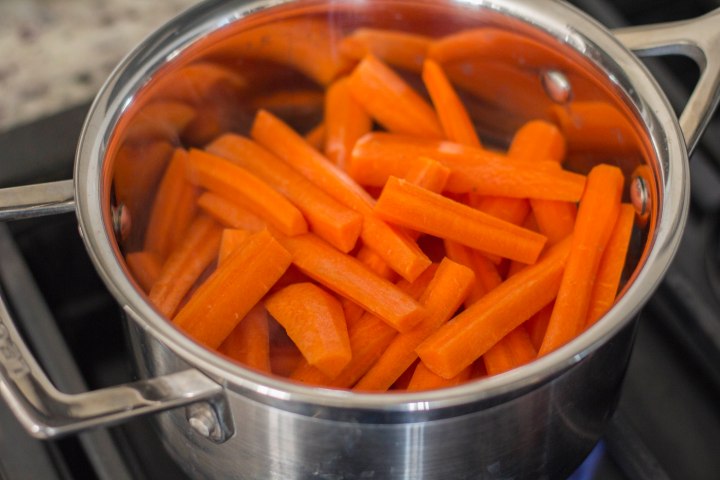
  2. Slice the carrots and zucchini into large, bite-sized pieces. Remove the stalk and leaves of the cauliflower and chop into large bite-sized pieces. Dice the onion.
  3. Add a small amount of oil or butter to a pan and heat on medium until the fat is hot. Add the onion and cook until translucent and tender. Add the cauliflower and carrots and saute until shiny. Add all the vegetable broth and simmer for 15 minutes.
  4. While the vegetables are simmering thaw the peas and drain the corn and peas. Set aside.
  5. Begin the roux by melting the butter in a heavy-bottomed saucepan over medium heat. When the butter is completely melted and bubbling whisk in half the flour.  Whisk continually until all the flour is incorporated and the mixture starts to melt and become a bit liquidy again. Add the remaining flour and repeat. Once all the flour is incorporated whisk constantly for 2 minutes until your roux reaches the blond stage.
  6. Slowly add half the milk and whisk until the mixture is thick.  Add the remaining milk and whisk until the mixture has thickened to a gravy-like consistency.
  7. Add all the simmering vegetables and broth, corn, peas, zucchini, herbs, salt, and pepper to the sauce and stir until well combined. Bring to a simmer and allow to simmer for 10-15 minutes to allow the flavors and spices to combine.

Nutcake

Nutcake

You know those weeks when you’re sure you’ll have plenty of time to do X and Y and everything in between?  And then reality happens and you wind up accomplishing absolutely nothing?  Well, folks, that week was this one for me.  I felt like, for the first time in a long time, I would have plenty of hours to get done my forever-long list of tasks.  And I didn’t finish any of them.  I wish there was a super-cool, trendy and fancy reason that would put me in the good graces of anyone and everyone and make me the super-star of the gathering.  But no… it was simply the fact that it’s been nearly two years since I’ve re-read Lord of the Rings and I can’t put it down!  I really love that book.  And I really love eating desserts while I read at night.  So this week I made a really easy, but awesome recipe.  Something I could throw in the oven and eat piping hot while engrossed in the Mines of Moria.  And after last week’s intense recipe I figured you could all use as much of a break as I did!  So let’s take it with this simple take on nutcake.

Nutcake
header and time

So I wanted to make this easy.  So easy you could do it in one bowl (though I used two).  So instead of making this an actual cake recipe it became a quick-bread.  What’s the difference between a cake and a quick-bread you ask?  Well, according to my friend, with whom I’ve had this debate several times, nothing.  So instead of arguing the point we’re just going to close our eyes and go with it!

nutcake ingredients

First we add all the dry ingredients to a mixing bowl.  Whisk them well to blend them together.  Just use a hand whisk.  This recipe isn’t fancy, remember?

dry ingredients

Add the eggs to a separate bowl and whisk with a fork until they are slightly beaten.  Add the remaining wet ingredients and mix until combined.

Make a well in the dry ingredients and add all the liquids at once.  Stir until just combined.  We don’t want things to get over-mixed or it’ll be a bit dry and tough.  So stir, I used a spoon, until the dry ingredients are all moist and homogenous.

liquids and drys

Chop the walnuts into quarterish pieces and add most of them to the batter.  Stir until they are evenly distributed.  This recipe is super complex, I know…

Grease a 9×5 loaf pan well with butter.  If you use anything else I cannot vouch for your loaf coming out of the pan in once piece.  I’ve tried other methods and for me, nothing works as well as butter.

Add all the mixture to the pan.  Now let’s make the pseudo-candied walnuts.  Chop the remaining walnuts and mix them with the maple syrup.  Stir them together until the walnuts are completely coated.  Gently spread them over the top of the batter.

buttered pan with batter and nuts

Bake until a cake tester comes out clean.  See?  After a rough recipe last week this one is a walk in the park!  It’s so easy I added an extra step – let’s make honey butter to spread over this wonderful bread/cake.

Add the softened butter and honey together in a bowl.  Whip or beat until well combined.  Done.  Now spread it over the nutcake/bread and enjoy!

bread in a pan

Link’s Glazed Veggies

    • Tabantha Wheat
    • Cane Sugar
    • Goat Butter
    • Any Nut

Nutcake with Walnuts and Spices

  • Servings: 1 loaf
  • Difficulty: easy
  • Print

Nutcake quick bread with Walnuts and spices


Nutcake

  • 2.5 cups all purpose flour
  • 1 cup sugar
  • 1 teaspoon salt
  • 2.5 teaspoons cinnamon
  • 1/2 teaspoon ground nutmeg
  • 1/2 teaspoon ground cloves
  • 1.25 teaspoons baking soda
  • 1 cup buttermilk
  • 2 large eggs
  • 2/3 cup butter, melted
  • 1.75 cup chopped walnuts
  • 2 tablespoons maple syrup

Honey

  • 1/2 cup butter, at room temperature
  • 5-6 tablespoons honey

Directions

  1. Preheat the oven to 350F.
  2. Add all the dry ingredients to a mixing bowl.  Whisk well to blend together.
  3. Add the eggs to a separate bowl and whisk with a fork until they are slightly beaten.
  4. Add the remaining wet ingredients and mix until combined.
  5. Make a well in the dry ingredients and add all the liquids at once.  Stir until just combined and there are no more dry parts.
  6. Chop the walnuts into quarters.
  7. Add 1 1/4 cups to the batter and stir until they are evenly distributed.
  8. Grease a 9×5 loaf pan well with butter and add all the mixture to the pan.
  9. Combine the remaining 1/2 cup quartered walnuts and the maple syrup together and stir until the walnuts are completely coated. Gently spread them over the top of the batter.
  10. Bake until a cake tester comes out clean, about 55-75 minutes.
  11. To make the honey butter, add the honey and softened butter in a bowl and whip until thick and completely combined.

Salt-Grilled Gourmet Meat

Salt-Grilled Gourmet Meat

It’s the second of two Thanksgiving posts and the day is almost here, which means this recipe is just in time!  So open this up, thaw your turkey (properly), and let’s make a turkey.

Raise of hands, how many of you have ever made a turkey before?  Really?  That few?  Well don’t be intimidated.  I promise it’s a lot easier than it sounds or looks.  Quite frankly, it’s just like any other salt-grilled meat recipe we’ve already done, with a few adjustments, of course.  And you’ll love the finished product.  It’ll be picture perfect and deliciously juicy for all your guests/family!

Salt-Grilled Gourmet Meattime and heart meter

Now, you should have started thawing your turkey by now following the instructions provided with your turkey (they almost always come with instructions).  It can take up to 4 days to thaw a turkey (depending on the size) in the fridge.  If you need to speed up the process you can fill a sink with cold water and place the turkey in.  Continue checking the water to make sure it doesn’t get too warm.  Drain the water every 1/2 hour and refill with cold water again.  Do this for roughly 8 hours.  It’s easier to thaw in the fridge but in a pinch, this other way will work.  Just whatever you do, please thaw it correctly!  I don’t want to be responsible for any food poisoning here!

turkey ingredients

We start with what’s called a brine.  Now, there are several ways to brine a turkey but I’ve chosen the easiest of them all.  You have enough to do on Thanksgiving – no reason to make it harder.  The brine with a turkey is the same principle as with pork – it tenderizes the meat and allows the juices to stay inside instead of the bird getting dry and gross.  It also negates, with an extra step, the need for basting!  That’s two time savers here people.  We’re on a roll!

You’re going to need to remove the bird from the packaging and take out any extras they throw in for the really hard-core people a.k.a the giblets and the neck.  Open the bottom of the turkey and they should be in there.  It’ll be a long neck and a packet of weird mushy stuff.  If the packet isn’t in there check where the neck is supposed to be attached.  Sometimes they put it up there to be sneaky.

Once everything gross is out pat the turkey dry with paper towels and coat it with kosher salt and pepper.  Be generous, it’ll help!  Allow the turkey to sit, with the salt and pepper, at room temperature for 1 hour to take off the chill.  The skin will be crispy and delicious if you do it that way.

While the turkey is warming up wash the sage and oregano or thyme, slice a medium onion into quarters, and remove the skin from 6 garlic cloves.  Place these inside your roasting pan, or if you don’t have excess cash floating around to buy a new pan for one meal a year (like me) a normal 11X15 cake pan.  If you want to get extra easy buy one of those disposable cake pans, like my mom does, and just throw it away when you’re done.  Whatever will fit your turkey comfortably will work!  Line the bottom of your pan with these ingredients, putting the onions in the corners.

buttering the turkeyThe next step is almost as important as the brine.  It’s also, for those of you who are a little squeamish, the grossest part of the entire affair.  Rub the room temperature butter all over your hands.  Then rub the entire turkey with those hands, pausing to get more butter if needed.  Make sure the entire bird in covered in the butter to make sure there’s an even crisp to the skin.  A safety note, just because I’m a microbiologist, please don’t reuse any butter you may have touched with raw poultry again.  Just throw it out and save yourself a horrible bought of food poisoning.

Preheat the oven to 425°F.  It’s very important you don’t go much higher than that because most glassware will shatter if you do and that would ruin your entire night.  If you’re using metal feel free to go up to 450°F.  Put your turkey in the pan and put your pan in the oven on the middle shelf.  Close the door and walk away for 45 minutes.  Plenty of time to get started on literally 1 million things to be cooked for dinner.

turkey in the pan

Once the turkey has been roasting for 45 minutes take some tinfoil and cover the breast of the turkey, molding it to keep it in place.  It’ll help trap in the moisture and make for a much more juicy bird!  If you need to make a piece of tinfoil bigger to cover the whole turkey simply fold over the edges of the foil together and press down to seal.  It’ll work.  Trust me.

Lower the temperature of the oven to 350°F and bake for the remainder of the time.  Here’s a handy, dandy chart for approximate times if you need one.  It’s all based on pounds, really, so make sure you know the poundage of your bird beforehand.

9-11 pounds: 2 1/2 hours

12-14 pounds: 3 hours

15-17 pounds: 3 1/2 hours

18-20 pounds: 4 hours

21-23 pounds: 4 1/2 hours

24+ pounds: 5+ hours

turkey thermometerTo check if the turkey is done you’ll need an instant read meat thermometer.  You can buy them in any grocery store this time of year for about $5.00.  It’s worth it.  You’ll use it again (maybe…).  When the time is up stick the thermometer in the thickest part of the thigh, making sure you aren’t touching any bones.  Allow the thermometer to read.  Your turkey temperature should be 165°F.  If it isn’t, your turkey needs more time to cook.  Mine took an extra 20 minutes to get up to temperature.  If you need to check again make sure you check in a different spot than the first time!  If you want to be extra careful, check in the breast under the wing, as well.  The temperature is much more important than the color.  Any turkey could have a pink coloring naturally, but if it got up to 165°F or higher, you’ll be just fine!

Remove the turkey from the oven and cover loosely with foil for at least 30 minutes to allow the turkey to rest.  This equalizes the juices inside so you have perfectly moist, delicious meat.

foiled turkey

Remove the turkey from the pan and start slicing!  There are several excellent videos if you google “how to slice a turkey”.  I think you’ll be alright!

While someone is slicing you can make the gravy.  Technically this isn’t part of the recipe but who eats Thanksgiving turkey without gravy?  Remove all the herbs, onions, and garlic, and pour all the drippings into a pot and add all the chicken or turkey stock.  Heat the liquid to a boil and, while you’re waiting, make the cornstarch mixture.  You could use a roux if you feel like it, but that takes longer and we are all about making Thanksgiving easy here!  Mix the cold water and cornstarch together until dissolved.  Once the liquid is boiling slowly add the cornstarch slurry to the drippings.  Stir and continue to heat until thickened.  If you need it thicker, just add more cornstarch liquid.

Serve with all the Thanksgiving trimmings and have an incredible time!

turkey leg

Link’s Salt-Grilled Meat

    • Raw Gourmet Meat or Raw Whole Bird
    • Rock Salt

    Salt-Brined Roast Turkey

    • Servings: dependant on turkey pounds
    • Difficulty: moderate
    • Print

    Turkey

    • 1 Turkey
    • 1/2 tsp kosher salt per pound of turkey
    • 1/4 tsp pepper per pound of turkey
    • 1/2-1 cup butter, room temperature, based on turkey size
    • 7 sprigs fresh oregano or thyme
    • 5 sprigs fresh sage leaves
    • 6 garlic cloves
    • 1 medium onion
    • 1 instant read meat thermometer

    Gravy

    • 1 pan turkey drippings
    • 3 cups chicken or turkey stock
    • 1/4 cup cold water
    • 3 heaping spoonfuls cornstarch

    Directions


    1. Thaw your turkey according to the packing instructions, generally refrigerated for a few days. If you need a quicker thaw, fill a sink with cold water and place the turkey in. Drain the water every 1/2 hour and refill with cold water. Continue this process for 8 hours until the turkey is thawed.
    2. Remove the bird from the packaging and take out the neck and giblets. These should be located inside the turkey at either the bottom or the neck holes.
    3. Dry the entire turkey with paper towels
    4. Coat the turkey in the kosher salt and pepper.  Allow the turkey to sit, with the salt and pepper, at room temperature for 1 hour to take off the chill.
    5. Wash the sage and oregano or thyme.
    6. Slice the onion into quarters.
    7. Remove the skin from 6 garlic cloves.
    8. Line the outside edges of a glass or metal cake pan large enough to hold your turkey with the aromatics, putting the onions in the corners.
    9. Rub the room temperature butter all over your hands, coating them completely.
    Then rub the entire turkey with those hands, pausing to get more butter if needed.  Make sure the entire bird in covered in the butter.  A safety note, if you touch any butter with turkey or turkey-covered hands please throw it away to mitigate the risk of food poisoning.
    10. Preheat the oven to 425°F. Put your turkey in the pan and put your pan in the oven on the middle shelf.  Close the door and bake for 45 minutes.
    11. Once the turkey has been roasting for 45 minutes take some tinfoil and cover the breast of the turkey, molding it to keep it in place. If you need to make a piece of tinfoil bigger to cover the whole turkey simply fold over the edges of the foil together and press down to seal.
    12. Lower the temperature of the oven to 350°F and bake for the remainder of the time. Please see the chart in the body of the post for the correct times.
    13. Insert the instant read thermometer into the thickest part of the thigh, making sure you aren’t touching any bones.  Allow the thermometer to read.  Your turkey temperature should be 165°F or higher. If the temperature is not quite high enough, roast the turkey until the temperature reads the correct amount.
    14. Remove the turkey from the oven and cover loosely with foil for at least 30 minutes to allow the turkey to rest.
    15. Remove the turkey from the pan.
    16. To make the gravy remove all herbs, onions, and garlic, and pour all the drippings into a pot. Add the chicken or turkey stock and bring to a boil.
    17. Mix the cold water and cornstarch together until dissolved. Once the drippings are boiling slowly add the cornstarch to the drippings, stirring to mix.
    18. Stir the gravy and bring it back to a boil. Add more cornstarch and water if a thicker gravy is desired.

Pumpkin Pie

Pumpkin Pie

Let’s talk about a few things.  I’ve been having a bit of a depression backslide lately.  There was a thing that happened, it was incredibly difficult to handle, and I haven’t really quite recovered yet.  So I haven’t been posting, as you are all well aware.  I’m sad about that, and I hope you are, too!  So I’ve made a few decisions that will, hopefully (finger’s crossed) help keep things moving a little more regularly on the blog as well as giving me enough time to continue to heal mentally.

Decision one: I think this blog is about to become very recipe-heavy!  I think there are some of you who are clapping and some who are booing, but all in all, I think this will be a good short-term solution.  I want to be better about posting BotW recipes and focusing on that instead of collaborations or even Thursday Thoughts will help that!  So get ready for one BotW recipe per week.  That’s definitely happening.

Decision two: I’m working on a pretty big (at least emotionally) Thursday Thoughts post.  I’m not sure when it’ll be done, but maybe at the end of the year.  It’s something I think will really help with some of the depression and anxiety I’ve been struggling with recently and hopefully will be worth reading!  So until then, I probably won’t do any other Thursday Thoughts.

Decision three:  In order to be a little more grateful in my life for the things that are going right and well I want to spend the rest of the year adding (maybe not every week, mind you) recipes from bloggers who have been supportive and inspiring and people who have helped shaped my life.  These will all be non-Zelda recipes and will showcase their favoriate/family recipes or recipes that have serious importance in my development as a person.  Hopefully you enjoy this season a little more because of these and we can all feel a little more appreciation for the wonderful people in our lives!

And now, without further ado, on to the first of two Thanksgiving (at least here in the U.S) recipes: pumpkin pie.

Pumpkin PiePumpkin pie meter and time

pumpkin pie ingredients

We start, as we did with the apple pie, with a pie crust.  For the real details check out my Apple Pie recipe.  For those of you who stick with me let’s shorten this up (see what I did there?).  Cut in the butter, add a tiny bit of cold water, mix, add more, etc… until you get the perfect, just-held-together texture.  Once we’re there simply wrap and refrigerate for about 15 minutes.

Now for the insides.  The very easy insides.

pimpkin, sugar, spices

Measure out the pumpkin, sugar, cinnamon, nutmeg, allspice, and cloves into a bowl.  Mix and stir until combined.  Add two eggs.  Now, you can either beat the eggs before you add them or do as I do and add the eggs, lightly beat them on top of the pumpkin mixture, and then mix everything all together.  I’m all about shortcuts here.

Once everything is mixed and homogenous add the cream and stir until combined.  It’ll look pale and a little fluffy.

Take the pie crust out of the fridge, lightly flour a surface, and roll the crust out into a round shape large enough to cover the pie tin and hopefully less than 1/4 inch thick.  Thick crust makes for weird pie, so thinner can definitely be better.  Using the coolest technique ever, gently roll the crust onto your rolling pin and unroll it into the ungreased pie tin.  It’ll make you look really awesome so be sure to do it while other people are looking.  If they aren’t make sure you cough loudly or sneeze to get their attention.

Gently press the crust into the tin, folding the crust over itself to patch any holes.  You can do the next step one of two ways: either cut the excess crust and then crimp it into a pretty shape OR crimp it and then cut off the excess.  Either way is fine, just make sure if you choose the first option you leave enough to crimp.

Pumpkin pie filling

Add the filling until it fills the crust at least 3/4 of the way.  It’ll rise a little as it bakes, but not too much.  We don’t want it over-full or you’ll get horrible burned stuff all over your oven.  And we don’t want it under-filled or you’ll get too much crust on top… Like mine…  Do as I say, grasshopper, not as I do…  Now bake for about 55-65 minutes.  The key is that the filling turns a lovely shade of darker brown and has a crack in the top.  If there’s no crack it may not be done.  If you’re unsure give the pie a bit of a wobble.  If it moves a lot, it’s not done.  If it’s a little more stiff it’s probably ready!

finished pie

Remove, make some whipped cream by adding sugar to cream that you are currently whipping, and serve!

delicious pie!

Link’s Pumpkin Pie recipe:

      • Fortified Pumpkin
      • Tabantha Wheat
      • Cane Sugar
      • Goat Butter

      Pumpkin Pie

      • Servings: 1 pie, 9 inches diameter
      • Difficulty: moderately easy
      • Print

      Homemade Pumpkin Pie


      Pie

      • 2 cups flour
      • 2/3 cup cold butter, cut into tablespoons
      • 1/3 teaspoon salt
      • 4-6 tablespoons ice-cold water

      Pumpkin

      • 1 15 oz can pumpkin puree
      • 1 teaspoon ground cinnamon
      • 1/2 teaspoon ground nutmeg
      • 1/2 teaspoon ground cloves
      • 1/3 teaspoon ground allspice
      • 3/4 cup sugar
      • 2 large eggs
      • 3/4 cup heavy cream

      Directions

      1. Pre-heat the oven to 375°F and add some ice to a small cup of water.
      2. Add the flour and salt to a mixing bowl. Cut the butter into tablespoon-sized pieces. Add the butter to the flour and begin rubbing it between your fingers while adding flour. This will create a breadcrumb-like texture. Make sure you leave some butter pieces as large as peas.
      3. Handling the dough as little as possible, start adding water a few tablespoons at a time until the mixture begins to hold together. The dough will be a bit shaggy but should be mostly cohesive.
      4. Wrap the dough in cling wrap.  Refrigerate for 15 minutes.
      5. While the dough is chilling make the filling.
      6. Add all pumpkin puree, sugar, and spices to a bowl and mix until combined.
      7. Add the eggs and lightly beat them on top of the mixture before adding them to the pumpkin.
      8. Add all the cream and stir until combined. The mixture should be light brown and creamy.
      9. When the dough has chilled remove it from the fridge.  Lightly flour a surface and roll it out into a round shape large enough to drape over the edges of the 9 inch pie tin and thinner than 1/4 inch.  Do not grease the tin beforehand.
      10. Roll the dough onto your rolling pin and unroll into the pie tin. Gently press the dough into the shape of the tin, filling any cracks with excess as necessary.
      11. Add all the pumpkin pie filling. It should fill at least 3/4 of the tin.
      12. Remove the excess crust using an knife and, using a pinching technique between two fingers on one hand and a finger on the other, pinch the crust to create a crimped look.
      13. Bake for 55-65 minutes. Check your pie about 40 minutes into the bake.  If it’s starting to look too dark on top gently place a layer of tinfoil on the parts that are browning too quickly. When it’s baked you should notice a significant darkening of the filling and the filling should have formed a bit of a crack. It should have a slightly firm wobble. If the filling isn’t cooked place it back in the oven for a few more minutes.  Once it’s baked remove the pie from the oven and allow to cool in the tin for at least an hour before you eat it. Serve with whipped cream, if desired.

Apple Pie

Apple Pie

It’s beginning to feel a lot like Autumn

Everywhere you look

There’s some rain that is falling down

And leaves that are turning brown

And pumpkin spice and sweaters all around!

So after that are you still here?  Yeah?  Well I can’t help it!  I love Autumn (or as we call it in the U.S. because American English is a pretty strange language, Fall) and it’s finally here!  Everything is cooling off, the squash are starting to ripen, apples are falling, cinnamon and nutmeg are everywhere, and the smell of wet pavement is a dream!  When things start to get chilly we naturally turn to deliciously warm food and spices to heat things up and what could possibly be better than fresh apple pie?  I submit that nothing could be… unless you don’t like pie… like me…

Apple Piemeter and time

apple pie ingredients

We start with a pie crust, technically called a short crust pastry.  There are other kinds of pastry you could use but this is a traditional and well-established method.  And since this was my very first apple pie ever, I thought we should go easy on ourselves.

Put some water into a cup and add a cube or two of ice.  The colder the water, the better the pastry will turn out.  Then let’s rub the cold butter into the flour until it resembles bread crumbs with some pea-sized chunks of butter left.  You don’t want it too fine or you won’t get a nice flaky crust!

Now for the scary part.  Once we start adding water we need to handle the dough as little as possible to get the best crust.  Start with a few tablespoons, mix it in with your hands, add a few more, mix, lather, rinse, repeat until you’ve got a dough that sticks together well but isn’t too wet.  It should be, as we say, a little shaggy, with some dried flour/butter bits still left over.  See the photo if you have questions.

shaggy dough

Lightly flour a surface and knead the dough together until it forms a cohesive mass.  Again, don’t handle it too much or it’ll be stiff and tough.  Split it so you have 1/3 and 2/3 in separate balls and wrap each in cling wrap.  Refrigerate for a while so it relaxes and doesn’t get too tough.

wrapped dough

Now let’s make the filling!

sliced apples
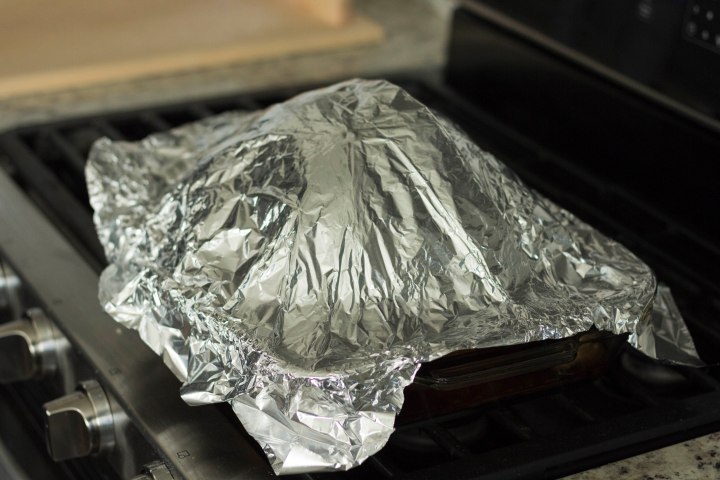
Thinly slice the apples, making sure to remove the core.  I like to leave the peel on for some added texture but if it bothers you, feel free to peel them as well.  Then add all the apples to a bowl and add the flour, cinnamon, nutmeg, and brown sugar to the apples.  Mix it around with your hands until all the apples are coated evenly and set aside.  PS – this is a pretty standard pie filling recipe but I’ve switched out the regular white sugar for brown sugar.  I’ve found it makes it a little more like caramel apples in flavor and I love it!

When the dough has chilled for about 15 minutes remove the smaller third from the fridge.  Lightly flour a surface and roll it out into a round shape large enough to drape over the edges of the pie tin you are using.  Don’t grease the tin or anything – there’s enough butter in the crust to take care of that for you!  Remove the remaining 2/3 dough from the fridge, flour your surface, and roll it out into a rectangle at least the width of the pie tin and the longest you can.  You want it as thin as you can get it because we are weaving this to match Link’s pie.  If you wind up with bits that crack don’t worry, shortcrust is super forgiving.  Just patch them up with some excess crust and roll over the top!

shortcrust rolled out

Once we have a nice rectangle cut the strips into 1 inch wide pieces.  Lightly flour another surface and let’st start weaving!  Lay out strips right next to each other the width of your pie tin.  Take leftover strips and weave them, starting from the center, through the strips you’ve laid out.  Over, under, over, under.  Take another strip and weave it the opposite way, so you’re two strips are over/under opposite one another.  Continue until you have a nice, even lattice.  If you run out of strips, no worries.  Just gather up any scraps and roll them out again.  Cut from that and you should be golden.  This crust recipe may be a little tight but it fit my 10 inch diameter pie tin just fine!  And don’t weave this lattice too tightly – we need to have some space for air to escape so the pie doesn’t explode!

Lightly flour the bottom of the pie crust in the tin.  This helps with the moisture and prevents you from incurring the wrath of Mary Berry and having a soggy bottom.  Add all the apples to the crust.  Don’t overfill the pie, we want it to be level with the top of the tin.  If you’re left with extra you won’t regret just eating them.  Promise.

Gently, using a combination of prayers, incantations, friend’s hands, and extra strong hopes, pick up your lattice somehow and lay it on top of the pie.  If you are lucky enough to have a flat, large sheet you can slide under it, lay it on the pie, and slide out do that!  If not, you’ll have to get some help.  If it breaks a little, again, no worries!  Just mash the pieces together and call it good.

Using a pinching technique between two fingers on one hand and a finger on the other, pinch the top and bottom layers of crust together.  Trim the excess off the sides using a knife, brush the top of the pie with milk, and bake!

Check your pie about 40 minutes into the bake.  If it’s starting to look too dark on top gently place a layer of tinfoil to the parts that are browning too quickly.  This didn’t happen to me so I don’t have any photos.  If it looks light and raw still you shouldn’t have a problem.  Once it’s baked remove the pie from the oven and allow to cool in the tin for at least an hour before you eat it!

fresh apple pie

Link’s Apple Pie recipe:

      • Apple or Wildberry
      • Any fruit
      • Tabantha Wheat
      • Cane Sugar

Apple Pie

  • Servings: 1 pie
  • Difficulty: moderate
  • Print

Homemade apple pie using fresh, tart apples

Pie

  • 3 cups flour
  • 1 cup cold butter, cut into tablespoons
  • 1/2 teaspoon salt
  • 6-9 tablespoons ice-cold water

Apple

  • 2 1/2 pounds tart apples
  • 1 teaspoon vanilla
  • 1/8 teaspoon salt
  • 1.5 tablespoons cornstarch
  • 1/4 cup sugar
  • 1 large egg
  • 2 tablespoons butter

Directions

  1. Pre-heat the oven to 375°F and add some ice to a small cup of water.
  2. Add the flour and salt to a mixing bowl. Cut the butter into tablespoon-sized pieces. Add the butter to the flour and begin rubbing it between your fingers while adding flour. This will create a breadcrumb-like texture. Make sure you leave some butter pieces as large as peas.
  3. Handling the dough as little as possible, start adding water a few tablespoons at a time until the mixture begins to hold together. The dough will be a bit shaggy but should be mostly cohesive.
  4. Lightly flour a surface and knead the dough together until it forms a cohesive mass, being careful not to handle it too much.
  5. Split the dough so you have 1/3 and 2/3 in separate balls and wrap each in cling wrap.  Refrigerate for 15 minutes.
  6. While the dough is chilling make the filling.
  7. Thinly slice the apples, making sure to remove the core.  You may peel the apples or leave the skin on, but leaving the skin gives it a little more texture and color.
  8. Add all the apples to a bowl and add the flour, cinnamon, nutmeg, and brown sugar.  Mix it with your hands until all the apples are coated evenly. Set this bowl aside aside.
  9. When the dough has chilled remove the smaller third from the fridge.  Lightly flour a surface and roll it out into a round shape large enough to drape over the edges of the pie tin you are using.  Do not grease the tin beforehand.
  10. Remove the remaining 2/3 dough from the fridge, flour your surface, and roll it out into a rectangle at least the width of the pie tin and the longest you can.  You want it fairly thin because we will be weaving the top. If you wind up with bits that crack just patch them up with some excess crust and roll over the top.
  11. Cut the strips into 1 inch wide pieces.  Lightly flour another surface to begin weaving.
  12. Lay out strips right next to each other the width of your pie tin.  Take leftover strips and weave them, starting from the center, through the strips you’ve laid out by placing the strip over then under the next strip. Take another strip and weave it the opposite way, so you’re two strips are over/under opposite one another.  Continue until you have a nice, even lattice.  If you run out of strips simply gather up any scraps and roll them out again.  Cut new strips to finish the lattice. Don’t weave this lattice too tightly – we need to have some space for air to escape so the pie doesn’t explode!
  13. Lightly flour the bottom of the pie crust in the tin.  This helps with the moisture from the apples and keeps the crust crisp. Add all the apple mixture to the crust.  Don’t overfill the pie, we want it to be level with the top of the tin.
  14. Gently pick up your lattice and lay it on top of the pie. If it breaks a little, again, no worries!  Just mash the pieces together and call it good.
  15. Using a pinching technique between two fingers on one hand and a finger on the other, pinch the top and bottom layers of crust together.  Trim any excess pie crust from the sides with a knife so it’s an even finish.  Brush the top of the pie with milk and bake for 45-55 minutes or until golden brown.
  16. Check your pie about 40 minutes into the bake.  If it’s starting to look too dark on top gently place a layer of tinfoil to the parts that are browning too quickly.  Once it’s baked remove the pie from the oven and allow to cool in the tin for at least an hour before you eat it.

Fruitcake

Fruitcake

There are many versions of fruitcake.  It means something different in every society and region of the world.  But if you take a peek at the recipe in Breath of the Wild it’s pretty obvious Link makes a Bavarian fruit cake.  Now, I don’t know how to make one of these layered, intense cakes on my own so I turned to my favorite pastry cookbook, Tartine by Elizabeth Pruitt.  She is an absolute star in the pastry world and her creations always look too good to be true.  Instead of shifting this recipe around to make it 100% my own, which wouldn’t have worked out nearly as well or delicious, I simply adapted this recipe to make it a little more “me” and ran with it.  So tighten those bootstraps, grab your handy whisk, and let’s get going on the most difficult recipe to date.

Fruitcakedifficulty and time meter

With how long this recipe takes as a whole we need to prioritize.  It’s like tackling a group of lizalfos – if you don’t freeze some and take out the silver one on one you’re never going to finish without dying.  Same with this recipe.  We start with some recipes and then, while they are “freezing” we work on the easier bits.  The ice breaks, we finish it all off, and we unlock the treasure, which, in this case, is an incredible cake.

ingredients

Flour mixture
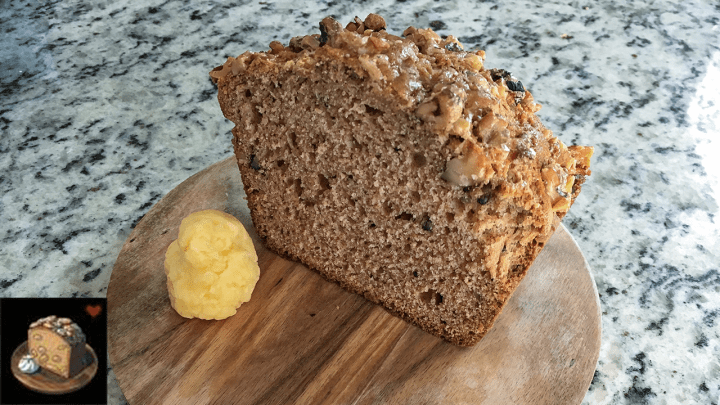
We start with the cake.  It’ll take a bit to bake and cool and we can work on other components while it does.  So start with flour, baking powder, sugar, and salt in a bowl.  Using a hand whisk (yes, I need to specify, we use a lot of whisks in this recipe) blend the flour mixture until well-combined and aerated.  Make a well shape in the bottom of the bowl with the flour and set aside.

egg separation

In the bowl of a stand mixer (or a regular bowl but you’ll be grateful for the stand mixer if you’ve got one) and another bowl separate the egg whites and yolks from 6 eggs.  You can do this in a few ways, the easiest is probably one of those fancy egg-separator-thingee-mabobs you find in the cooking aisle.  The cheapest is the way I do it, by slowly cracking the egg in two, keeping most of the whites and all the yolk in one side of the shell.  Then slowly tip the yolk into the other shell.  Keep up this slow version of hot potato until the only thing left in the egg shell is the yolk.  The albumen (white part) goes in the stand mixer bowl, the yolk goes in the other bowl.  And trust me, if you don’t go slowly you’ll break your yolk, which defeats the purpose.  If it happens try and keep as much of it out of your bowl, dump the egg, and try again.

eggs plus flour

Repeat this process for all 6 eggs, then add the vegetable oil, water, and extract to your yolk bowl.  Mix this well using your hand whisk and transfer it to your flour mixture.  Whisk this in for 2ish minutes until it’s nice and smooth (you can use a normal whisk for this).

And now for the stand mixer.  We need 4 more egg whites but don’t need the yolks so go ahead and throw those out.  Put on the whisk attachment, add the bowl, and whisk on medium-high until the eggs get frothy.  If you don’t have a stand mixer you can use a hand mixer with a whisk attachment.  But don’t blame me when your arm falls off from all the vibration!  Once the whites are frothy add the cream of tartar.  Keep whisking until the eggs hold soft peaks.  There’s a photo if you’re unsure!  Then add a bit of the sugar, and, yes, you know the drill, keep whisking.  Once the whites hold nice, stiff, shiny peaks it’s ready!

Here comes the part that’ll ruin your entire cake if it’s not right – we have to fold in the whites.  Fold too quickly and too vigorously and you’ll lose all that beautiful air we just put in them.  Fold too slowly and you’ll get bored, give up, and leave.  So we scoop about 1/3 of this whites into the batter and carefully fold in by scooping from the bottom and turning over on the top.  Gently continue this until it’s well mixed then add the remaining whites and fold in until just combined.  Grease a springform pan with butter and then add flour.  Tap out the excess flour, but make sure all your butter is covered by flour.  Pour the batter into the pan and bake.

batter pour

Next: the pastry cream.  This will take a bit to cool, as well, so it needs to be second.  Add the milk into a saucepan with the vanilla and the salt.  Heat it all over medium-high heat, making sure to stir frequently.  If you don’t you may burn the milk and I promise you it’ll be horrific to eat and you’ll wind up throwing it away.  While the milk is warming up whisk (using a regular whisk) the eggs, cornstarch, and sugar in a bowl until smooth.  When the milk is almost boiling pour about 1/3 (we like thirds here) of the hot milk into the eggs and whisk constantly.  Once combined quickly add the entire mixture into the saucepan and continue to whisk and heat over medium heat until the mixture (a custard, if anyone wanted to know) becomes as thick as lightly whipped cream and is just under the boiling point (i.e. a few bubbles but not actual boiling).

Ladle (or scoop, spoon, spatula, etc…) the cream out of the pan and put it in a shallow bowl.  If you leave the cream in the pan it’ll keep cooking and ruin it.  Let it cool for about 10 minutes, stirring occasionally to remove some of the heat.  Once it’s cool add the butter 1 tablespoon at a time and whisk until smooth.

Cover the cream with plastic wrap the same way we did the Wildberry Crepes by pressing the plastic all the way down on the top of the cream to prevent a skin from forming.  Place this in the fridge to chill and take a deep breath!  We are maybe 1/3 of the way through this recipe…

cooling the cakeWhen the timer goes off test the cake for doneness (which is totally a word) by inserting a toothpick.  It should come out nice and clean.  Remove the pan from the oven but leave the cake in it to cool.  Let it cool entirely before doing anything with it.

So is that cake almost cool yet?  Almost?  Perfect.  Once it is let’s start on the next few steps.  We need to make the fruit puree (to prevent the cake from drying out), the actual cream filling, and cut all the fruit.  Let’s start with the cream bit.

Again, it needs to cool a tad so timing is key.  Add the gelatin to the water and let it sit for several minutes.  It’s kind of cool and gross to watch so if you do I won’t judge.  And while we are doing that let’s make a double boiler.  To do this we need a saucepan that’ll be several inches deep with water but still have headroom for steam and either a stainless steel mixing bowl or another pan (which is what I do.  We get fancy around here).  Fill the first pan several inches deep with water and get it boiling.  Once it is add some 1/4 cup of the chilled pastry cream to the bowl/bigger pan.  Place this bowl/pan over the boiling water and pray the water doesn’t touch the pan.  Heat the cream, whisking constantly, until hot to the touch.  Add the gelatin (which has now become The Blob) and whisk until smooth.  Remove from the heat and add half the remaining cream.  Once it’s mixed add the remaining pastry cream and hand whisk until smooth.

cream plus cream

Using a hand mixer or stand mixer with a whisk attachment whisk the cream until it holds medium-stiff peaks.  Gently, using our skills from earlier, fold the whipped cream into the pastry cream mixture.

blend the raspberriesNow for the fruit.  Take about 1 pint of the washed raspberries and blend them with the sugar and salt until smooth.  Pour it out and set it aside.  We cut up and remove the pits from the peaches and wash the rest of the raspberries.

And now it’s cake time!

Remove the cake from the pan, finally, and carefully cut the top off to make an even level.  Cut it right down the center (longways) to make two even cake layers.  Line a springform cake pan (it can be the same one, just wash it first) with plastic wrap, making sure there’s extra to cover the cake at the end.  Put the bottom layer of cake in so it’s nice and snug.  Spoon on about half of the berry puree and then a thin layer of cream.  Arrange the fruit in a nice pattern (and of course it’s the one photo I forgot to take!) and then add the remaining pastry cream.  Gently add the top layer of cake and press down slightly to remove any air bubbles.  Cover the top layer with the remaining puree, cover it with the wrap, and set it in the fridge to chill for at least 4 hours.  If you pull it out early the cream won’t be set and the whole thing will fall apart. Trust me, I did this…

When it’s almost time (I promise, just a little more whisking) let’s make a nice whipped cream.  Add the cream and sugar to a stand mixer or bowl and whisk until it holds stiff, delicious peaks.  Remove the cake from the fridge and release it from the pan.  Move the cake to a cake stand (if you’re cool) or just remove the plastic wrap and place it on a plate (my method).  Using a spatula, add the whipped cream just like you’re icing a cake.  If you’re feeling like you haven’t done enough feel free to pipe some fancy swirls on to the top.  Decorate with the fruit and enjoy the spoils of your hard-won war!  Congratulations and let them eat cake!

cake decorated

Link’s Fruitcake recipe:

    • Apple or Wildberry
    • Any fruit
    • Tabantha Wheat
    • Cane Sugar

Fruitcake

  • Servings: 1 cake
  • Difficulty: extra hard
  • Print

A Bavarian-style fruitcake with peaches and raspberries


Recipe adapted from Summer Fruit Bavarian by Elizabeth Pruitt from Tartine

Cake

  • 2 1/4 cups flour
  • 2 teaspoons baking powder
  • 1 1/2 cups sugar
  • 3/4 teaspoons salt
  • 1/2 cup vegetable oil
  • 6 large egg yolks
  • 3/4 cup water
  • 2 teaspoons vanilla extract
  • 10 large egg whites
  • 1/4 teaspoon cream of tartar

Pastry

  • 1 cup whole milk
  • 1 teaspoon vanilla
  • 1/8 teaspoon salt
  • 1.5 tablespoons cornstarch
  • 1/4 cup sugar
  • 1 large egg
  • 2 tablespoons butter

Filling

  • 3/4 teaspoon gelatin
  • 1 tablespoon water
  • 1 batch pastry cream
  • 1 cup heavy cream, very cold

Raspberry

  • 1/2 pint raspberries
  • 1/4 cup sugar
  • 1 pinch of salt

Toppings

  • 2 cups heavy cream
  • 1/3-1/2 cup sugar
  • 1/2 pint raspberries
  • 2 large peaches

Cake

  1. Pre-heat the oven to 325°F and grease and flour a 10 inch springform cake pan.
  2. Add the flour, baking powder, 1 1/4 cups of the sugar, and salt in a bowl.  Whisk the flour mixture until well-combined and aerated.  Make a well shape in the mixture and set aside.
  3. In the bowl of a stand mixer or a regular bowl and second bowl separate the egg whites and yolks from 6 eggs.  You can do this by slowly cracking the egg in two, keeping most of the whites and all the yolk in one side of the shell.  Then slowly tip the yolk into the other shell. Continue switching egg shells until the only thing left in the egg shell is the yolk.  The albumen (white part) goes in the stand mixer bowl, the yolk goes in the other bowl. Repeat this process for all 6 eggs.
  4. Add the vegetable oil, water, and extract to your yolk bowl.  Whisk this until smooth and transfer it to your flour mixture.  Whisk the two together until it’s nice and smooth.
  5. In the bowl of the stand mixer add 4 more egg whites to the 6 already separated. Using the whisk attachment, whisk on medium-high until the eggs get frothy.  If you don’t have a stand mixer you can use a hand mixer with a whisk attachment. Once the whites are frothy add the cream of tartar.  Keep whisking until the eggs hold soft peaks.  Add the remaining 1/4 cup of sugar and whisk until the whites hold nice, stiff, shiny peaks.\
  6. Scoop about 1/3 of the whisked whites into the yolk batter and carefully fold in by scooping from the bottom and turning over on the top of the batter.  Gently continue this until it’s well mixed. Add the remaining whites and fold in until just combined.
  7. Pour the batter into the greased pan and bake for 45-55 minutes or until a toothpick or cake tester comes out clean. Allow the cake to cool in the pan.

Pastry

  1. Add the milk into a saucepan with the vanilla and the salt.  Heat over medium-high heat, making sure to stir frequently to prevent burning the milk.
  2. While the milk is warming up whisk the eggs, cornstarch, and sugar in a bowl until smooth.
  3. When the milk is nearly boiling pour about 1/3 of the hot milk into the eggs and whisk constantly.  Once combined quickly add the entire mixture into the saucepan.
  4. Continue to whisk and heat over medium heat until the mixture becomes as thick as lightly whipped cream and is just under the boiling point (i.e. a few bubbles but not actual boiling).
  5. Ladle (or scoop, spoon, spatula, etc…) the cream out of the pan and put it in a shallow bowl.  If you leave the cream in the pan it’ll keep cooking and ruin it.  Allow to cool for about 10 minutes, stirring occasionally to remove some of the heat.
  6. Cut the butter into tablespoons. Once the cream has cooled slightly add the butter 1 tablespoon at a time, whisking until smooth between each addition.
  7. Cover the cream with plastic wrap by pressing the plastic all the way down on the top of the cream to prevent a skin from forming.  Place this in the fridge to chill until needed for the filling.

Filling

  1. Add gelatin to the water and let it sit for several minutes.
  2. While the gelatin is forming make a double boiler by adding several inches of water to a saucepan and heating until lightly boiling.
  3. Once the water is boiling add 1/4 cup of the chilled pastry cream to a second saucepan or stainless steel bowl. Place this bowl/pan over the boiling water and heat the cream, whisking constantly, until hot to the touch.  Add the gelatin and whisk until smooth.  Remove from the heat and whisk in half the remaining cream.  Once it’s mixed add the remaining pastry cream and whisk until smooth.
  4. Using a hand mixer or stand mixer with a whisk attachment, whisk the cream until it holds medium-stiff peaks.
  5. Gently fold the whipped cream into the pastry cream mixture and set aside.
  6. Take about 1/2 pint of washed raspberries and blend them with the sugar and salt until smooth.  Pour it out and set it aside.

Assembly

  1. Wash the remaining raspberries and pit and slice the peaches
  2. Remove the cake from the pan, finally, and carefully cut the top off to make an even level.  Cut it in half to make two even cake layers.
  3. Line a springform cake pan (it can be the same one, just wash it first) with plastic wrap, making sure there’s extra to cover the cake at the end.
  4. Add the bottom layer of cake to the lined pan so it’s nice and snug.
  5. Spoon on about half of the berry puree and then a thin layer of cream.
  6. Arrange the fruit in a nice pattern and then add the remaining pastry cream.
  7. Gently add the top layer of cake and press down slightly to remove any air bubbles.
  8. Cover the top layer of cake with the remaining puree. Cover the cake with the wrap and set it in the fridge to chill for at least 4 hours.
  9. To make the whipped cream topping add the cream and sugar to a stand mixer or bowl and whisk until it holds stiff, delicious peaks.
  10. Remove the cake from the fridge and release it from the pan.  Move the cake to a cake stand or remove the plastic wrap and place it on a plate.
  11. Using a spatula, add the whipped cream just like you’re icing a cake.
  12. Decorate with the fruit and eat cake!

Glazed Veggies

Glazed Veggies

I seriously underestimated the amount of fun and lack of free time I would have on my vacation last week.  I suspected that, since I had to be back to the hotel by 9ish to put my small child down for bed I would have plenty of time to write a blog post in the evening.  What I did not account for was the extremely late nights and loads of fun my family would have staying up till 12 or 1 each night playing card games.  Never underestimate the hilarity of a game like Balderdash at midnight when all the adults are exhausted but cant. stop. playing.

But that serious fun does mean I missed a lot of posts!  I’m sorry!  And after I specifically made two recipes the week before in order to not miss a week…  So thanks for your patience, thanks for the continued support and follows, and let’s get on with the show!

Glazed Veggiestime and difficulty meter

Guys, this recipe is super easy but super delicious.  That makes it a win-win, right?

glazed veggies ingredients

First we chop the veggies and, if you’re feeling bold, chop and mince the fresh herbs.  If you’re not feeling bold, no worries, this recipe is equally awesome for all types.  Just measure out those herbs and get them handy because, frankly, herbs of all sorts look pretty.

Start boiling the tiny, finger height portion of water in a nice, deep pot.  If you haven’t noticed I’m super exact with my measurements… Just check out this post for proof…

Add carrots to boiling water

Once it’s boiling add the carrots and cover with the lid.  We want this to boil for 7-9 minutes, depending on how full your pot is, or until the carrots are “crisp-tender”… Who makes up these cooking terms, anyway?  For those of you who can’t guess based on the name, crisp-tender means the stage after raw but before mushy.  It’s a pretty big ballpark, you can’t really miss it unless you’re being negligent.  And you’d never be negligent with carrots, would you?

Steaming carrots

Remove the carrots, drain the water, and put the pot back on the heat.  Add the honey and butter until they melt together.  Add your herbs and carrots back in and stir until the carrots are coated and the herbs are a little fragrant, about 2 minutes.  Serve warm!

You wanna know how to best use this recipe?  Add it as a side to either the Salt-Grilled Prime Meat or the Salt-Grilled Meat.  That’s what I did and it made for one amazing meal!

close up of carrots

Link’s Glazed Veggies

    • Any Vegetable
    • Courser Bee Honey

Herb Glazed Veggies

  • Servings: 4
  • Difficulty: easy
  • Print

Carrots glazed with honey and fresh herbs


Filling

  • 1 lb carrots
  • 1.5 tablespoons butter
  • 2 tablespoons honey
  • 1-1.5 tablespoons kosher salt
  • 1-2 teaspoons pepper
  • 1.5 tablespoons fresh thyme (or 1-1.5 teaspoon dried thyme)
  • 1.5 tablespoons fresh oregano (or 1-1.5 teaspoon dried oregano)

Directions

  1. If you use fresh herbs wash and then mince the herbs. Use a very sharp blade to mince in order to prevent bruising. Mix both the thyme and sage together and set aside.
  2. Cut all carrots equally and evenly to ensure they all cook the same amount and finish at the same time. If you desire, peel the carrots first.
  3. Boil enough water in a 4 quart saucepan to cover the first joint in your finger.
  4. Add carrots and cover the pot. Allow to boil for 7-9 minutes, or until crisp-tender.
  5. Remove carrots and drain pot.
  6. Add honey and butter and allow to melt together. Add herbs and carrots and stir until carrots are completely glazed and the herbs become fragrant, about 2 minutes.
  7. Serve hot.

Salt-Grilled Meat

Salt-Grilled Meat

I’ve done salt-grilled prime meat but it’s summer, which means I want to grill like crazy.  So while that mood lasts I made salt-grilled meat.  Instead of choosing just a choice cut of steak instead of a prime cut of steak I tried to think about what Link actually eats in the game.  There’s a lot of birds and a lot of wild pigs.  So it came down to chicken and pork.  Now, if any of you grill you know that you never, never, ever grill chicken.  It is incredibly difficult to get cook through without drying out.  However, if you do cook pork, you know that you fell victim to one of the the classic blunder, the most famous of which is never get in a land war with Asia but only slightly less well-known is this, never grill pork unless death is on the line…  But we have a few tricks to help you build up an immunity to grilling pork.  Follow these steps and you should come out the victor.

Salt-Grilled Meatsalt grilled pork meter

If you are going to use fresh herbs first wash and then mince the herbs.  You want to make sure you have a really sharp blade to mince greens.  If you don’t, instead of cutting they tend to bruise.  Mix both the thyme and sage together and set aside.

The most  important thing is the very next step.  If you skip this step we may as well quit now…  We have to tenderize the meat as much as possible so the pork doesn’t dry out while we grill.  It’s called a brine, bro.

slicing the pork fat

The pork you purchase should be at least 1.5 inches thick.  Any thinner and it will cook too quickly.  Take your pork loin out of the fridge.  Pat each piece dry.  Now we gently slice the fat at 1 inch intervals.  You want to slice the fat but do not slice the meat.  If you have a thick piece of fat along the side slice about 1/4 inch in.  If you have a thin strip of fat cut all the way through but do not cut the meat.


seasoning the pork

Brush or rub the pork on both sides with oil, preferably olive or avocado.  Then rub the pork generously with salt, pepper and the herbs.  Now we let them sit for at least 30 minutes.  Don’t get impatient.  Remember, 30 minutes is the minimum for how long we want to brine.  Closer to an hour and the pork will be even more tender and juicy.

Since not everyone has an outdoor grill I decided to make this using our stove-top grill.  Heat on medium high when the pork is nearly ready to cook.  When the grill is hot lay the pork down away from you.  Allow to sear and cook for 8ish minutes.  Along the side you’ll see how far up the pork is cooking.  When you can see that the cook of the pork is nearly to the middle but not quite (maybe 1/3 of the way up) render the fat by holding it fat-side down on the grill for 30 seconds to 1 minute if the fat is thick. When that’s done flip it over and cook on the other side.  It should be nicely and beautifully browned.

lay the pork on the grill

Cook for about 8ish minutes on this side as well.  This is where you have to start using your judgement.  It should be mostly cooked.  You have a 10 minute minimum rest time so you want the pork to be cooked medium so it can finish up while it’s resting.  This means pulling it off when it reaches an internal temperature of 135F.  You want the final temperature to be 145F.  If it’s not quite ready flip over and cook for a minute or two, then flip again and cook for a minute or two.  This will prevent it from over cooking on one side and still cook through.

grilling pork

Take the pork off the grill and place on a plate to rest.  Cover with foil and let it sit for about 10-12 minutes so the juices can equalize.  If you try and skip this step it’ll be a little tough and the juices will all run out.


pork close-up

Uncover and serve with whatever you’d like!  If you want to wait till next week’s recipe this pairs really well with that!

Link’s Salt-Grilled Meat

    • Raw Meat or Raw Bird Drumstick
    • Rock Salt

Salt-Grilled Pork

  • Servings: 4
  • Difficulty: moderate
  • Print

Salt-grilled pork with thyme and sage


Filling

  • 4 pork loin, 1.5 inch thick
  • 1.5-2 tablespoons oil
  • 1-1.5 tablespoons kosher salt
  • 1-2 teaspoons pepper
  • 1.5 tablespoons fresh thyme (or 1-1.5 teaspoon dried thyme)
  • 1.5 tablespoons fresh sage (or 1-1.5 teaspoon dried sage)

Directions

  1. If you use fresh herbs wash and then mince the herbs. Use a very sharp blade to mince in order to prevent bruising. Mix both the thyme and sage together and set aside.
  2. Take your pork loin out of the fridge and pat each piece dry.
  3. At 1 inch intervals gently slice the fat but do not cut the meat.  If you have a thick piece of fat along the side slice about 1/4 inch in.
  4. Brush or rub the pork on both sides with oil, preferably olive or avocado. Rub the pork generously with salt, pepper and the herbs.
  5. Allow the pork to sit for at least 30 minutes. If you choose to brine for longer start them in the fridge and finish the last 30 minutes out of the fridge.
  6. Heat your grill on medium high when the pork is nearly ready to cook.  When the grill is hot lay the pork down away from you.  Allow to sear and cook for 8ish minutes.  Along the side you’ll see how far up the pork is cooking.  When you can see that the cook of the pork is nearly to the middle but not quite (maybe 1/3 of the way up) turn it and render the fat for each chop.
  7. Flip the loin and cook on the other side for another 8ish minutes.
  8. At this point your chop should be mostly cooked.  You have a 10 minute minimum rest time so you want the pork to be cooked medium so it can finish up while it’s resting.  This means pulling it off when it reaches an internal temperature of 135F.  You want the final temperature to be 145F. If it’s ready remove from the grill and place onto a plate.
  9. If your pork isn’t quite ready flip it over and cook for a minute or two, then flip again and cook for a minute or two.  This will prevent it from over cooking on one side and still cook through.
  10. Take the pork off the grill and place on a plate to rest.  Cover with foil and let it sit for about 10-12 minutes so the juices can equalize. Uncover and serve!

Fish Pie

Fish Pie

Guys- I’m sorry about the whole “no post thing” yesterday.  I’m currently preparing for a vacation on top of several fires at work and I completely forgot it was Tuesday…

Link sure has some serious pastry and cooking skills.  This recipe, while not exactly difficult, was a bit strange.  I don’t know about you guys, but I’ve never had fish pot pie before.  I’ve never had fish anything pie before.  And while I learned that a lot of people make seafood pie, hardly anyone uses fish – it’s typically crab, shrimp, or a combination of both.  And if they do make fish pie, it’s made with a puff pastry crust, which isn’t quite as malleable and shape-able as shortcrust.  But, from past general experience and a whole lotta luck, I bring you fish pie.

Fish Piefish pie difficulty and time meter

This recipe gets a involved kinda fast.  It feels like it starts off easy and then all of a sudden food is ready to be turned, you weren’t paying attention to correct cooking order and you’re dirtying extra pans just to make it all work, your crust starts to get too warm and difficult to roll out, and children start crying.  At least, mine did!  But you got this – because we are going to do this together.

Fish Pie ingredients

First, in order to make things easier in the future, put a large cookie sheet in the fridge.  Having something cold to put your crust shapes on while you roll everything else out will make sure they stay nice and flaky!  Then we start with the filling.

all the veggies on a plateDice carrots and onion and get those peas thawed.  You can do this by either microwaving for a minute or simply running them under water.  The peas don’t need to be cooked, or even warm, since they will go through a few more heat steps before you eat them!  Heat your pan on medium and then add your oil.  Add your onions and saute (a fancy word for cooking in a minimal amount of fat over relatively high heat) until slightly tender and they turn translucent.  Add your carrots and cook for a few minutes or until the carrots are tender.  Add the peas next and cook until warm and mixed thoroughly.  Remove your veggies from the pan to a plate or bowl and put your pan back on the heat.

poaching white fish in milk

Make sure your fish is thawed properly if it was frozen and, for the first time ever, we don’t need to warm it up to room temp or even pat it down!  Add all your milk, your fish, and half the thyme, oregano, and dill to the same pan you cooked your vegetables in.  Keep the heat on medium and allow to come to a boil.  Once it’s boiling drop the heat a bit so it simmers.  Simmer your fish for 2-3 more minutes on this side and then flip them and simmer for an additional 3 minutes.  You don’t want to overcook it or the fish will get rubbery and gross in the pie.  Remove the fish to a plate, and, if you did it right, it’ll be flaky and beautiful and still a bit glistening on the inside.  Break the fish up on the plate into bite size pieces.

Now we start the roux.  Roux can be seriously hard, especially if you’ve never done it before.  I became really good at it when I was determined to make homemade mac and cheese.  It took me a long time to get it right and I had to throw out a lot of batches before I really nailed it down.  Here are my tips for a perfect roux:

Melt your butter in a heavy-bottomed saucepan over medium heat.  You could probably use a regular saucepan, but I always use my enamel dutch oven since it keeps the heat nice and even.  Wait until the butter is completely melted and bubbly.  Once it is, whisk in half the flour.  This is important!  If you try and do it all at once it probably won’t melt back down.  Once all the flour is incorporated and the mixture starts to melt and become a bit liquidy again add the remaining flour.  Whisk is continually until it starts to melt again.  At this point start timing – you’ll want to whisk continually for at least 2 minutes or until you reach the blond stage of a roux (a little darker than when you added it. you want all the flour taste to be gone!).  Once the butter/flour mixture is melty and blond start slowly adding the milk that you left in the pan.  Add about half the milk – the flour/butter may ball up on itself but just keep whisking.  Just keep whisking, just keep whisking, just keep whisking, whisking, whisking…  It’ll sort itself out!  Whisk until the mixture is homogeneous and slightly thick.  Add the remaining milk and repeat.  If the mixture is too thick you may have added too much flour.  Add regular milk until it reaches a nice, gravy-like consistency.

If you are unlucky and screw up your roux this is how you’ll know:

  • The flour and butter never reach that nice, melty stage after any flour addition
  • The flour/butter balls up when you add the milk and never mixes properly.

Don’t worry!  If one of these things happen just throw it out and start again.  Especially the first one – you can sometimes come back with even more vigorous whisking from the second but it’s very difficult to fix the first.

add veggies and fish to sauce

Once you have nice sauce add veggies, the remaining spices, and the fish.  Stir until combined, adjust spices for taste, and remove from the heat.  This we will set aside until the crust is ready!

Phew – all done with step one.  Now on to step two… which is just as long and just as rough.

Start by adding ice cubes to a cup or two of water.  You want the water to be as cold as possible!  Add all the flour and salt for the shortcrust (which, for those of you who are normal people, is pie crust) to a large bowl and whisk to mix.  Use butter flavored shortening (for a better flavor) and cut it into large chunks.  Mix in the shortening, using your hands, by rubbing the shortening into the flour until it’s combined into a nice, crumbly texture with some pea-sized clumps.

From this point forward you’ll want to handle your crust as little as possible.  The more you fiddle with it the tougher and denser the crust will be.  And we want a light, flaky crust because that’s the delicious way!  Slowly add the water 2 tablespoons at a time and combine it with the flour mixture.  I mix by hand because I have a better grasp on how the dough is actually doing.  Only add water until the mixture is just combined with some flour mixture not perfectly mixed in.  Too much water and you’ll be left with a tough, dense crust.  Take your cookie sheet out of the fridge and lightly flour a surface.  Take about 1/4 of the dough, mash it into a ball, and roll it out.  You’ll want it to be nice and thin, at least 1/8-1/4 inch, or it won’t cook evenly and your distribution of crust to filling will be weird.

fish template on crust
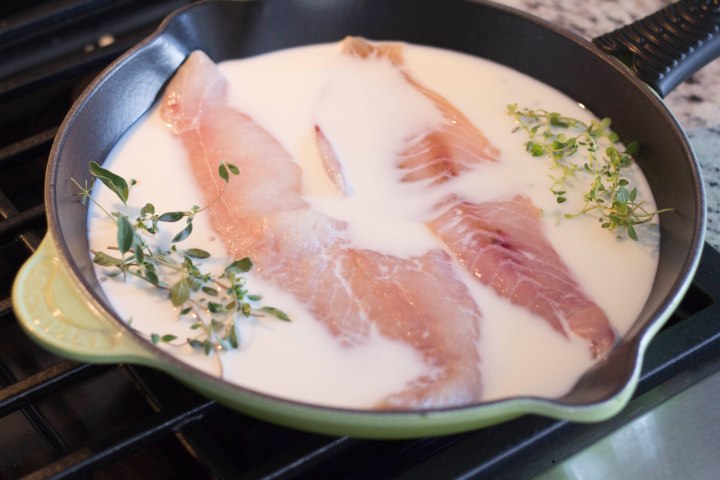
At this point I took a knife and, using a template I made before I started, cut out the base of the fish.  If your rolled out piece isn’t big enough just tack on more from the bowl and roll it out with the piece you’re working with to make it bigger.  Place this on the cookie sheet, gather up the scraps and lay them to the side, and repeat for another 1/4 of the dough.  Repeat two more times until you have 4 base pieces, which will be enough for two pies.  Take all the scraps, mash them into a ball, and roll them out together.  From this there should be enough, if you angle properly, to cut out all your designs perfectly.  Lay them to the side (or leave them where they’re at).

filled pie shapes

Fill two of the fish shapes to within 1/2 inch of the edge – don’t fill them too high and don’t fill that gap or your pie won’t close properly and it’ll leak.  Wet the edges with water (I use my finger because I’m super fancy), place the other fish shape on top, and press down along the edges.  Crimp each edge with a fork to help seal the dough.  Repeat for the second pie.  Wet the back of each of the designs and place it down on the fish shape where you’d like it.  Using a fork, poke a few holes in the top crust, ensuring it pokes all the way through to the center.  This will help the steam escape and keep your pie from exploding!  Beat and egg and brush the tops of each pie with it.  Place in the oven and bake for 40 or so minutes until the crust is golden brown!

fish pie

If you want my honest opinion this pie #1) tastes way better with tartar sauce smothered on top, and #2) is more work than it’s worth.  Unless you want to make something extra special and pretty I’d just cover a pie dish with your shortcrust, add the filling, cover the top, seal, and bake that way!  It’ll be much easier!  But this way definitely turned into a show-stopper for looks!

Link’s Salmon Meunière

    • Tabantha Wheat
    • Goat Butter
    • Rock Salt
    • Any Seafood

Fish Pie

  • Servings: 2 large pies
  • Difficulty: moderately difficult
  • Print

White fish pot pie with vegetables


Filling

  • 3/4 lb white fish of any kind
  • 2 cups milk
  • 1-2 teaspoons pepper
  • 1.5 tsp thyme
  • 1 tsp oregano
  • 1/2-1 tsp dill
  • 2-3 tsp salt
  • 1/2 cup carrots, diced
  • 1/2 cup yellow onion, diced
  • 1/2 cup peas, thawed
  • 1 tablespoon unsalted butter
  • 3 tablespoons flour
  • 2 tablespoons oil

Shortcrust

  • 3 cups flour
  • 1 cup butter flavored shortening
  • 4-9 tablespoons ice water
  • 1/2 tsp salt
  • 1 egg, beaten, for egg wash

Directions

  1. Put a large cookie sheet in the fridge or freezer.
  2. Dice the carrots and onion.
  3. Thaw the peas by microwaving for 1 minute or running them under water for 1 minute.
  4. Heat the pan on medium. Add the oil and onion and saute until slightly tender and translucent. Add the carrots and cook for 3-5 minutes or until tender. Add the peas and continue cooking until warm and mixed thoroughly.
  5. Remove your veggies from the pan to a plate or bowl and put your pan back on the heat.
  6. Add all your milk, your fish, and half the thyme and oregano to the same pan you cooked your vegetables in.  Keep the heat on medium and allow to come to a boil.  Once boiling, drop the heat to a simmer.  Simmer your fish for 2-3 minutes on this side. Flip the fish and simmer for an additional 3 minutes.
  7. Remove the pan from the heat, leaving the milk in the pan, and place the fish on a plate and break it into small pieces.
  8. Melt butter in a heavy-bottomed saucepan over medium heat. When the butter is completely melted and bubbly whisk in half the flour. Once all the flour is incorporated and the mixture starts to melt and become a bit liquidy again add the remaining flour.  Whisk continually until it starts to melt again. Continue whisking for about 2 minutes or until you reach the blond stage of a roux (a little darker than when you added it but not brown).
  9. Once the butter/flour mixture is melty and blond start slowly add half the milk from the pan.  Whisk until the mixture is homogeneous and slightly thick.
  10. The flour/butter may ball up on itself but just keep whisking.  Add the remaining milk and repeat.  If the mixture is too thick you may need to add an additional few tablespoons of milk. Whisk until the mixture reaches a nice, gravy-like consistency.
  11. Add the veggies, remaining spices, and fish to the sauce and stir until combined. Adjust spices for taste and remove from the heat.
  12. Add several ice cubes to a cup of water and set aside.
  13. Add all the flour and salt for the shortcrust to a large bowl and whisk to mix.
  14. Cut the shortening into large cubes. Add it to the flour and, using your hands, mix them together by rubbing the shortening into the flour until it’s combined into a nice, crumbly texture with some pea-sized clumps.
  15. Make a small well in the center of the flour mixture and slowly add the water 2 tablespoons at a time. Using your hand mix the water and flour together until combined. Continue adding water until the mixture is just combined but not perfectly mixed in. Don’t add too much water and don’t overmix or the crust will be dense and chewy.
  16. Take your cookie sheet out of the fridge and lightly flour a surface.  Take about 1/4 of the dough, mash it into a ball, and roll it out to 1/8-1/4 inch thin. Using a template (or freehanding it) cut the base of the fish out with a knife. If your rolled out piece isn’t big enough just tack on some more from the bowl and roll it out with the piece you’re working with to make it bigger.
  17. Place this on the cookie sheet, gather up the scraps and lay them to the side.
  18. Repeat step 14 3 more times to make 4 fish shapes.
  19. Take all the scraps, mash them into a ball, and roll them out together.  From this there should be enough, if you angle properly, to cut out all your designs perfectly.  Lay them to the side (or leave them where they’re at).
  20. Fill two of the fish shapes to within 1/2 inch of the edge – don’t fill them too high and don’t go in that 1/2 gap or your pie won’t close properly. Wet the edges of the pastry with water, place the other fish shape on top, and press down along the edges.  Crimp each edge with a fork to help seal the dough.
  21. Repeat for the second pie.
  22. Wet the back of each of the designs and place it down on the fish shape where you’d like it.  Using a fork, poke a few holes in the top crust, making sure it pokes all the way through to the center.
  23. Beat and egg and brush the tops of each pie with it.
  24. Bake for 40 minutes at 425°F. Allow to cool for several minutes before serving.

Salmon Meunière

Salmon Meunière

I learned a lot while making this recipe.  Here are my top three – and then on to the food…

First: it is very important to choose your butcher carefully when you get seafood.  I mistakenly used a grocery store butcher that I usually trust.  Apparently the betray you when it comes to seafood.  The salmon wasn’t scaled properly and still had all it’s pin bones.  And, not only that, but the cut was uneven.  I wound up slicing off a decent amount of fish that wasn’t really usable to get even portion sizes!  I was pretty disappointed.  So make sure you choose a reputable seller, double check that they scaled and removed the bones prior to purchasing, and then hope you have a very sharp knife if they don’t cut evenly!

deboning a salmon filetIf you do get unlucky enough to have to debone the fish yourself it’s really easy.  Just annoying.  Wash a pair of pliers with hot water and soap.  Carefully push the flesh of the salmon in and grasp the tip of the pin bone.  Pull it as carefully as you can to prevent the flesh from ripping.  It’s not bad if it does, it just isn’t as pretty anymore.  Make sure you get all the bones – you’ll be able to feel them if you gently run your hand down the length of the fish.  If you are doubly unlucky and they didn’t remove all the scales just flip the salmon over to skin side up.  Run the blade of the knife down the fish and watch all the clear, inedible scales pop off.  But you can always skip both these steps by choosing a better store!  Which I will do for all my fish from now on.

Second: experimenting with a very basic, traditional recipe turns out sub-par results.  I tried really hard to fiddle with this this recipe a bit and make it my own.  Turns out this recipe is so straight forward it doesn’t do well with a lot of tweaking.  I tried the sauce twice before I finally gave up and realized sometimes the old school way is the best way.

Third: no matter how many times I try it I really, really hate salmon.  It’s very fishy, even fairly fresh, and fatty.  The flavor is just… not my favorite.  If I’m going to spend this much on a protein you can bet it’ll be something I actually want to eat.  Unlucky for me, there are still a handful of salmon recipes left in the official Breath of the Wild guide…

Salmon Meunièredifficulty and time meter

salmon meuniere ingredients

You’ll find a lot of themes in these recipes.  One of them is to allow the meat to warm up to room temperature and to pat it dry before seasoning.  I explain why in my Meat and Rice Bowl recipe.  And that’s exactly how we are going to start salmon meunière – take the salmon out of the fridge about 30 minutes before cooking and allow to warm up to room temperature.

While it’s warming up wash and pull the leaves off the parsley.  It’s pretty easy, actually.  Just grab the stems and line up the leaves, place the knife edge down right at the base of the leaves, and gently but firmly pull the parsley through the knife blade.  It’ll get most of the stems off and leave you with a nice pile of leaves.  And no, it’s not one of the piles that hides a korok seed.  Sorry.  Roughly chop the parsley into pieces, they don’t have to be perfect.  You’ll want a small handful of parsley.  If you’re using fresh lemon cut it in half and squeeze the juice of one of them.  You only need 3/4 tablespoon so no need to go crazy. Smash the garlic by placing the flat of a knife blade against the garlic clove and smash your hand into the blade.  Never do this on the edge of the knife and never smash the knife down – both these could result in some serious cuts and I refuse to be held responsible for that.  When the garlic is smashed peel off the skin.  Get the butter cut and ready to go and play a few rounds of Splatoon 2 until the salmon is ready.

dreding salmon in flour
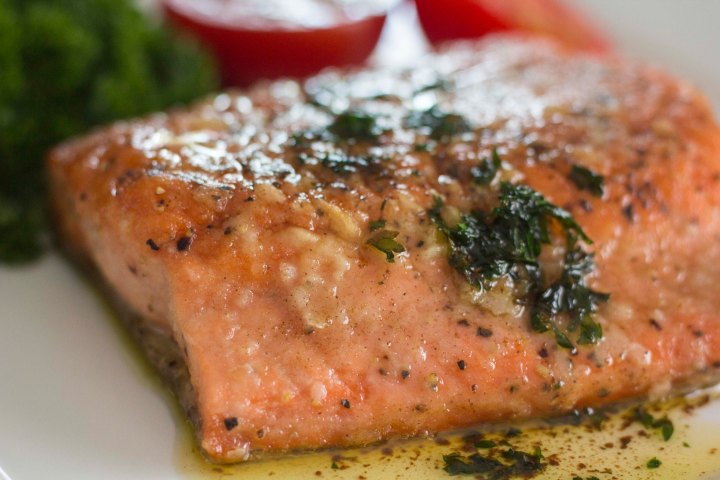
When you’re ready to cook pat the salmon dry and season with kosher salt and pepper.  Turn your burner on to medium, add your oil, and get your pan nice and hot.  When the pan is hot add the butter.  Be really careful, the butter will splatter and pop as the water cooks out of it!  We add the salmon when the butter stops popping so when the mixture starts to calm down spread the flour out on a plate and dip and pat the salmon into the flour to completely coat it.  This is called dredging and it’s a pretty awesome technique to get a nice, crispy, almost fried skin.  Make sure you don’t dredge too early or the flour just gets soaked into the fish and it doesn’t fry quite as well.

pan fried salmon filet

Add the fish to the pan, skin down, laying it away from you to prevent any oil splatters.  Let it cook for 3-4 minutes on this side then flip the fish and allow it to cook for 3 more minutes.  Take it out of the pan, place it on a plate, and cover with foil.  You’ll want to do this next part quickly – the longer the fish sits under that foil the less crispy it gets!

Using a few paper towels rolled in a ball and a heavy duty oven mitt pour out the oil into a heat safe container and wipe the inside of the pan.  We don’t want to keep any of the old mixture since it’s likely to burn if it cooks too long.

melting butterbrowned butterAdd the new butter and smashed garlic and wait for it to melt and cook down.  It will take 2-3 minutes to turn brown and nutty and delicious.  Remove the pan from the heat (don’t follow my photo example and just turn off the heat.  It’s not good enough!).  Add the lemon and parsley and stir to combine.  Again, use caution, this mixture may splatter as well.  Uncover the fish, pour the sauce over, and serve immediately.  PS- if your pan is still really hot your parsley may brown pretty quickly and it’ll make your sauce look a bit burned.  I promise, if you use this recipe it won’t burn and will still taste good!

salmon meuniere close up

Link’s Salmon Meunière

    • Tabantha Wheat
    • Goat Butter
    • Hearty Salmon

Salmon Meunière

  • Servings: 2
  • Difficulty: moderately easy
  • Print

Salmon drizzled with a meunière butter lemon sauce


Salmon

  • 2 8 oz portions salmon
  • 1-2 tablespoons kosher salt
  • 1-2 teaspoons pepper
  • 2 tablespoons oil
  • 1 tablespoon unsalted butter
  • 1/4 cup flour

Sauce

  • 3/4 tablespoon lemon juice (juice from half a small lemon)
  • 5 tablespoons unsalted butter
  • 2-3 tablespoons chopped parsley
  • 1 large garlic clove, smashed

Directions

  1. Warm the salmon to room temperature.
  2. Using the blade of your knife pull the leaves off the parsley by gently but firmly running the blade along the stems. Roughly chop into small pieces.
  3. Cut the lemon and juice one half, making sure not to get any seeds in the juice.
  4. Using the flat of a knife blade smash the garlic and remove the skin.
  5. Pat the salmon dry and season with kosher salt and pepper.
  6. Heat a pan over medium with the oil.
  7. When the oil is hot add the butter. Be careful, as this will splatter and pop until all the water is cooked out of the butter.
  8. When the butter mixture starts to calm down add the flour to a plate and dredge the salmon by patting it into the flour. Immediately add the salmon to the pan, skin down, by laying it away from you.
  9. Cook the salmon for 3-4 minutes, turn, and cook for another 3 minutes.
  10. Remove the salmon and cover with foil.
  11. Acting quickly pour the remaining oil mixture out of the pan and wipe out with paper towels. Be careful not to burn yourself and use proper heat proof equipment.
  12. Add the 5 tablespoons of butter and garlic to the pan and allow to melt and brown, about 2-3 minutes.
  13. Remove the pan from the heat and add the lemon and parsley. Again, use caution when you add the lemon because it may splatter and pop.
  14. Immediately pour over the salmon filets and serve.