
It’s the second of two Thanksgiving posts and the day is almost here, which means this recipe is just in time! So open this up, thaw your turkey (properly), and let’s make a turkey.
Raise of hands, how many of you have ever made a turkey before? Really? That few? Well don’t be intimidated. I promise it’s a lot easier than it sounds or looks. Quite frankly, it’s just like any other salt-grilled meat recipe we’ve already done, with a few adjustments, of course. And you’ll love the finished product. It’ll be picture perfect and deliciously juicy for all your guests/family!
Salt-Grilled Gourmet Meat
Now, you should have started thawing your turkey by now following the instructions provided with your turkey (they almost always come with instructions). It can take up to 4 days to thaw a turkey (depending on the size) in the fridge. If you need to speed up the process you can fill a sink with cold water and place the turkey in. Continue checking the water to make sure it doesn’t get too warm. Drain the water every 1/2 hour and refill with cold water again. Do this for roughly 8 hours. It’s easier to thaw in the fridge but in a pinch, this other way will work. Just whatever you do, please thaw it correctly! I don’t want to be responsible for any food poisoning here!

We start with what’s called a brine. Now, there are several ways to brine a turkey but I’ve chosen the easiest of them all. You have enough to do on Thanksgiving – no reason to make it harder. The brine with a turkey is the same principle as with pork – it tenderizes the meat and allows the juices to stay inside instead of the bird getting dry and gross. It also negates, with an extra step, the need for basting! That’s two time savers here people. We’re on a roll!
You’re going to need to remove the bird from the packaging and take out any extras they throw in for the really hard-core people a.k.a the giblets and the neck. Open the bottom of the turkey and they should be in there. It’ll be a long neck and a packet of weird mushy stuff. If the packet isn’t in there check where the neck is supposed to be attached. Sometimes they put it up there to be sneaky.


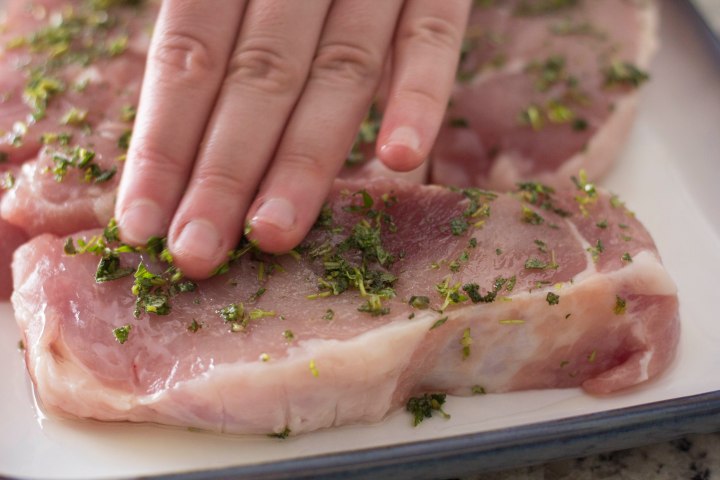
Once everything gross is out pat the turkey dry with paper towels and coat it with kosher salt and pepper. Be generous, it’ll help! Allow the turkey to sit, with the salt and pepper, at room temperature for 1 hour to take off the chill. The skin will be crispy and delicious if you do it that way.


While the turkey is warming up wash the sage and oregano or thyme, slice a medium onion into quarters, and remove the skin from 6 garlic cloves. Place these inside your roasting pan, or if you don’t have excess cash floating around to buy a new pan for one meal a year (like me) a normal 11X15 cake pan. If you want to get extra easy buy one of those disposable cake pans, like my mom does, and just throw it away when you’re done. Whatever will fit your turkey comfortably will work! Line the bottom of your pan with these ingredients, putting the onions in the corners.


 The next step is almost as important as the brine. It’s also, for those of you who are a little squeamish, the grossest part of the entire affair. Rub the room temperature butter all over your hands. Then rub the entire turkey with those hands, pausing to get more butter if needed. Make sure the entire bird in covered in the butter to make sure there’s an even crisp to the skin. A safety note, just because I’m a microbiologist, please don’t reuse any butter you may have touched with raw poultry again. Just throw it out and save yourself a horrible bought of food poisoning.
Preheat the oven to 425°F. It’s very important you don’t go much higher than that because most glassware will shatter if you do and that would ruin your entire night. If you’re using metal feel free to go up to 450°F. Put your turkey in the pan and put your pan in the oven on the middle shelf. Close the door and walk away for 45 minutes. Plenty of time to get started on literally 1 million things to be cooked for dinner.

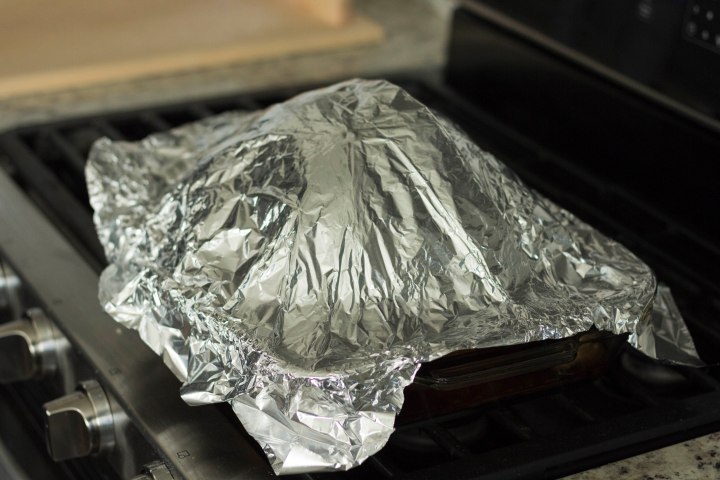
Once the turkey has been roasting for 45 minutes take some tinfoil and cover the breast of the turkey, molding it to keep it in place. It’ll help trap in the moisture and make for a much more juicy bird! If you need to make a piece of tinfoil bigger to cover the whole turkey simply fold over the edges of the foil together and press down to seal. It’ll work. Trust me.


Lower the temperature of the oven to 350°F and bake for the remainder of the time. Here’s a handy, dandy chart for approximate times if you need one. It’s all based on pounds, really, so make sure you know the poundage of your bird beforehand.
9-11 pounds: 2 1/2 hours
12-14 pounds: 3 hours
15-17 pounds: 3 1/2 hours
18-20 pounds: 4 hours
21-23 pounds: 4 1/2 hours
24+ pounds: 5+ hours
 To check if the turkey is done you’ll need an instant read meat thermometer. You can buy them in any grocery store this time of year for about $5.00. It’s worth it. You’ll use it again (maybe…). When the time is up stick the thermometer in the thickest part of the thigh, making sure you aren’t touching any bones. Allow the thermometer to read. Your turkey temperature should be 165°F. If it isn’t, your turkey needs more time to cook. Mine took an extra 20 minutes to get up to temperature. If you need to check again make sure you check in a different spot than the first time! If you want to be extra careful, check in the breast under the wing, as well. The temperature is much more important than the color. Any turkey could have a pink coloring naturally, but if it got up to 165°F or higher, you’ll be just fine!
Remove the turkey from the oven and cover loosely with foil for at least 30 minutes to allow the turkey to rest. This equalizes the juices inside so you have perfectly moist, delicious meat.
Remove the turkey from the pan and start slicing! There are several excellent videos if you google “how to slice a turkey”. I think you’ll be alright!
While someone is slicing you can make the gravy. Technically this isn’t part of the recipe but who eats Thanksgiving turkey without gravy? Remove all the herbs, onions, and garlic, and pour all the drippings into a pot and add all the chicken or turkey stock. Heat the liquid to a boil and, while you’re waiting, make the cornstarch mixture. You could use a roux if you feel like it, but that takes longer and we are all about making Thanksgiving easy here! Mix the cold water and cornstarch together until dissolved. Once the liquid is boiling slowly add the cornstarch slurry to the drippings. Stir and continue to heat until thickened. If you need it thicker, just add more cornstarch liquid.


Serve with all the Thanksgiving trimmings and have an incredible time!

Link’s Salt-Grilled Meat
-
- Raw Gourmet Meat or Raw Whole Bird
- Rock Salt
Salt-Brined Roast Turkey
Turkey
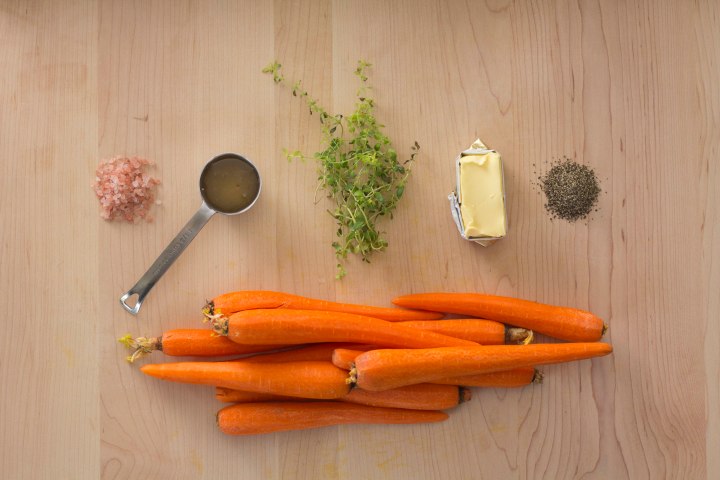
- 1 Turkey
- 1/2 tsp kosher salt per pound of turkey
- 1/4 tsp pepper per pound of turkey
- 1/2-1 cup butter, room temperature, based on turkey size
- 7 sprigs fresh oregano or thyme
- 5 sprigs fresh sage leaves
- 6 garlic cloves
- 1 medium onion
- 1 instant read meat thermometer
Gravy
- 1 pan turkey drippings
- 3 cups chicken or turkey stock
- 1/4 cup cold water
- 3 heaping spoonfuls cornstarch
Directions
1. Thaw your turkey according to the packing instructions, generally refrigerated for a few days. If you need a quicker thaw, fill a sink with cold water and place the turkey in. Drain the water every 1/2 hour and refill with cold water. Continue this process for 8 hours until the turkey is thawed.
2. Remove the bird from the packaging and take out the neck and giblets. These should be located inside the turkey at either the bottom or the neck holes.
3. Dry the entire turkey with paper towels
4. Coat the turkey in the kosher salt and pepper. Allow the turkey to sit, with the salt and pepper, at room temperature for 1 hour to take off the chill.
5. Wash the sage and oregano or thyme.
6. Slice the onion into quarters.
7. Remove the skin from 6 garlic cloves.
8. Line the outside edges of a glass or metal cake pan large enough to hold your turkey with the aromatics, putting the onions in the corners.
9. Rub the room temperature butter all over your hands, coating them completely.
Then rub the entire turkey with those hands, pausing to get more butter if needed. Make sure the entire bird in covered in the butter. A safety note, if you touch any butter with turkey or turkey-covered hands please throw it away to mitigate the risk of food poisoning.
10. Preheat the oven to 425°F. Put your turkey in the pan and put your pan in the oven on the middle shelf. Close the door and bake for 45 minutes.
11. Once the turkey has been roasting for 45 minutes take some tinfoil and cover the breast of the turkey, molding it to keep it in place. If you need to make a piece of tinfoil bigger to cover the whole turkey simply fold over the edges of the foil together and press down to seal.
12. Lower the temperature of the oven to 350°F and bake for the remainder of the time. Please see the chart in the body of the post for the correct times.
13. Insert the instant read thermometer into the thickest part of the thigh, making sure you aren’t touching any bones. Allow the thermometer to read. Your turkey temperature should be 165°F or higher. If the temperature is not quite high enough, roast the turkey until the temperature reads the correct amount.
14. Remove the turkey from the oven and cover loosely with foil for at least 30 minutes to allow the turkey to rest.
15. Remove the turkey from the pan.
16. To make the gravy remove all herbs, onions, and garlic, and pour all the drippings into a pot. Add the chicken or turkey stock and bring to a boil.
17. Mix the cold water and cornstarch together until dissolved. Once the drippings are boiling slowly add the cornstarch to the drippings, stirring to mix.
18. Stir the gravy and bring it back to a boil. Add more cornstarch and water if a thicker gravy is desired.


 We start with the cake. It’ll take a bit to bake and cool and we can work on other components while it does. So start with flour, baking powder, sugar, and salt in a bowl. Using a hand whisk (yes, I need to specify, we use a lot of whisks in this recipe) blend the flour mixture until well-combined and aerated. Make a well shape in the bottom of the bowl with the flour and set aside.


 When the timer goes off test the cake for doneness (which is totally a word) by inserting a toothpick. It should come out nice and clean. Remove the pan from the oven but leave the cake in it to cool. Let it cool entirely before doing anything with it.


 Now for the fruit. Take about 1 pint of the washed raspberries and blend them with the sugar and salt until smooth. Pour it out and set it aside. We cut up and remove the pits from the peaches and wash the rest of the raspberries.


 Dice carrots and onion and get those peas thawed. You can do this by either microwaving for a minute or simply running them under water. The peas don’t need to be cooked, or even warm, since they will go through a few more heat steps before you eat them! Heat your pan on medium and then add your oil. Add your onions and saute (a fancy word for cooking in a minimal amount of fat over relatively high heat) until slightly tender and they turn translucent. Add your carrots and cook for a few minutes or until the carrots are tender. Add the peas next and cook until warm and mixed thoroughly. Remove your veggies from the pan to a plate or bowl and put your pan back on the heat.


 At this point I took a knife and, using a template I made before I started, cut out the base of the fish. If your rolled out piece isn’t big enough just tack on more from the bowl and roll it out with the piece you’re working with to make it bigger. Place this on the cookie sheet, gather up the scraps and lay them to the side, and repeat for another 1/4 of the dough. Repeat two more times until you have 4 base pieces, which will be enough for two pies. Take all the scraps, mash them into a ball, and roll them out together. From this there should be enough, if you angle properly, to cut out all your designs perfectly. Lay them to the side (or leave them where they’re at).


 If you do get unlucky enough to have to debone the fish yourself it’s really easy. Just annoying. Wash a pair of pliers with hot water and soap. Carefully push the flesh of the salmon in and grasp the tip of the pin bone. Pull it as carefully as you can to prevent the flesh from ripping. It’s not bad if it does, it just isn’t as pretty anymore. Make sure you get all the bones – you’ll be able to feel them if you gently run your hand down the length of the fish. If you are doubly unlucky and they didn’t remove all the scales just flip the salmon over to skin side up. Run the blade of the knife down the fish and watch all the clear, inedible scales pop off. But you can always skip both these steps by choosing a better store! Which I will do for all my fish from now on.


 When you’re ready to cook pat the salmon dry and season with kosher salt and pepper. Turn your burner on to medium, add your oil, and get your pan nice and hot. When the pan is hot add the butter. Be really careful, the butter will splatter and pop as the water cooks out of it! We add the salmon when the butter stops popping so when the mixture starts to calm down spread the flour out on a plate and dip and pat the salmon into the flour to completely coat it. This is called dredging and it’s a pretty awesome technique to get a nice, crispy, almost fried skin. Make sure you don’t dredge too early or the flour just gets soaked into the fish and it doesn’t fry quite as well.


 Add the new butter and smashed garlic and wait for it to melt and cook down. It will take 2-3 minutes to turn brown and nutty and delicious. Remove the pan from the heat (don’t follow my photo example and just turn off the heat. It’s not good enough!). Add the lemon and parsley and stir to combine. Again, use caution, this mixture may splatter as well. Uncover the fish, pour the sauce over, and serve immediately. PS- if your pan is still really hot your parsley may brown pretty quickly and it’ll make your sauce look a bit burned. I promise, if you use this recipe it won’t burn and will still taste good!
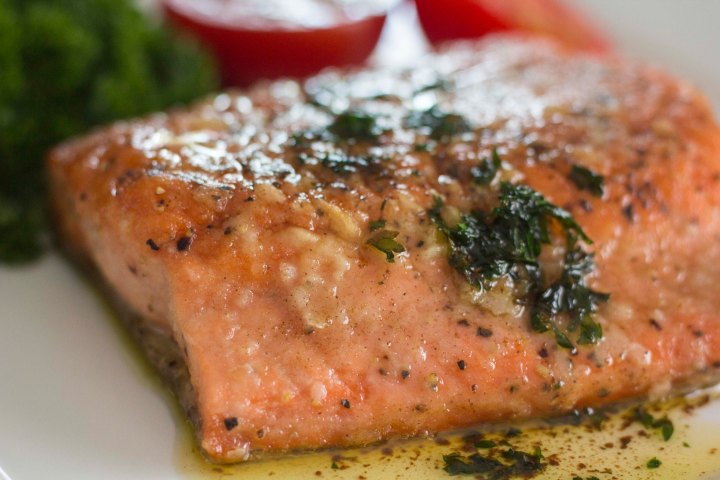


 Now here comes the different part and the reason this isn’t an “easy” recipe. Add all the eggs to a bowl and whip on high, using a whisk or electric mixer fitted with a whisk attachment, until they start to get bubbly. Stop and add the rest of the sugar and all the oil, and continue whisking until the eggs get light in color, start to get fluffy, and can almost double in volume. This will take at least 5 minutes. If you’re lucky enough to have a stand mixer like a KitchenAid you can do this while grating the carrots and save yourself even more time!


 Butter a 10 inch round cake pan, making sure you get all the cracks and crannies. I prefer a springform pan because they are the easiest to get a cake out of. If you don’t use a springform you may have to flour the pan as well as butter it. Just throw in some flour after you grease it, shake it until the butter is covered, and dump out the excess. It’s pretty easy. Add the cake batter and stick it in the oven. The entire bake process is an adventure, like completing a shrine. Depending on the oven, the type of oven, how old your oven is, etc… your baking time will be different from someone else’s. But my oven bake time was about 45 minutes. Yours will be pretty close to this, but just watch starting around 40 minutes. Getting a perfectly domed cake is all about timing. Take the cake out to early (or even check on it too early) and the whole thing will collapse on you. Take the cake out late and it’ll be so dry you’ll regret eating it. So if you open the oven door to check on the cake and the center wobbles a bit close it quick and wait another 5-10 minutes before you even try again. A toothpick inserted into the center will come out clean when it’s ready!


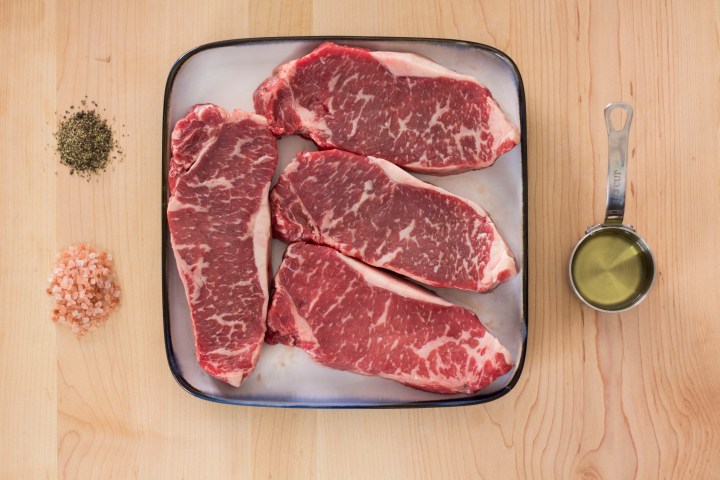


 Once the coals are ashy spread them out along the bottom of the grill until they are evenly distributed. Lay the steaks cross-ways along the grill – you want really pretty sear marks and it provides the best support for your steaks. Cover your grill and allow to cook for 5-7 minutes, depending on the heat of the grill and thickness of the steaks.

