It’s been a while. I know this. I have no apology. But what I do have is this incredible and easy Meat Pie recipe. Trust me, you’ll accidentally eat every single one the second they cool down enough to shove into your mouth. And you won’t even feel bad about it. So in honor of that feeling, let’s get rid of all guilt associated with not posting for a while and just get on with the show!
OH! And as a side note, I finished exploring every. little. section and area of BotW except the final castle. It’s done! And tonight I’m totally finishing the castle. Here’s hoping I find the last few things I’m missing there…
And without further waiting on your end:
Meat Pie
Start by making the pastry dough. This has to chill for at least an hour so it should always be your first step. If you want to make the dough far ahead it can be chilled up to overnight in the fridge before use. So make life, and dinner, a little easier on yourself and make it when you have a spare 10 minutes.
Put some water into a cup and add a cube or two of ice. The colder the water, the better the pastry will turn out. Add the flour to a bowl and cut up the cold (it must be cold, just like the pie crust recipe in Apple Pie) butter into 1-2 tablespoon chunks.


Now let’s rub the cold butter into the flour until it resembles bread crumbs with some pea-sized chunks of butter left. You don’t want it too fine or you won’t get a nice flaky crust! … maybe next time I’ll make a gif of how to do this. I’m just now realizing that would probably be nice…


Now add 2/3 cup water to the dough and mix until it completely comes together and forms a ball. This is a far more forgiving recipe than my pie crust (even though the method is the same) so a little extra handling won’t necessarily hurt it… but I wouldn’t work it too much. You should still see large chunks of butter in your dough.
Split it in half and press into a square shape about an inch thick. Wrap in plastic wrap and refrigerate until you’re ready for it.


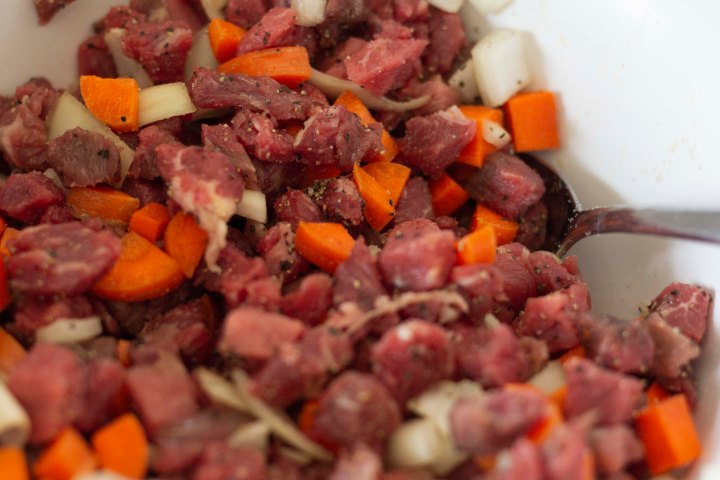
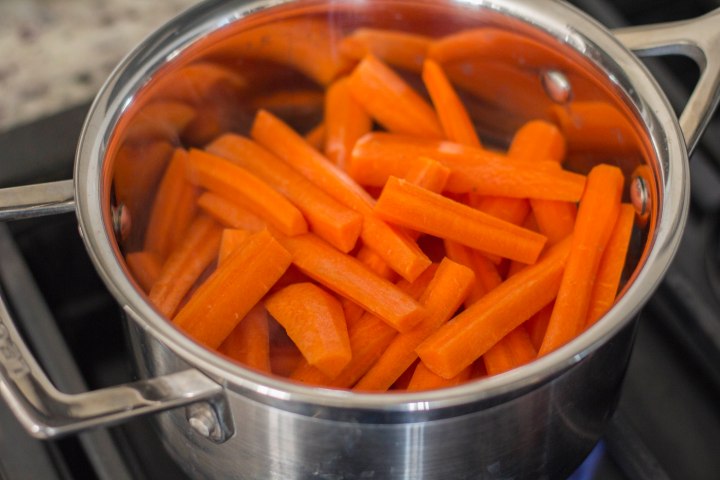
Now, the key to the filling on this meat pie is dicing everything up really small. Like, say, 1/4 inch cubes. This goes for the carrots, the onion, and the roast. Normally with my recipes size doesn’t really matter. But in this case we want everything to cook properly and be able to squish as much as possible in the little pastry cases, so size becomes very important.
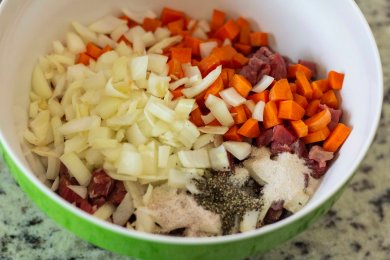
Once they’re all cut up put them together in a bowl and mix with a spoon to combine. Add all the spices and stir until the spices coat everything. I’d start with the smallest amount of spices and then, based on look and smell (please don’t taste it! There’s raw meat in there…) add the rest if you feel like it’s necessary. I, personally, use all the spices. I like my food to have some flavor! Also – yeah, yeah, I know that meat pie doesn’t traditionally have random vegetables thrown in. But I can’t really make something like this, which feels like a full meal, without adding at least one vegetable to it. So it’ll be fine.
Take the dough from the refrigerator and lightly flour a large surface. Place the dough on the surface and roll it out into a large rectangle, about 1/8 inch thick.

Start by rolling in once direction several times until it makes a large square. Then rotate it 90°, add more flour under the dough, and roll it out until it forms your triangle. Repeat with the other piece, making sure both are the same size.
Take the largest round cutter you have (mine happened to be 3.5 inches long) and cut circles into your pastry. Cut the same amount of circles into each pastry rectangle – these will serve as your bottom and your top. If you’re really feeling ambitious you can gather the scraps and roll them out once more for even more pies. I didn’t really feel like doing that so I simply threw the scraps away. If you’re feeling lazy and the idea of wasted scraps horrifies you, simply cut the pastry into an equal amount (and equal sizes) of squares on both pastries and call it good. It’s all about presentation and how much you’re willing to give to it.

Transfer half of the square/circle pastries to a cookie sheet lined with parchment paper or silicone baking sheets. Fill each square/circle with your meat filling. Now, we want to fill to within 1/2 inch of the sides of the pastry case and we want it to be no more than stacked double in the center. That’s very specific, I know, but if you fill it too much the case will either split mid-bake or you’ll be unable to get the top on in the first place!

Next, dip your fingers into water and brush the empty edges of the pastries. Lay the last half of the pastries on top of the first half to make enclosed pies. Gently press the pastries halves together with your fingers and then seal with a fork by pressing into the edges. This will crimp the pastries together and (fingers crossed) hopefully prevent them from leaking. After your pastries are crimped poke 3-4 holes in the top. It helps release the steam to prevent mini explosions in your oven


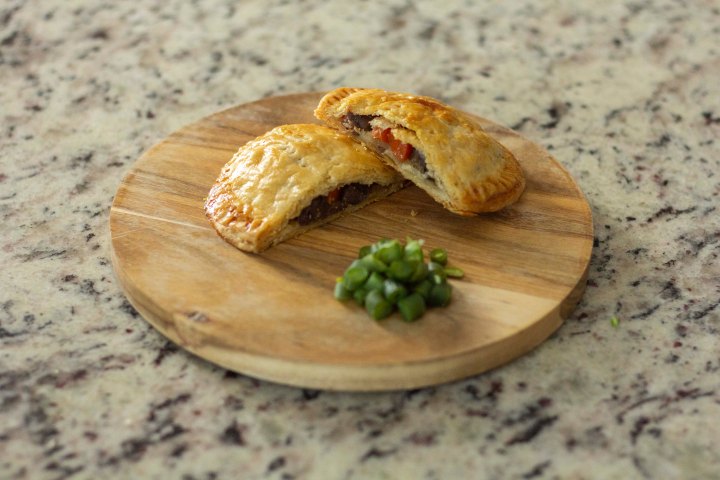
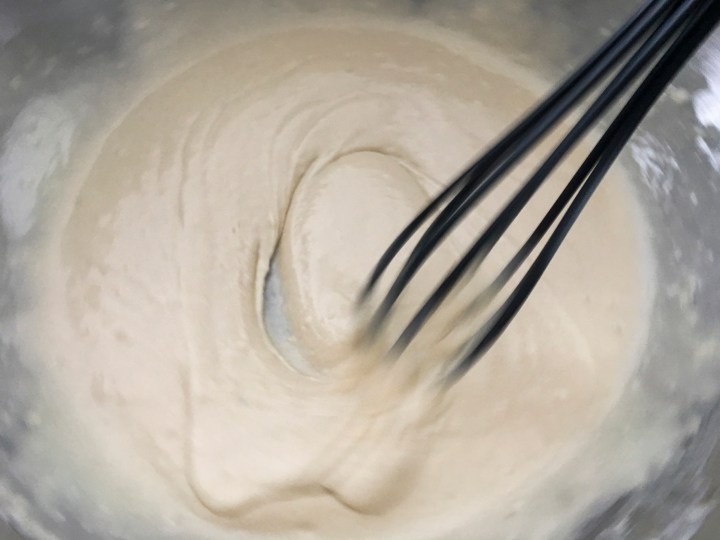
Whisk an egg with a fork and brush the top of the pastries with the beaten egg. This will give you a nice, beautiful, crispy, shiny crust! The best kind, in my opinion! Place in the oven and bake for about 45-60 minutes, or until the pastries are nice and browned and/or and internal temperature has been reached of about 165ish. We can be less specific because we’re using roast and beef instead of poultry.
Remove from the oven and serve warm!
Link’s Meat Pie recipe:
-
-
- Any Meat
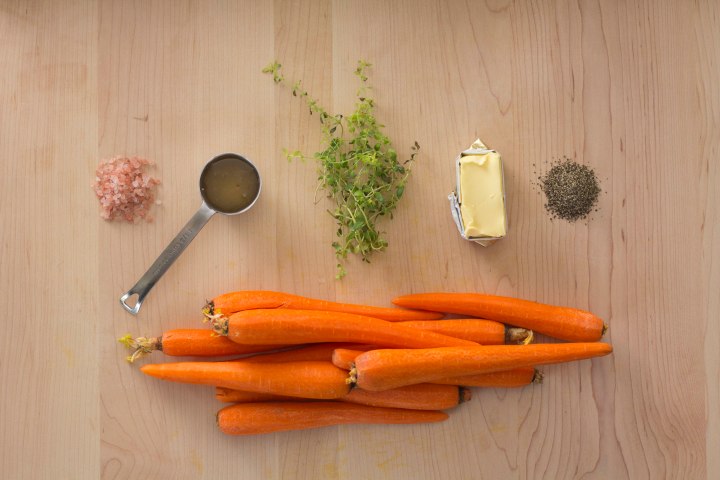
- Goat Butter
- Rock Salt
- Tabantha Wheat
-
Meat Pie
Meat pies with carrots and onion
Pastry
- 3 cups plus 2 tablespoons (455g) all-purpose flour
- 1 cup plus 5 tablespoons (300g) cold butter, cut into tablespoons
- 1 teaspoon salt
- 2/3 cup (150ml) ice cold water
Filling
- 1 pound beef roast
- 2 medium carrots
- 1/4 medium onion
- 2-3 teaspoons salt
- 2-3 teaspoons garlic powder
- 1-2 teaspoons black pepper
Directions
- Pre-heat the oven to 400°F and add some ice to a small cup of water.
- Add the flour and salt to a mixing bowl. Cut the butter into tablespoon-sized pieces. Add the butter to the flour and begin rubbing it between your fingers while adding flour. This will create a breadcrumb-like texture. Make sure you leave some butter pieces as large as peas.
- Add 2/3 cup of your ice water and mix until combined. There should still be chunks of butter visible in the dough.
- Split the dough into two equal pieces, wrap in plastic, and refrigerate for at least an hour but up to overnight.
- Dice the roast, carrots, and onion into small 1/4 inch cubes. Place them in a bowl and mix with a spoon until combined.
- Add the smaller amount of spices and then, based on look and smell add the rest if you feel it’s necessary. I, personally, use all the spices. Stir until thoroughly mixed.
- Take the dough from the refrigerator and lightly flour a large surface. Place the dough on the surface and roll it out into a large rectangle, about 1/8 inch thick.
- Roll the dough by rolling in once direction several times until it makes a large square. Then rotate it 90°, add more flour under the dough, and roll it out until it forms your triangle.
- Repeat with the other piece, making sure both are the same size.
- Using a large round cutter cut circles into your pastry. Repeat on the other half of the pastry dough, ensuring you have the same amount of circles on each side. You may gather the scraps and re-roll the dough to cut more circles if you wish, but only re-roll once to prevent a tough pastry. Or, alternatively, cut your pastry into even squares, ensuring there’s an even number on each half.
- Transfer half of the square/circle pastries to a cookie sheet lined with parchment paper or silicone baking sheets. Fill each square/circle with your meat filling to within 1/2 inch of the sides of the pastry case and no more than stacked double in the center.
- Dip your fingers into water and brush the empty edges of the pastries.
- Lay the last half of the pastries on top of the first half to make enclosed pies. Gently press the pastries halves together with your fingers and then seal with a fork by pressing into the edges. Poke 3-4 holes in the top.
- Whisk an egg with a fork and brush the top of the pastries with the beaten egg. Place in the oven and bake for about 45-60 minutes, or until the pastries are nice and browned and/or and internal temperature has been reached of about 165ish. Serve warm.


 Dice carrots and onion and get those peas thawed. You can do this by either microwaving for a minute or simply running them under water. The peas don’t need to be cooked, or even warm, since they will go through a few more heat steps before you eat them! Heat your pan on medium and then add your oil. Add your onions and saute (a fancy word for cooking in a minimal amount of fat over relatively high heat) until slightly tender and they turn translucent. Add your carrots and cook for a few minutes or until the carrots are tender. Add the peas next and cook until warm and mixed thoroughly. Remove your veggies from the pan to a plate or bowl and put your pan back on the heat.
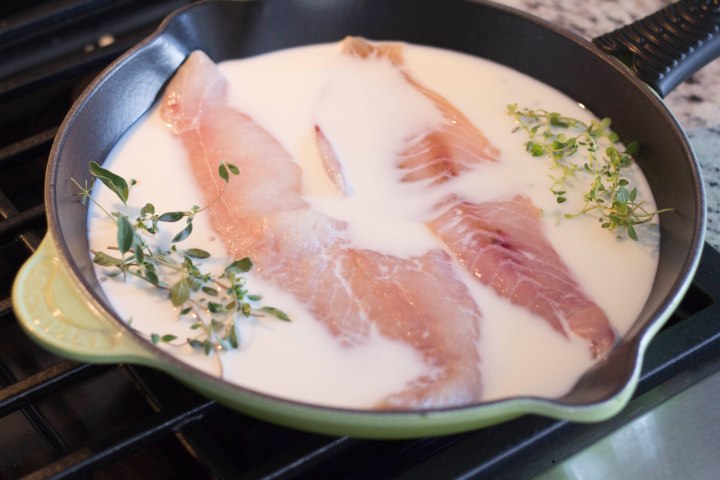


 At this point I took a knife and, using a template I made before I started, cut out the base of the fish. If your rolled out piece isn’t big enough just tack on more from the bowl and roll it out with the piece you’re working with to make it bigger. Place this on the cookie sheet, gather up the scraps and lay them to the side, and repeat for another 1/4 of the dough. Repeat two more times until you have 4 base pieces, which will be enough for two pies. Take all the scraps, mash them into a ball, and roll them out together. From this there should be enough, if you angle properly, to cut out all your designs perfectly. Lay them to the side (or leave them where they’re at).


 If you do get unlucky enough to have to debone the fish yourself it’s really easy. Just annoying. Wash a pair of pliers with hot water and soap. Carefully push the flesh of the salmon in and grasp the tip of the pin bone. Pull it as carefully as you can to prevent the flesh from ripping. It’s not bad if it does, it just isn’t as pretty anymore. Make sure you get all the bones – you’ll be able to feel them if you gently run your hand down the length of the fish. If you are doubly unlucky and they didn’t remove all the scales just flip the salmon over to skin side up. Run the blade of the knife down the fish and watch all the clear, inedible scales pop off. But you can always skip both these steps by choosing a better store! Which I will do for all my fish from now on.


 When you’re ready to cook pat the salmon dry and season with kosher salt and pepper. Turn your burner on to medium, add your oil, and get your pan nice and hot. When the pan is hot add the butter. Be really careful, the butter will splatter and pop as the water cooks out of it! We add the salmon when the butter stops popping so when the mixture starts to calm down spread the flour out on a plate and dip and pat the salmon into the flour to completely coat it. This is called dredging and it’s a pretty awesome technique to get a nice, crispy, almost fried skin. Make sure you don’t dredge too early or the flour just gets soaked into the fish and it doesn’t fry quite as well.


 Add the new butter and smashed garlic and wait for it to melt and cook down. It will take 2-3 minutes to turn brown and nutty and delicious. Remove the pan from the heat (don’t follow my photo example and just turn off the heat. It’s not good enough!). Add the lemon and parsley and stir to combine. Again, use caution, this mixture may splatter as well. Uncover the fish, pour the sauce over, and serve immediately. PS- if your pan is still really hot your parsley may brown pretty quickly and it’ll make your sauce look a bit burned. I promise, if you use this recipe it won’t burn and will still taste good!
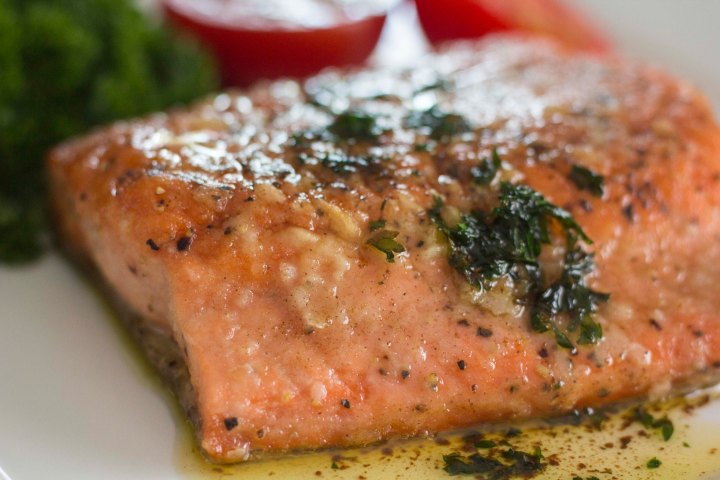


 Heat up your nice, heavy pan and add the oil and butter. Cook the onion until it’s nice and tender and get ready for the fun/exciting/scary/hot part: the rice.