Monster Stew

Monster Stew

When  I saw the BotW recipe for Monster Stew I couldn’t imagine how I was going to pull it off.  Meat, seafood, flour, milk?  How on earth are you supposed to combine those together to make, not only something edible, but a stew?  So I just went with it – totally making this up as I went along.  It may not be the first recipe I’ve ever made up from scratch, but it is the first recipe I’ve dared share with people.  So hopefully you all like it as much as I do… I’ll be super embarrassed if not!

Also, no scary story today… I couldn’t get it quite right.  I’ll keep working and maybe I’ll post it a little later.  But Happy Halloween anyway, right!?

Monster Stew

time and difficulty

Let’s start with the beef.  This’ll take about an hour to cook down, and the entire recipe will take about 2 hours, so give yourself plenty of time before you plan to eat.  Otherwise you’ll be starving come 9 pm and you’ll order take out just because you don’t want to wait till it’s ready.

Cut the beef into 1 inch cubes.  Add oil to the bottom of a heavy pot – as usual, I prefer my cast iron – and turn it on medium.  When the oil is hot add the beef and garlic salt and stir until the meat is browned on all sides.  Then add 4 cups of beef broth, wait for it to come to a boil, turn it down to a simmer, put the lid on, and step away for an hour.  I’d recommend checking it every half hour to make sure the liquid isn’t boiling off too quickly.  If it looks like it needs more liquid you can add more beef broth or water.

While the meat is cooking cut the carrots, onions, and peppers into bite size pieces.  Also slice the Andouille sausage into bite size pieces and pull the tails off the shrimp.  It’s pretty easy – I talk about it in my Seafood Fried Rice post.  But here’s a quick recap: Properly thaw the shrimp.  Then place the shrimp on a cutting board, lay your knife on the tail, and gently pull the shrimp away from the tail.  It should just slip right out.  Easy peasy.

add rice

When your beef has been stewing about an hour add the remaining beef broth and the rice.  We are deviating slightly from the photos.  After eating the stew it was determined (by me) that the rice takes way too long to cook and the shrimp and veggies are all overdone by the time the rice is done.  I think this is inherent to the thick grain nature of the forbidden rice, which brings such a delightful color, but really takes a long time to cook.  So instead, add the rice and broth to the beef and bring back to a simmer.  Place the lid on and leave it alone until we add everything else.  This will allow the rice to cook properly.  A word of advice – if you’re using white rice, you probably need to add the rice and veggies/shrimp at the same time.  If you’re cooking with brown rice, I’d recommend adding them early, like the forbidden rice.

We want to add the shrimp/veggie/sausage mixture in at about 15 minutes remaining in rice cooking time.  So when the rice has been cooking for about 10 minutes heat another pan/skillet with the remaining oil until it’s hot.  Add the sausage, shrimp, and creole seasoning and stir until the shrimp are just barely turning pink.  At this point add all the veggies, stir them around until everything is shiny, and pour the entire thing into the soup pot.  Stir it around to mix the creole seasonings in and cover again, letting it simmer until the rice is tender, about 15 minutes more.

close up of stew

Serve and enjoy this creepy, purplish black masterpiece!

Link’s Monster Stew recipe:

    • Any Meat
    • Any Seafood
    • Monster Extract

Monster Stew

  • Servings: 4-5
  • Difficulty: moderately easy
  • Print

Southern-style beef and seafood stew with forbidden rice

Ingredients

  • 1 pound rump or chuck roast
  • 1/2 pound shrimp, thawed and deveined
  • 15-20 inches of Andouille sausage (about 3 links)
  • 2 medium carrots
  • 1 green bell pepper
  • 1 medium yellow onion
  • 8 cups beef stock
  • another 4 cups beef stock and water in case your liquid boils off too quickly
  • 5 Tablespoons vegetable oil
  • 1/2 – 1 teaspoon kosher salt, to taste
  • 1/4 – 1/2 teaspoon black pepper to taste
  • 1/2 – 1 teaspoon garlic salt
  • 2-3 tablespoons Creole seasoning

Directions


1. Cut the beef into 1 inch cubes.
2. Add 3 tablespoons of oil to the bottom of a heavy pot and heat on medium.
3. When the oil is hot add the beef, salt pepper, and garlic salt and stir until the meat is browned on all sides.
4. Add 4 cups of beef broth and allow to come to a boil. Reduce heat to a simmer, cover, and simmer for 1 hour. I recommend checking it every half hour to make sure the liquid isn’t boiling off too quickly.  If it looks like it needs more liquid you can add more beef broth or water.
5. Cut the carrots, onions, and peppers into bite size pieces. Slice the Andouille sausage.
6. Pull the tails off the shrimp. To do this, properly thaw the shrimp. Place the shrimp on a cutting board, lay your knife on the tail, and gently pull the shrimp away from the tail. It should slip right out.
7. When your beef has been stewing about an hour add the remaining beef broth and the rice and bring back to a simmer.  Place the lid on and allow to cook for 15 minutes. A note: if you’re using white rice, add the rice and veggies/shrimp at the same time as the cooking time is less for white rice.
8. Add the shrimp/veggie/sausage mixture in at about 15 minutes remaining in rice cooking time. So when the rice has been cooking for about 10 minutes heat another pan/skillet with the remaining oil until it’s hot.  Add the sausage, shrimp, and creole seasoning and stir until the shrimp are just barely turning pink.
9. Add all the veggies, stir them around until everything is shiny, and pour the entire thing into the soup pot.
10. Stir the stew to mix the creole seasonings in and cover, letting it simmer until the rice is tender, about 15 minutes more.
11. Serve and enjoy this creepy, purplish black masterpiece!

Monster Curry

Monster Curry

Guys, there’s no such thing as Monster Extract.  We all know this.  It’s severely disappointing, but it’s true.  So, after much deliberation, I decided that Monster Extract was simply going to be unusual ingredients thrown into regular meals that either A) dye the food a more purple color or B) add a unique/unexpected purple food to the meal.  The goal is to actually do both.  And while some recipes will require the use of food coloring to achieve the right effect, this one, I am proud to say, does not!  Now, to make that happen, this meal isn’t quite as purple as I wish it could have been.  But we make do…

Monster Currymonster cake meter

We need to start with the chicken and the marinade.  This allows the spices to mix together for long enough that the marinade takes on the flavor of the spices and they don’t taste quite so raw and it also allows the chicken to soak up the flavor of the marinade.  It’s like… giving the chicken the Zora Tunic – all of a sudden Link takes on the characteristics of the Zora and can breathe underwater.  Thank goodness.

So cut up the thigh meat (technically you can use breast, too, but thigh tends to retain moisture better) into 1/2 inch cubes.  Doesn’t have to be perfect, we just want them similar in shape so they cook at the same time.  Then peel and cut the garlic and fresh ginger.

add to the blender

Next we add all the spices, the tomato paste, and the yogurt to a blender (or food processor if you’re cool like that).  Blend until completely combined.  You may have to stop occasionally, even in a high-powered blender like a Vitamix, and shake and scrape everything around to make sure the garlic and ginger get thoroughly chopped.

Add the spice mixture to a bowl with the chicken and stir to completely coat the chicken.  Cover and let it marinate in the fridge for at least 1 hour, preferably 2.

When the chicken is nearly done marinating let’s take the onion, carrot, and beets, wash them, and dice them.  A word of caution – if you cut the beets into large or thick pieces they will take FOREVER to cook.  Don’t make my mistakes, cut them up nice and skinny.

Start the rice about the time you’re ready to start cooking.  We’ve gone over this – add rice, wash rice, add water, press start.  You guys are experts by this point!

When you’re done dicing and slicing, take the chicken out of the fridge to warm up a bit.  Add half the butter and oil to a pan – I prefer my good, old-fashioned cast iron pans.  I’m kind of obsessed with them…  When the butter is melted add the onion and cook for maybe 1-2 minutes.  Next add the carrots and beets and cook until they’re tender, about 10 minutes.

cook chicken

Remove the veggies from the pan and add the remaining butter and oil.  When the butter is, you got it, melted, add the chicken and all the marinade.  It feels like a lot.  It feels thick and goopy.  It feels weird.  But trust me, it all works out in the end.

add veggies back in

Cook until the chicken is completely cooked through.  Depending on the size of your chicken pieces it should take about 10 minutes.  Just make sure there’s no pink in the middle of a piece if you cut it open, okay?  Add back all the veggies and stir and cook for another 3-5 minutes, until everything is nice and combined.

add the cream

At this point, add your heavy cream.  Stir and mix until it’s completely combined and then simmer for about 15 minutes.  We want to give the flavors time to combine and we want to give the curry time to change colors from yellow to… a more purplish yellow…  It’s all I could do, folks.

close up

Serve with the rice and be happy!

Link’s Monster Curry recipe:

    • Hylian Rice
    • Goron Spice
    • Monster Extract

Monster Curry

  • Servings: 5
  • Difficulty: moderately easy
  • Print

A chicken korma curry with beets and carrots


Recipe adapted from Indian Chicken Korma by Sabrina from Dinner Then Dessert

Ingredients

  • 8 chicken thighs boneless and skinless
  • 5 medium carrots
  • 8-10 beets
  • 1 medium yellow onion
  • 2 tablespoons cooking oil i.e. canola
  • 6 tablespoons butter
  • 1 1/2 cups heavy cream
  • 2.5 cups dry rice
  • water to cook rice

Marinade

  • 3 tablespoons tomato paste
  • 1.5 tablespoon-sized piece of fresh ginger, peeled
  • 3 large garlic cloves
  • 1.5 tablespoon garam masala
  • 1/3 teaspoon crushed red pepper (or more for a spicier meal)
  • 3/4 teaspoon paprika
  • 1.5 teaspoon ground cardamom
  • 1 1/4 teaspoon kosher salt
  • 1/2 teaspoon turmeric
  • 1/2 cup almonds
  • 1 1/4 cup greek yogurt

Directions

  1. Cut up the chicken thighs into 1/2 inch cubes.
  2. Add all the spices, tomato paste, and yogurt to a blender or food processor.
  3. Blend until completely combined, scraping down and mixing the sauce as needed.
  4. Add the spice mixture to a bowl with the chicken and stir to completely coat the chicken.  Cover and let it marinate in the fridge for at least 1-2 hours.
  5. Wash and dice the onion, carrot, and beets. Dice the beets into thin, bite-size pieces in order to shorten cooking times.
  6. Start the rice when you’re ready to start cooking. Rinse the rice several times, add water up to your first knuckle of your finger when it rests on top of the rice, and press start on your rice cooker.
  7. Take the chicken out of the fridge to warm up while you cook the vegetables.
  8. Add half the butter and oil to a pan. When the butter is melted add the onion and cook for 1-2 minutes. Add the carrots and beets and cook until they’re tender, about 10 minutes.
  9. Remove the veggies from the pan.
  10. Add the remaining butter and oil. When the butter is melted add the chicken and all the marinade.
  11. Cook until the chicken is completely cooked through, ensuring there is no pink in the center of the chicken – about 10 minutes.
  12. Add back all the veggies and stir and cook for another 3-5 minutes, until everything is combined.
  13. Add the heavy cream.  Stir and mix until it’s completely combined and then simmer for about 15 minutes.
  14. Serve with the rice and be happy!

Monster Cake

Monster Cake

It’s the first Halloween post of the season!  And yes, we are starting with the easiest, but I wanted to make sure A) the post got done and B) you could make these delicious little monsters for your own spooky (or simply fun) Halloween bash!

Thanks to everyone who participated in the polls on Instagram and Twitter this last week!  Even though the results were overwhelmingly in favor of allowing me to use purple coloring as my Monster Extract, I’ve decided on a compromise.  I’ll do half the recipes with naturally occurring purple coloring from the ingredients I use.  And for those recipes that need a little extra help I’ll add actual Monster Extract i.e. purple coloring.  Sound good?  Sound like a nice compromise?  I hope so, because it’s already happening.

Monster Cakemonster cake meter

We are going to start with the tempered chocolate.  Confession: I’ve never tempered chocolate before.  And not only have I never done it before, I just had to start with the most difficult chocolate to temper – white chocolate.  Oh well.  Prep by inserting a piping bag with a medium round tip (#10 Wilton is what I used) into a cup and wrapping the top of the bag around the edges.  It’ll be easier than trying to fill a bag in your hand.  Lay a piece of parchment paper out on the counter, and get ready to melt some chocolate!

We temper chocolate by using a candy thermometer and a water bath to gently melt the chocolate to the perfect temperature.  Start by splitting the white chocolate into two bowls – about 75% into a stainless steel bowl and 25% into any other bowl.  Bring 2 inches of water to a boil in any old pot, place the stainless steel bowl over the top, add the gel food coloring, and attach the candy thermometer.  Now, two things.  First, we MUST use gel food coloring.  If you add any amount of water to the chocolate it’ll seize up and be unusable.  And second, you’ll need to make sure the tip of the thermometer is in the chocolate BUT NOT touching the bottom.  If the tip is touching the bowl it’ll register the temperature of the bowl, NOT the chocolate.  We need to know the temperature of the chocolate.

seed the chocolate

Once it’s inserted correctly gently stir to melt the chocolate evenly until the temperature of the chocolate reads 110°F.  Quickly remove the bowl from the pot and add a few morsels of chocolate.  Stir until completely dissolved, read the temperature, and add more chocolate.  We need to use this “seed” method to bring the temperature of the chocolate down to 84°F.  This is the temperature at which the chocolate will still be shiny and not brittle.  Do it wrong, and you may have to start over.

When the chocolate reaches the correct temperature quickly add it to a piping bag and begin piping the chocolate into horn shapes on the parchment.  You’ll probably want them to be about 2 inches tall at the most – you don’t want them falling off the cakes!  Leave them on the parchment to cool and harden while we make the cake and frosting.  If you want to speed this up, yes, you can put it in the fridge.

Next – the cake!  And trust me when I say, the chocolate was the hardest part of this recipe.  The rest is… a piece of cake…

butter and sugar

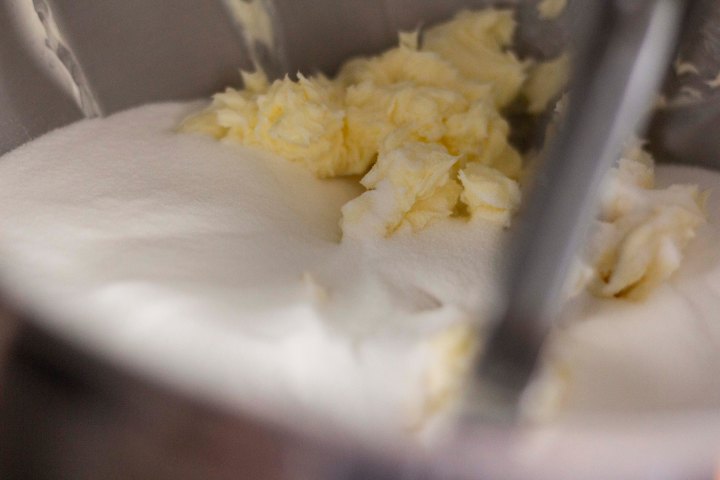
Start by putting the butter in the bowl of a stand mixer with the paddle attachment (or a bowl with a hand mixer) and beat on medium until soft.  Add the sugar and beat on medium until fluffy and pale in color (about 2 minutes).  Next, add the eggs one at a time, beating on low until each egg is fully incorporated, then bring the speed up to medium for several seconds until homogeneous.

dry ingredients

The next part is the trickiest with the cake.  Add all the dry ingredients to a bowl and either sift or, if you’re like me and don’t have a sifter, whisk until they’re fully mixed.  Then, slowly and with the mixer off (trust me on this one) add 1/3 of the dry ingredient mixture to the stand mixer.  Mix on low until fully mixed.  Then add 1/2 of the buttermilk to the bowl and mix on low until incorporated.  Add the remaining 1/3 dry, 1/2 buttermilk, 1/3 dry and mix fully between each step.

Butter and lightly flour a sheet cake pan (18 x 26 inches with a 1 inch lip).  Add all the cake batter to the pan and smooth with a spatula.  It looks like a lot, I know, but this cake doesn’t actually rise a lot – it’s a pretty dense version of a blackout cake.  Place in the oven and bake for 15-20 minutes, or until a toothpick/cake tester comes out clean when inserted into the center.  Put aside and cool completely.

While the cake is either baking or cooling, let’s make the buttercream!  Now, for ease, I always make an American buttercream.  It’s much easier, doesn’t require any cooking, but is sweeter than your other versions.  I have found, with cakes, at least, that sweeter isn’t a bad thing.  Particularly because I prefer my cakes less sweet, so the balance works nicely.

Wash and blend or mash with a potato masher or fork all the blackberries.  Add the butter and powdered sugar to a bowl of a stand mixer with the paddle attachment (or, again, a bowl with a hand mixer) and beat on low until the butter and powdered sugar have come slightly together.  Add 3/4 of the blackberry puree to the bowl and beat on low until the mixture comes together and there’s no more dry powdered sugar.  Beat on medium, check the consistency of the buttercream, and add more blackberries as needed to reach the right consistency.  You’ll want the frosting to hug a spoon or spatula and not slip or fall when held upside down (called a medium consistency).  This will ensure the frosting is thick enough to hold your cakes steady.

proper frosting consistency

Once the cakes are completely cooled, cut out each shape with a 3 inch round cutter.  Now, here’s where I’m going to suggest you do something different than I did.  In the pictures the cakes are overwhelmingly tall in comparison with the frosting layer.  Which is fine!  But if I were to make these for myself and my own party, instead of stacking two heavy pieces of cake together, I’d simply cut each round in half, fill the center, and stack them together again.  That way the frosting can actually hold up the top layer properly and no one gets a giant piece of cake there’s no way they could actually eat it.  Besides, by cutting it you’ll double the amount of cakes you’ll get – making this recipe way more feasible (you’ll get about 15 cakes instead of 7-8).

So, slice each cake in half or, if the warning wasn’t enough, place two whole rounds together.   Fill a piping bag fit with a large flower tip (or star tip) with frosting, and pipe rosettes around each of the bottom pieces of cake.  To pipe a rosette simply pipe a fat star about 1/3 inch above the center of the cake then pipe a swirl around the outside of the cake.  Do it in one motion to make a nice rosette or two separate motions because no one will see it, anyway.  For a good video, see the Wilton tutorial here.

Layer the top portion of the cake onto the frosting-covered bottom and pipe another rosette on the top layer, continuing the swirl all around in ever-decreasing circles to get a nice swirl.  Again, a great Wilton tutorial can be found here.

Add your monster horns by gently pressing them into the cupcake swirl and really impress your friends for that Halloween party!  These are best eaten the same day or stored in the fridge for a few days.

Link’s Monster Cake recipe:

    • Tabantha Wheat
    • Cane Sugar
    • Goat Butter
    • Monster Extract

Monster Cake

  • Servings: 15 3 inch cakes
  • Difficulty: moderately easy
  • Print

A chocolate cake layered with blackberry buttercream and topped with white chocolate horns

Recipe adapted from Devil’s Food Layer Cake by Elizabeth Pruitt from Tartine

Cake

  • 1 3/4 C all-purpose flour
  • 4 1/2 tablespoons cornstarch
  • 1 teaspoon baking powder
  • 1 1/4 cups cocoa powder
  • 1 teaspoon salt
  • 1 cup butter, softened at room temperature
  • 2 3/4 cups sugar
  • 5 large eggs
  • 1 1/4 cups buttermilk

White

  • 12 ounces white chocolate (morsels or baking chocolate)
  • 1/8 teaspoon purple GEL food coloring

Blackberry

  • 2 cups butter, at room temperature
  • 7 cups powdered sugar
  • 1 cup blackberries, washed and pureed

Directions

  1. Prepare a piping bag by inserting a medium round tip (#10 Wilton or similar). Place the bag in a cup, wrapping the top of the bag around the outside of the cup. Lay a piece of parchment paper out on the counter.
  2. Split the white chocolate into two bowls – 75% into a stainless steel bowl and 25% into any other bowl.
  3. Bring 2 inches of water to a boil in a pot. When the water is lightly boiling, place the stainless steel bowl over the top, add the gel food coloring, and attach the candy thermometer. Ensure the tip of the thermometer is in the chocolate not touching the bowl.
  4. Gently stir the melting chocolate until even and the temperature reads 110°F.  5. Quickly remove the bowl from the pot and add a few morsels of chocolate.  Stir until completely dissolved, read the temperature, and add more chocolate. Continue adding and melting chocolate until the temperature reads 84°F. This is the temperature at which the chocolate will still be shiny and not brittle.
  5. When the chocolate reaches the correct temperature quickly add it to a piping bag and pipe the chocolate into horn shapes, 2 inches tall, on the parchment. Leave them on the parchment to cool and harden or put it in the fridge.
  6. Pre-heat the oven to 350°F and butter and flour a sheet cake pan (18 x 26 inches with a 1 inch lip)
  7. Add the butter to the bowl of a stand mixer with the paddle attachment (or a bowl with a hand mixer) and beat on medium until soft.
  8. Add the sugar and beat on medium until fluffy and pale in color (about 2 minutes).
  9. Add the eggs one at a time, beating on low until each egg is fully incorporated, then bring the speed up to medium for several seconds until homogeneous.
  10. Add all the dry ingredients to a new bowl and whisk until they’re fully mixed.
  11. With the mixer off add the flour mixture in 3 equal batches alternately with the buttermilk in 2 equal batches. You should start and end with flour mixture.
  12. Add all the cake batter to the pan and smooth with a spatula. Place in the oven and bake for 15-20 minutes, or until a toothpick/cake tester comes out clean when inserted into the center.  Put aside and cool completely.
  13. To make the butter cream first wash and blend or mash with a potato masher or fork all the blackberries.
  14. Add the butter and powdered sugar to a bowl of a stand mixer with the paddle attachment (or, again, a bowl with a hand mixer) and beat on low until the butter and powdered sugar have come slightly together.
  15. Add 3/4 of the blackberry puree to the bowl and beat on low until the mixture comes together and there’s no more dry powdered sugar. Beat on medium, check the consistency of the buttercream, and add more blackberries as needed to reach the right consistency. You’ll want the frosting to hug a spoon or spatula and not slip or fall when held upside down (called a medium consistency).  This will ensure the frosting is thick enough to hold your cakes steady.
  16. Once the cakes are completely cooled, cut out each shape with a 3 inch round cutter.
  17. In order to maximize the amount of cakes you get and to realistically frost and present the cakes cut each round in half lengthwise, dividing each round into 2 equal pieces.
  18. Fill a piping bag fit with a large flower tip (or star tip) with frosting, and pipe rosettes around each of the bottom pieces of cake. Do this by piping a fat star about 1/3 inch above the center of the cake then pipe a swirl around the outside of the cake. Do it in one motion to make a true rosette or two separate motions because no one will see it, anyway.
  19. Layer the top portion of the cake onto the frosting-covered bottom and pipe another rosette on the top layer, continuing the swirl all around in ever-decreasing circles to get a nice swirl.
  20. Add your monster horns by gently pressing them into the cupcake swirl and really impress your friends for that Halloween party! These are best eaten the same day or stored in the fridge for a few days